
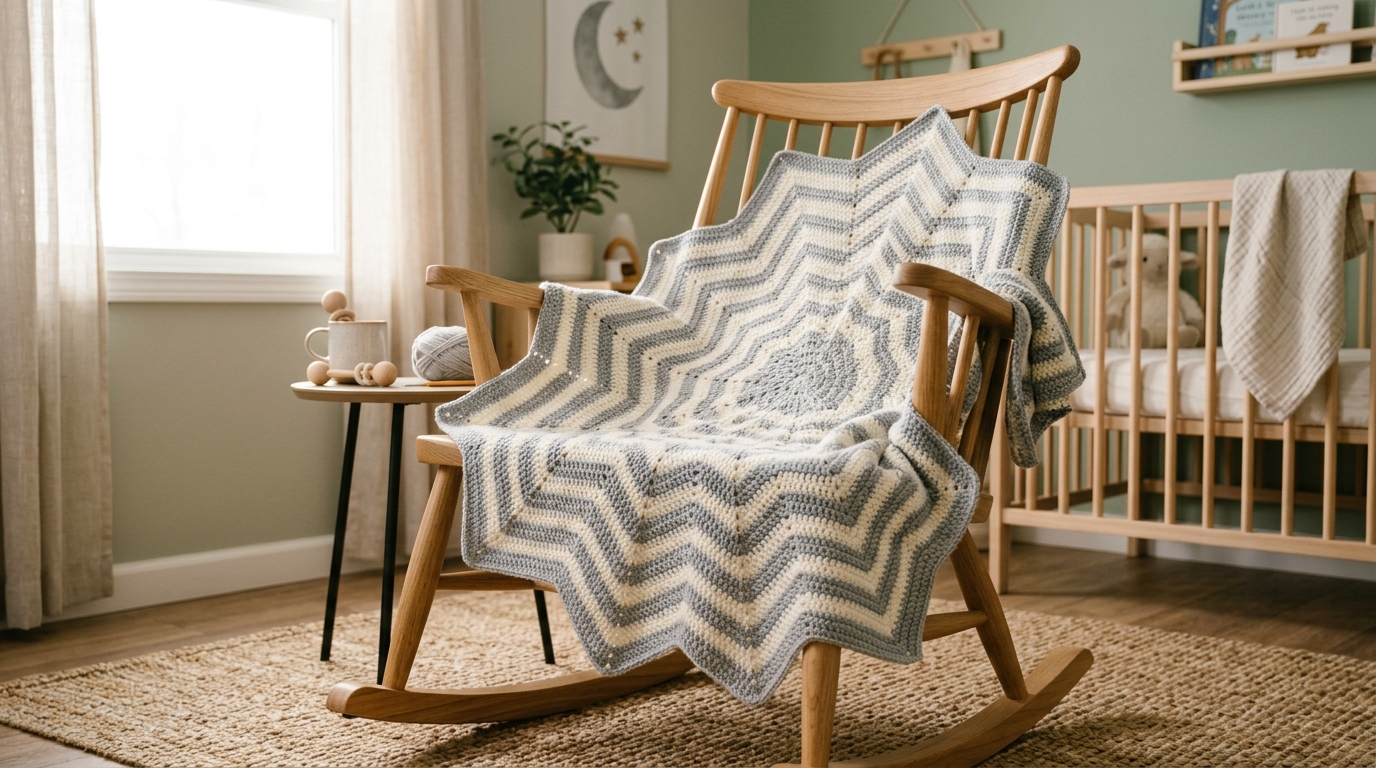
There is something truly magical about the moment you realize a simple length of yarn and a hook can transform into something as grand and beautiful as a star-shaped blanket. If you have ever looked at a nursery and imagined a soft, heirloom-quality piece draped over a crib, you are in the right place. The round ripple star blanket is a classic in the crochet world—it is whimsical, timeless, and surprisingly meditative to create once you get into the rhythm.
Whether you are a beginner looking for your first major project or an intermediate crocheter seeking a relaxing “go-to” pattern, this star blanket is perfect. It works up in a circular fashion, creating points that naturally evolve as you add more rounds. It is the ultimate baby shower gift that looks incredibly complex but relies on the simplest of stitch combinations, making it a rewarding journey from the first chain to the final scallop. Let’s prepare our yarn, find a comfortable spot to sit, and start creating something beautiful together.
Quick Overview
This project is designed with the confident beginner in mind. While it uses basic stitches, the nature of working in the round requires a bit of attention to stitch counts.
- Skill Level: Beginner-Friendly Intermediate
- Estimated Time: 15 to 25 hours (depending on your speed and size)
- Finished Size: Approximately 35 to 40 inches in diameter (easily adjustable)
- Best Use: Nursery decor, baby shower gift, or a cozy lap throw
- Why You’ll Love It: This design is “growth-friendly.” You can keep adding rounds until it is the size you desire, making it perfect for stash-busting or long-term projects.
Materials and Tools Needed
To ensure your blanket has that soft, dreamy drape perfect for a newborn, keep these supplies in mind:
- Yarn: Worsted weight (Size 4) acrylic or cotton-blend yarn. Acrylics are often preferred for baby blankets because they are machine washable and soft against delicate skin. Look for a “baby” soft label.
- Hook: Size H/8 (5.0 mm) crochet hook provides a balanced tension. If you tend to crochet tightly, consider moving up to an I/9 (5.5 mm) hook.
- Stitch Markers: Absolutely essential for keeping track of your star points.
- Tapestry Needle: For weaving in your ends securely.
- Scissors: Any sharp pair will do.
- Measuring Tape: To track your progress.
Crochet Terms and Abbreviations
We will be using standard U.S. crochet terminology throughout this pattern:
- ch: chain
- st(s): stitch(es)
- sl st: slip stitch
- sc: single crochet
- dc: double crochet
- sk: skip: ignore the stitch underneath
- yo: yarn over
- rep: repeat
Helpful Notes Before You Start
The beauty of the star blanket lies in its increasing structure. You are essentially creating a pentagon that transitions into a star shape.
- Tension: Consistent tension is key for a flat lay. If your blanket starts to ruffle (frill) like a skirt, your tension might be a little loose, or you might be adding too many stitches. If it pulls like a bowl, your tension is too tight.
- The “V” Shape: Always make sure you are working into the “V” of the stitch unless otherwise noted.
- Color Changes: You can make this in a single solid color for a modern look, or change colors every few rounds to create a stunning, multi-toned effect. When changing colors, always fasten off and join your new color with a slip stitch in one of the valley spaces for a clean look.
Main Tutorial: The Star Blanket Pattern
This pattern follows a repetitive increase sequence. You will have eight points on your star.
Part 1: The Foundation
Round 1: ch 4, join with a sl st to the first chain to form a ring.
Round 2: ch 3 (counts as first dc), work 15 dc into the center of the ring. Join with sl st to the top of the starting ch-3. (16 dc total).
Part 2: The Increasing Rounds
Round 3: ch 3 (counts as 1 dc), dc in same st, ch 2, skip 1 st, 2 dc in next st; rep from around until 1 st remains, ch 2, join to top of ch-3. You now have 8 “islands” of 2 dc.
Round 4: sl st into the center of the ch-2 space, ch 3, dc in same space, ch 2, 2 dc in same space. Ch 1, skip 2 dc, (2 dc, ch 2, 2 dc) in next ch-2 space; rep from around. Join with sl st.
Round 5: sl st into the ch-2 space, ch 3, 2 dc, ch 2, 3 dc in same space. Ch 1, skip the next space, 3 dc, ch 2, 3 dc in the next ch-2 space; rep from around. Join with sl st.
Part 3: The Expanding Star
Continue following the expansion logic established in Round 5. As the blanket grows, the key is to increase the number of stitches in each “point” and the number of chains between points if the piece begins to curl.
- The Point (Tip): Always work (3 dc, ch 2, 3 dc) into the tip of each star point.
- The Valley (Between points): Work your skipping pattern (ch 1) to ensure the valleys stay narrow, creating the signature star silhouette.
Finishing
Once your blanket reaches your desired size—typically 35-40 inches for a newborn—keep going until you hit a “point” round. To finish, do a simple round of single crochet stitches around the entire perimeter, working 3 sc into each ch-2 space at the tips to keep them sharp and flat.
Step-by-Step Explanation
If you feel overwhelmed by the stitch counts, think of it in terms of “Points” and “Valleys.” Every round, you are traveling up the side of a point, adding an increase at the very top (the ch-2 space), and then traveling back down to a valley. By consistently adding stitches at the tips and keeping your skips consistent in the valleys, the star shape will naturally emerge from your work without any complex math.
Watch your work after every few rounds. Lay it flat on a table. If it wiggles, you are doing great. If it curls into a bowl, try using a slightly larger hook next time to relax the stitches.
Common Mistakes to Avoid
- Forgetting to Skip the Valley: If you accidentally work a stitch into the “valley” between two points, your blanket will lose its star shape and become a large, lumpy octagon.
- Tight Starting Chain: Use a slightly larger hook for your initial turning chain to prevent the center of your blanket from pulling tight.
- Mixing Terms: Ensure you are using U.S. terms throughout. If you accidentally use a U.K. trebble crochet instead of a U.S. double crochet, your points will appear much longer and thinner than intended.
- Counting Errors: Always count your star points at the end of every round. You should have eight points. If you have seven or nine, go back and identify where you missed an increase or added an extra one.
Pro Tips for a Better Result
- Blocking: Once you finish, your star points might look a little rounded. Blocking is the secret weapon for professional-looking crochet. Pin your blanket out on a yoga mat or blocking board, dampen it with a spray bottle, and let it dry overnight. This makes the points sharp and the stitches uniform.
- Yarn Choice: For a newborn, opt for bamboo-cotton blends or premium acrylics that feel like wool but wash easily. Avoid novelty yarns (like eyelash or fuzzy yarns) for a first project, as they make it impossible to see your loops.
- The “Weaving” Trick: Don’t wait until the very end to weave in your ends. Do it at the end of every color block. It saves you hours of tedious work at the very end.
Variations and Personalization
- The Ombré Effect: Use five different shades of the same color, starting from the darkest at the center and moving to the lightest at the edges.
- Texture Play: Every five rounds, do a round of “Front Post Double Crochet” stitches to create a subtle ridge that adds dimension.
- Appliqués: Since the center is flat, you can easily sew on a small crocheted moon or a few tiny stars once the blanket is finished to give it a whimsical “night sky” theme.
Care, Storage, and Next Steps
When washing a handmade baby blanket, place it in a delicates laundry bag and wash on a cold, gentle cycle. Lay it flat to dry; never hang a wet crochet blanket, as the weight of the water will stretch the yarn and distort your beautiful star shape. Store it folded in a cool, dry place wrapped in acid-free tissue paper if you plan to keep it as a long-term heirloom.
FAQ
What do I do if my blanket is starting to ruffle?
Ruffling usually happens when you have added too many stitches, especially in the valleys. Try skipping more stitches or omitting the ch-1 space in the valleys for a few rounds to pull the fabric back in.
How do I make the blanket larger?
The beauty of this design is its scalability. Just continue repeating the pattern rounds, adding an extra dc or an extra ch-1 space if you feel the blanket beginning to tension up. You can make this as large as a full bedspread if you wish!
Can a beginner really do this?
Absolutely! If you know how to chain, single crochet, and double crochet, you have all the skills needed. The key is to check your stitch count every two rounds so that small errors don’t compound.
How long does it take for a beginner to finish?
On average, a beginner might spend about 20 to 25 hours on a standard 35-inch baby blanket. Don’t rush; think of it as a relaxing hour of “me time” each evening.
Does the yarn weight matter?
Yes. If you use a thinner yarn (like DK) with an H-hook, the blanket will be smaller and have more drape. If you use a thicker yarn (like bulky), the blanket will be larger and much warmer. Always adjust your hook size to match the recommended tension on your yarn label for the best result.
Conclusion
Creating a star-shaped blanket is a rite of passage for many crocheters, and there is something deeply satisfying about seeing those eight points grow and take shape in your hands. Whatever colors you choose—whether it’s soft, classic pastels for a nursery or bold, bright primaries for a playmat—your handmade effort will be cherished for years to come. Remember, even the most expert designers started with their first wonky square or circle. Embrace every stitch, be patient with yourself, and enjoy the rhythm of the hook. Your star is on its way to becoming a beautiful, cozy reality. Happy crocheting!