
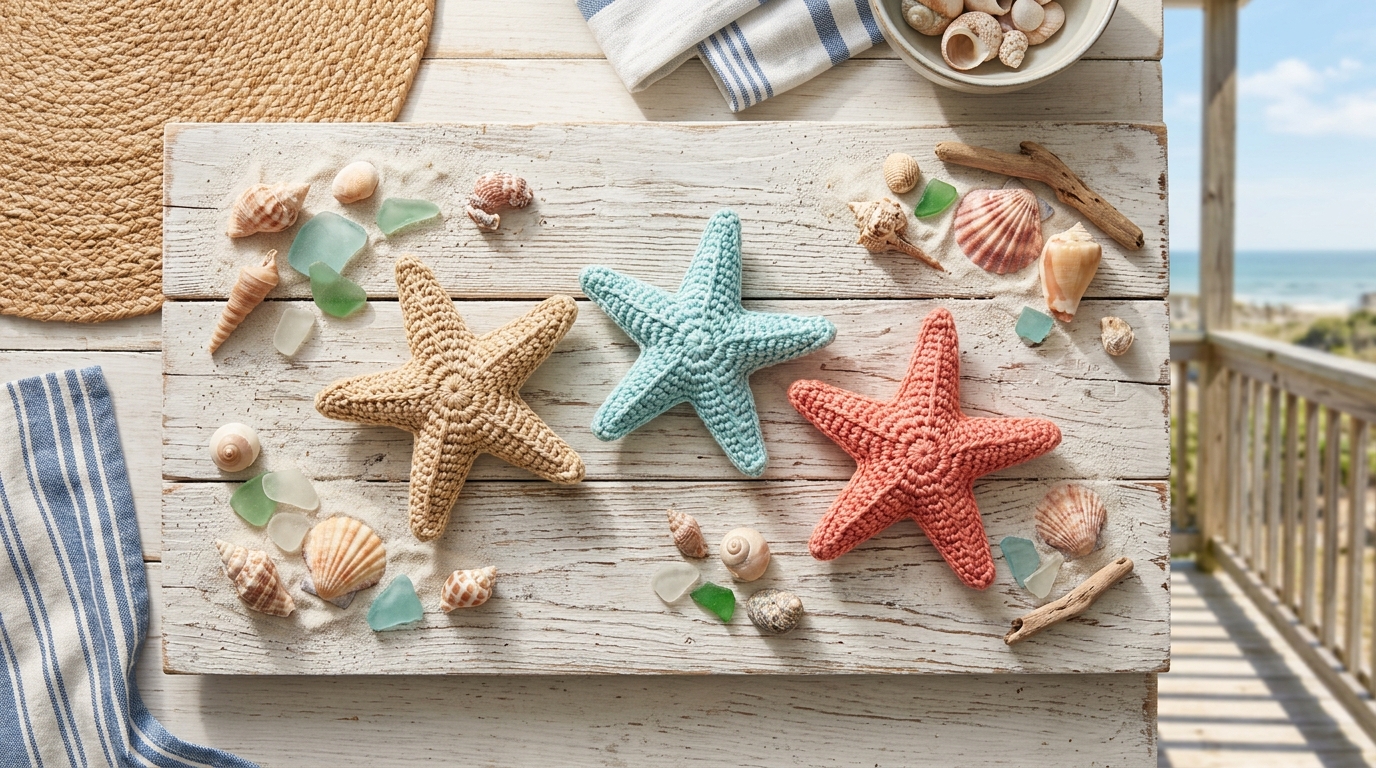
There is something uniquely magical about bringing a piece of the seaside into your own home, especially with a handmade touch. Crochet starfish are perhaps one of the most delightful, versatile, and beginner-friendly projects you can undertake. Whether you are dreaming of a coastal-themed nursery, crafting last-minute party favors for a summer gathering, or simply wanting a quick, satisfying win that takes only minutes to complete, these little sea stars are the perfect solution.
Because they are small and use minimal yarn, they are also an excellent project for using up those colorful scraps languishing in your yarn bin. There is a sense of calm and accomplishment that comes from holding a finished starfish in the palm of your hand—knowing you created it entirely with the rhythmic movement of your hook and a bit of creativity. In this guide, we will walk through every step of creating these charming decorations, ensuring that even if you have only just picked up your first crochet hook, you feel confident and excited to get started.
Quick Overview
This project is a classic beginner-friendly endeavor, perfect for those who want to practice working in the round.
- Skill Level: Beginner.
- Estimated Time: 15–20 minutes per starfish.
- Finished Size: Approximately 3 to 4 inches across, depending on your yarn choice and tension.
- Best Use: Coastal home decor, beach-themed nursery mobiles, children’s plushies, or charming gift toppers.
- Why You Will Love It: It is incredibly fast, requires very little material, and offers immediate gratification.
Materials and Tools Needed
One of the best things about this project is its simplicity. You don’t need a massive investment to get started.
- Yarn: A small amount of worsted weight (Category 4) cotton yarn is ideal. Cotton holds its shape beautifully for home decor projects. You can choose classic sandy beige for a realistic look or go whimsical with bright teals, pinks, or corals.
- Crochet Hook: A size H/8 (5.0 mm) hook is recommended for most worsted weight yarns to keep the stitches nice and tight. If you find gaps between your stitches when stuffing, consider sizing down to a G/6 (4.0 mm) hook.
- Fiberfill: A small handful of polyester stuffing or even recycled yarn scraps to give your starfish a bit of puffiness.
- Tapestry Needle: For weaving in your ends.
- Scissors: To trim your yarn.
- Stitch Marker: To help you keep track of the start of your round, although a scrap piece of yarn works just as well.
Crochet Terms and Stitches
Before we dive into the pattern, let’s go over the simple stitches we will be using. All terms are in standard U.S. crochet terminology.
- Magic Ring (or Adjustable Ring): The best way to start a project in the round because it allows you to pull the center tight, leaving no hole.
- Chain (ch): The foundation of most crochet projects.
- Single Crochet (sc): The workhorse stitch of amigurumi. You will insert your hook, yarn over, pull up a loop, yarn over, and pull through both loops.
- Slip Stitch (sl st): Used for joining rounds and finishing.
- Increase (inc): Working two single crochet stitches into the same stitch to add volume.
- Decrease (dec): Working two stitches together to shrink the circumference.
Helpful Notes Before You Start
Crocheting for home decor requires just a little more attention to tension than a loose scarf might, because we want the starfish to hold its shape. Try to keep your tension consistent—not so tight that your wrists hurt, but tight enough that the stuffing doesn’t show through the stitches. If you are a loose crocheter, definitely opt for that smaller hook size. If you are worried about the stuffing, feel free to use a yarn color that closely matches your stuffing material, just in case a tiny bit peaks through!
The Starfish Pattern
This pattern is worked in two identical halves that we will join together with a border.
The Two Halves
Make two pieces following these instructions:
Round 1: Start with a magic ring. Chain 1 (does not count as a stitch) and work 10 single crochet into the ring. Join with a slip stitch to the first sc. (10 stitches)
Round 2: Chain 1. Work 2 single crochet in each stitch around. Join with a slip stitch. (20 stitches)
Round 3: We will now create the five points of the starfish. Chain 6. Working down the chain: single crochet in the second chain from the hook, half double crochet in the next, double crochet in the next, double crochet in the next, and half double crochet in the very last chain. Skip the next stitch on the base and slip stitch into the following stitch. Repeat from to four more times until you have five points. Join to the base of the first point.
Fasten off your yarn, leaving a long tail on one of the pieces for sewing, and a shorter tail on the other to be woven in.
Assembly and Closing
Place your two starfish halves together, wrong sides touching (so the “pretty” sides are facing out). We are now going to crochet them together.
Using the long tail from one piece or a new length of yarn, insert your hook through the corresponding stitches on both halves. Single crochet around the entire perimeter of the star, working one single crochet into each stitch. When you reach the halfway point, stop and gently insert your fiberfill stuffing. Don’t overstuff—you want the starfish to remain relatively flat and “plump,” not round like a ball.
Continue single crocheting around the points, adding a tiny amount of stuffing as you go if needed, until you reach the beginning. Slip stitch to close the round, fasten off, and weave your ends into the center of the starfish to hide them completely.
Step-by-Step Explanation
For those new to the process, here is what is happening at each stage. First, you build the “base circle” which ensures your star has a solid center. By working 10 stitches into the magic ring and doubling them in the next round, you create a flat foundation.
The “points” are created by working back down the chain you created. This creates a soft, tapered look that mimics the natural shape of a sea star. By crocheting the two pieces together, you are creating a “sandwich” that gives the item the structure needed for a plushie. The border of single crochet holds everything neatly in place, creating a crisp edge that makes your project look professional and polished.
Common Mistakes to Avoid
The most common hurdle for beginners is the “hole” in the center. If your magic ring isn’t pulled tight enough, it can look like an eyelet. Don’t be afraid to pull that tail quite firmly once you’ve finished the first round!
Another frequent issue is the “twisted” starting point. When attaching your points, be careful that your yarn doesn’t twist around the hook, which can make the points look slightly curved rather than straight. Lastly, avoid the temptation to overstuff. If you put too much fiberfill in, the stitches will pull apart, revealing the white fluff inside. A little goes a long way with these delicate sea creatures.
Pro Tips for a Better Result
If you want to take your starfish to the next level, consider working with a variegated yarn that transitions between shades of blue or sand. It mimics the natural variation in sea life. For a more tactile, “beach-found” look, try using a slightly thicker cotton twine for a rustic vibe, though keep in mind that twine can be tough on the fingers, so have a pair of soft-grip hooks handy.
If you are making these as mobile decorations, you can easily thread a piece of monofilament or cotton thread through one of the top points to hang them. If you want them to be extra sturdy, a light spray of fabric stiffener can help them hold a perfectly flat shape if you plan on using them as coasters or table scatterings.
Variations and Personalization
The beauty of this project is how easily it adapts to your personal style.
- The Miniature Version: To make tiny starfish for a treasure chest or dollhouse, follow the pattern using sock-weight (fingering) yarn and a small 2.0 mm hook.
- The Embellished Version: Use a tapestry needle to sew on small white French knots to mimic the texture of a real starfish skin.
- The Seasonal Twist: Crochet these in festive red and green for a “coastal Christmas” theme—they look adorable tucked into the branches of a tree!
Care and Storage
Since these are likely made of cotton, they are quite durable. If they get dusty, simply give them a gentle spot-clean with a damp cloth and mild soap. Because they are stuffed, avoid putting them in the washing machine, as the intensity of the agitation may cause the stuffing to lump up or the fiberfill to escape. When storing them after the summer season, tuck them into a breathable fabric bag or a small box to keep them clean and ready for next year.
FAQ
Can I use acrylic yarn for these starfish?
Yes, you certainly can. Acrylic yarn is soft and comes in many bright colors. However, it is a bit “floppier” than cotton. If you choose acrylic, your starfish might be a bit squishier and less defined, but they will still be absolutely charming.
How do I stop the stuffing from poking through?
Use a crochet hook that is one size smaller than what is recommended on the yarn label. This tightens your stitches, making the fabric denser and ensuring your fiberfill stays securely on the inside where it belongs.
Can I make these without a magic ring?
Absolutely. If the magic ring feels tricky, simply chain 4 and join with a slip stitch to the first chain to form a small ring. Then, work your first round of single crochets into the center of that chain loop. It works just as well.
How much yarn do I really need?
Very little! You can easily make two or three starfish from a single small “sample” ball of yarn. It is the ideal scrap-busting project.
Are these safe for babies?
If you are gifting these to a baby, skip the button eyes or beads. Use embroidery thread to stitch simple closed-eye expressions, and ensure all your ends are woven in very securely so there are no loose threads for tiny fingers to pull.
Conclusion
Creating your own coastal paradise is a joyful experience, and these little crochet starfish are the perfect way to begin your journey or add a splash of handmade happiness to your home. There is something truly special about taking a bit of string and transforming it into a piece of art that reflects the wonders of the ocean. Whether you make one or a dozen, I hope you find the process as relaxing and rewarding as I do. Keep that hook moving, enjoy the rhythmic flow of your stitches, and remember that every piece you create carries a bit of your own heart into the world. Happy crocheting!