
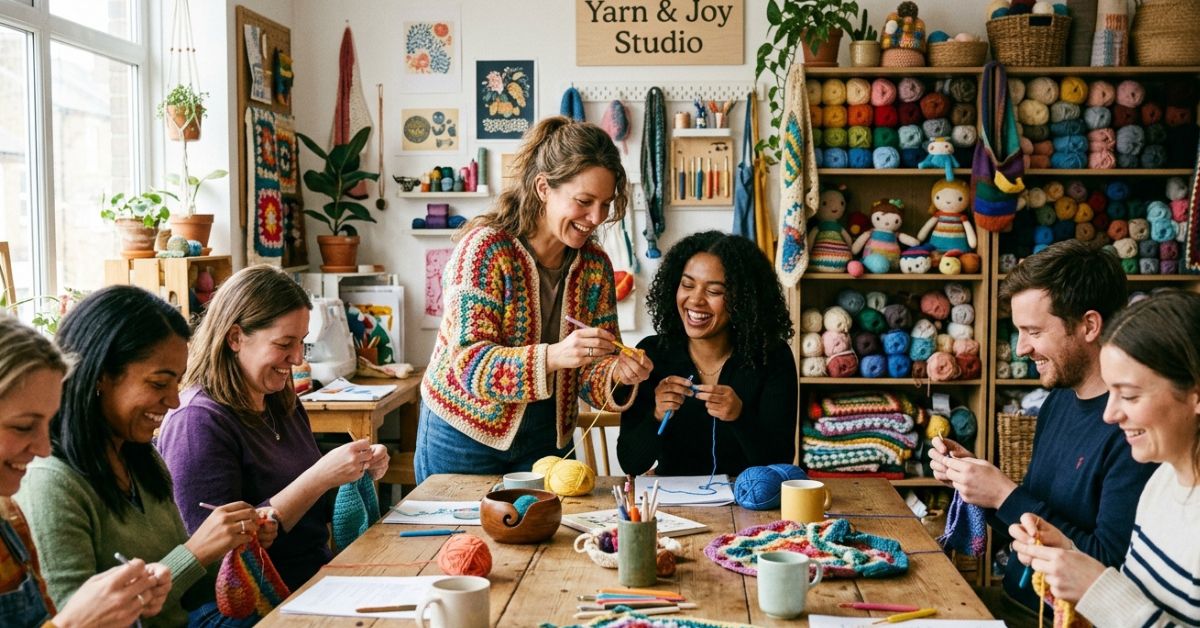
There is something profoundly special about the quiet, rhythmic clicking of a crochet hook against yarn—a meditative practice that transforms a simple ball of fiber into something functional, beautiful, and deeply personal. Perhaps you have found yourself sitting in your favorite armchair, perfecting your tension while the afternoon sun streams through the window, thinking about how wonderful it would feel to share this joy with others. Teaching crochet to your local community is a beautiful way to cultivate new friendships, pass on a lost art, and help others find the same internal peace that you feel when you hold a crochet hook.
Many people are intimidated by the complexity of patterns, but with a gentle hand and the right project, anyone can learn. Whether you are an experienced crafter looking to host your first neighborhood workshop or simply want to help a friend pick up the craft, this guide is designed to walk you through the process of teaching successfully. To make your first “class” a true success, we are going to dive into a project that is perfect for beginners and seasoned pros alike: The “Golden Hour” Textured Cotton Market Tote. It is practical, uses universal stitches, and serves as the perfect teaching tool for learning how to manage rounds, increases, and stitch placement. You can do this, and your students—or your future self—will love learning through this timeless pattern.
Quick Project Overview
This market tote is designed to be the ultimate teaching project. Because it is worked in the round, it teaches students how to transition between rows seamlessly, how to maintain consistent gauge, and how to create structure in a piece that needs to be durable.
- Skill Level: Beginner-Friendly Intermediate
- Estimated Time: 4 to 6 hours for an experienced crocheter; ideal for a multi-session workshop.
- Finished Size: Approximately 12 inches wide by 14 inches deep.
- Best Use: Grocery shopping, farmers’ market visits, or even as a simple beach bag for summer essentials.
- Why You’ll Love It: This pattern uses basic stitches that create a sophisticated “waffle-like” texture, making the finished bag look far more complex than it actually is. It is the perfect project to boost confidence while providing a useful, sturdy result.
Materials Needed
To teach or complete this project, quality materials matter. Cotton is essential here because it doesn’t stretch as much as acrylic or wool, keeping your groceries safe!
- Yarn: 3 skeins (approx. 500 yards) of Worsted Weight (Category 4) 100% Cotton. Avoid mercerized cotton for beginners, as it can be slippery. Look for a soft, matte finish cotton.
- Hook: Size H/8 (5.0 mm) crochet hook. Choose one with an ergonomic handle if you are teaching others to prevent wrist fatigue.
- Notions: A set of locking stitch markers, a tapestry needle (with a blunt tip), a pair of sharp fabric scissors, and a measuring tape.
- Optional Extras: A small project bag to keep everything organized and printed pattern sheets for notes.
Stitches and Abbreviations
- Ch (chain): The foundation of most crochet projects.
- Sl St (slip stitch): Used to join rounds.
- Sc (single crochet): A short, sturdy stitch.
- Dc (double crochet): A taller stitch that provides the height and airiness needed for a market bag.
- Yo (yarn over): The essential movement for picking up yarn.
- St(s) (stitch/stitches): The individual loops you work into.
Pattern Notes Before You Start
Success in teaching—and in crocheting—lies in the preparation. Before you begin, remind yourself that the goal is consistency, not perfection.
- Tension: If you are teaching, tell your students to focus on “relaxing their grip.” A tight grip leads to tight tension, which makes the work hard to pull through.
- Gauge: This bag is fairly forgiving, but if your gauge is loose, your bag will sag. If it is too tight, the fabric will be stiff as cardboard. Aim for a “middle-of-the-road” tension that is comfortable for your hands.
- Joining: We will be using the “join and chain” method. Always ensure you are joining to the first stitch of the round, not the turning chain, to keep your edges straight.
Full Crochet Pattern
This pattern is worked from the bottom up, starting with a flat oval base and moving into the textured body of the bag.
Part 1: The Base
Round 1: Ch 21. Sc in the 2nd ch from the hook. Sc in each ch until the last ch. Work 3 sc into the last ch (this turns the corner). Now, work along the opposite side of the chain. Sc in each st until the last st. Work 2 sc in the last st. Join with a sl st to the first sc. (42 sts)
Round 2: Ch 1, sc in each st around, working 2 sc into the corners of the oval. Join with a sl st. (46 sts)
Round 3: Repeat Round 2. (50 sts)
Part 2: The Body
Round 4: Ch 2 (counts as first dc). Dc in each st around. Join with a sl st to the top of the ch-2. (50 sts)
Round 5: Ch 2, front post double crochet (FPdc) around the next st, dc in the next st. Repeat from to around. Join with a sl st. This creates the beginning of the textured ribbing.
Round 6: Ch 2, dc in the next st, FPdc around the next st. Repeat from to around. Join with a sl st.
Repeat Rounds 5 and 6 until the bag measures 12 inches from the base.
Part 3: The Handles
Round 1: Ch 1, sc in each of the first 8 sts. Ch 40 (this forms the handle). Skip 10 sts on the main body of the bag. Sc in the next 15 sts. Ch 40. Skip 10 sts. Sc in the remaining 7 sts. Join with a sl st.
Round 2: Sc in each sc and each ch around the handles. This will create a sturdy, thick handle that won’t dig into your shoulders. Join and fasten off.
Finishing
Weave in all your ends on the inside of the bag. Use a tapestry needle to stitch back and forth through the fibers at least three times to ensure the ends don’t unravel after heavy use. Give the bag a gentle steam block to even out the stitches.
Step-by-Step Tutorial Explanation
When you sit down to teach this, use the “I do, you do” method. First, show them the foundation chain. Explain how to hold the yarn so that it flows naturally through their fingers. The most important part of the Round 4 transition is counting stitches. If a student loses a stitch, don’t panic! Simply have them recount the round. For the texture in Round 5 and 6, physically point to where the hook goes—under the post of the dual-colored stitches—so they understand that they are working around the post, not into the top loop. This is the “Aha!” moment for almost every student.
Common Mistakes to Avoid
Even seasoned crafters make mistakes, and when teaching, pointing these out can be very reassuring to beginners:
- The Twisted Chain: If your foundation chain is twisted when you join, the whole bag will be skewed. Always lay your chain flat on a table before joining.
- The “Invisible” Stitch: Beginners often miss the last stitch of a round because it hides behind the joining slip stitch. Remind them to count their stitches at the end of every round.
- Death Grip: If your student’s knuckles are white, they are holding the hook too tightly. Suggest a quick stretch break every 20 minutes.
- Uneven Increases: If the base of the bag is cupping (like a bowl), they are not increasing enough. If it is ruffling, they are increasing too much. The base should lay flat like a pancake.
Pro Tips for a More Beautiful Result
The difference between a “handmade” bag and a “hand-crafted” bag is in the finishing details.
- Color Palettes: If you are teaching others, encourage them to choose two colors: one solid for the base and one for the handles. It makes the piece look professionally designed.
- Blocking: Many crocheters skip this, but for a bag, it is vital. Wet the finished bag, lay it flat on a towel, and shape it to the desired dimensions. Letting it dry completely sets the stitches and hides minor irregularities in tension.
- Seaming: If you choose to add a liner (which makes the bag much more durable), use a simple cotton fabric and a whip stitch to sew the lining to the inside top edge. This covers up your starting tails and adds a boutique touch.
Variations and Personalization Ideas
Once you have mastered the basics of this tote, you can teach endless variations:
- The Mini Version: Use a thinner yarn and a smaller hook to create a snack-sized gift bag.
- The Boho Fringe: Add 6-inch lengths of yarn to the bottom of the bag to give it a trendy, festival-ready look.
- The Seasonal Swap: Use red and green cotton for a Christmas market bag, or soft pastels for a spring Farmers’ Market haul.
- Advanced Texture: For intermediate students, suggest alternating rows of single crochet and puff stitches to create a more tactile, dense fabric.
Care Instructions
Part of the beauty of handmade items is their longevity. Because this bag is made of 100% cotton, it is machine washable, but you must treat it with care. To keep the bag looking fresh:
- Washing: Place the bag inside a mesh delicates laundry bag. Wash on a cold, gentle cycle with a mild detergent.
- Drying: Never put your crochet bag in the dryer. The heat will shrink the cotton and distort the shape. Instead, reshape the bag while damp and lay it flat to air dry on a clean towel.
- Storage: Store the bag hanging up or folded neatly. Avoid keeping heavy, sharp objects inside during long-term storage to prevent the crochet fabric from stretching out of shape.
FAQ
How do I help students who are struggling with tension?
Tension usually improves with time and muscle memory. Encourage them to try different ways of holding the yarn—some people prefer tensioning through their pinky, while others prefer the index finger. There is no “right” way, only the way that works for their hands.
What should I do if a student makes a mistake 10 rows down?
Do not worry! In a class setting, it is often better to help them “drop down” that specific column to fix the error rather than frogging the whole project. If they are truly overwhelmed, show them how to weave in the error and move forward; imperfection is character.
How do I price a class if I decide to teach professionally?
Consider your costs for materials, the time spent preparing the pattern, and the duration of the class. It is often helpful to include a “kit fee” so students show up with exactly the right materials, which ensures everyone is set up for success from minute one.
Is it necessary to teach basic stitches before starting a project?
It is usually better to combine the two. Teaching a chain as a standalone exercise can be boring, but teaching a chain as the first step of a bag keeps the student motivated. Keep it practical; people learn better when they know what they are building.
How do I encourage people who think they are “bad” at crochet?
Remind them that crochet is just a series of loops. Even the most complex blanket is just one stitch repeated over and over. Patience is the only requirement for being a great crocheter.
Conclusion
Teaching others how to crochet is one of the most rewarding ways to spend your time. By choosing a project like this textured market tote, you are not just teaching a set of stitches—you are giving someone the tools to build something beautiful with their own two hands. Do not feel that you need to be a master of every technique before you start. The most important quality you can bring to a class is your enthusiasm and your willingness to help.
As you prepare for your first session—whether it is a formal workshop or just a coffee date with a friend who wants to learn the ropes—remember that your goal is to share the cozy, creative peace of this hobby. If you make a mistake, laugh it off. If they make a mistake, celebrate the opportunity to learn how to fix it together. Keep your hooks steady and your heart open, and your local crochet community will flourish beautifully. Happy hooking!