
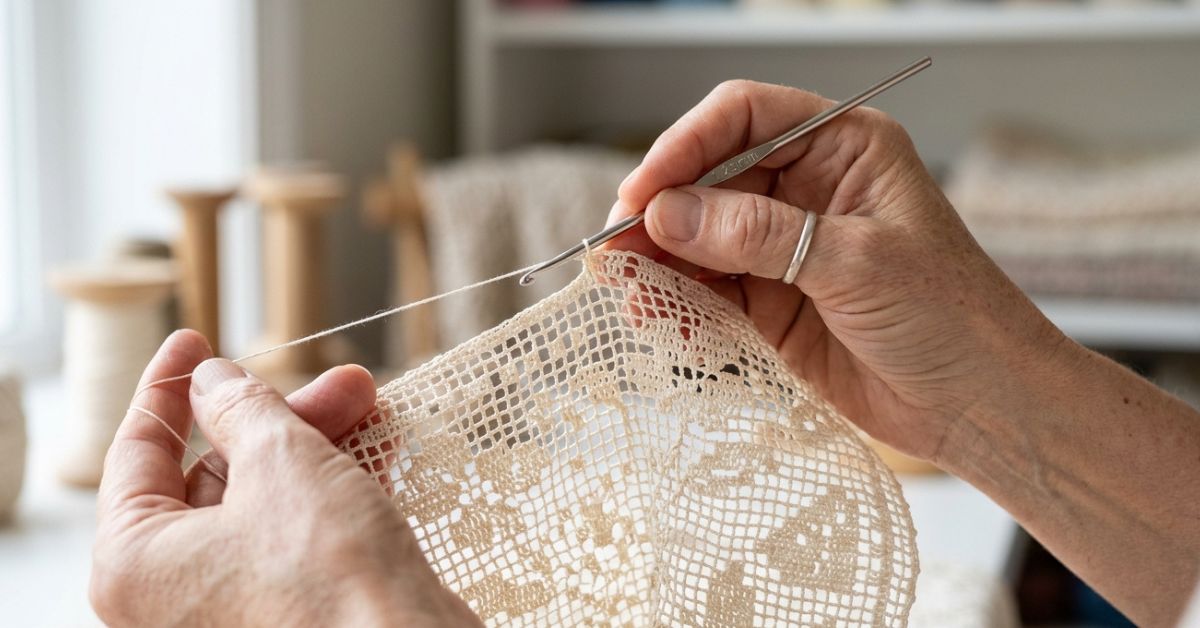
There is something truly magical about the way a simple grid can transform into a delicate, lace-like tapestry. Filet crochet is one of those timeless techniques that feels both nostalgic and refreshingly modern. Whether you are envisioning a vintage-inspired table runner for your dining room, a lightweight summer shawl, or a sophisticated wall hanging to add texture to a nursery, filet crochet offers a canvas that is as versatile as it is elegant.
If you have ever been intimidated by the thought of “lace,” please take a deep breath and let those worries fade away. Filet crochet is essentially just a dance between two stitches: the chain and the double crochet. By creating an open grid, or “mesh,” and filling in certain squares with solid blocks, you can create intricate shapes, letters, and motifs that look incredibly professional while being wonderfully rhythmic to hook. In this tutorial, I will walk you through the fundamentals of reading a filet chart, how to keep your edges tidy, and how to create a beautiful, classic floral-inspired filet square that will serve as the perfect foundation for your lace-making journey.
Quick Project Overview
This project is perfect for those who want to master the art of geometric patterns without needing a degree in mathematics.
- Skill Level: Beginner-friendly intermediate. You should be comfortable with chain stitches and double crochet.
- Estimated Time: 3–5 hours depending on your speed.
- Finished Size: Approximately 10″ x 10″ (perfect for a decorative cushion front or a piece of a larger sampler blanket).
- Best Use: This floral motif is beautiful as a standalone doily, a coaster, or joined together with other squares to create a larger tablecloth.
- Why You’ll Love It: Once you “get” the rhythm of the open and closed squares, the work becomes meditative. It’s the ultimate “Netflix and crochet” project.
Materials Needed
To achieve that crisp, lace-like look, I recommend a fine-weight yarn that allows the stitches to breathe.
- Yarn: Size 3 (light/DK) cotton yarn is ideal. Cotton provides the stitch definition required for filet crochet because it doesn’t stretch or fuzz as much as acrylic.
- Hook: Size E/4 (3.5mm) crochet hook. You want your stitches to be slightly firm, so if you tend to be a loose crocheter, don’t hesitate to size down to a 3.25mm hook.
- Tapestry Needle: To weave in your ends securely.
- Scissors: Any sharp pair will do.
- Blocking Mat and Pins: Essential for opening up the lace and making the grid look perfectly square.
Stitches and Abbreviations
We will be using standard American crochet terminology.
- Ch (Chain): Yarn over, pull through the loop on your hook.
- Dc (Double Crochet): Yarn over, insert hook into stitch, yarn over, pull up a loop, yarn over, pull through two loops, yarn over, pull through remaining two loops.
- St (Stitch): The individual loop you work into.
- Sp (Space): The hole created by skipping chains.
- Sl St (Slip Stitch): Insert hook into stitch, yarn over, pull through both the stitch and the loop on your hook.
Pattern Notes Before You Start
In filet crochet, an “Open Square” (or mesh) is typically created by working [1 dc, ch 2, skip 2 sts, 1 dc]. A “Solid Square” (or filled block) is created by working 4 double crochets in a row.
Because we are working in rows, we will use a turning chain of 3 to act as the first double crochet of each row. When working into the side of a previous row’s chain-3, remember that the turning chain counts as one stitch. Keeping your tension consistent is the secret to a professional finish; if your “open” squares look lopsided, try tugging slightly upward on your hook before completing the final yarn-over of your double crochet. This helps match the height of your chains to your stitches.
Full Crochet Pattern
This pattern creates a centered diamond-within-a-square design. We will chain an odd number to allow for symmetry.
Part 1: The Foundation
Chain 40.
Row 1: Dc in 8th chain from hook (the first 3 chains count as the first dc, the next 2 are the chain-2 space). Ch 2, skip 2 chains, dc in next chain. Repeat from to until the end of the row. You should have 12 open squares. Turn.
Row 2: Ch 5 (counts as 1 dc and ch-2 space), skip the first ch-2 sp, dc in the next dc. Ch 2, dc in next dc. Repeat across, ending with a dc in the 3rd chain of the turning chain. Turn.
Part 2: The Motif
Now we begin the “filled” blocks to create our design.
Row 3: Ch 5, dc in next dc (this is your first open square). Ch 2, dc in next dc. To make a solid square, work 2 dc in the next ch-2 space, then 1 dc in next dc. This is your solid block. Continue with open squares to mirror the other side.
Row 4-12: Follow your desired spacing. To keep it simple: Work open squares until you reach the center, then work 3 solid blocks in a row to begin your diamond, then revert to open squares. Use these rows to practice “reading” the fabric. If you see a solid block, you must put dc stitches into the chain spaces of the previous row.
Part 3: The Border
Once you have reached 30 rows (or your desired height), do not fasten off immediately.
Final Round: Ch 1, work single crochet evenly around the entire piece. Place 3 single crochets in each corner to ensure the piece lays flat without curling. Join with a slip stitch to the first sc and fasten off.
Step-by-Step Tutorial Explanation
When you look at your work after the first few rows, you might see what looks like a ladder. This is exactly what you want! The chain-2 spaces are the “windows” of your lace. When you see a “closed” square, you are simply filling those windows with stitches.
If you get lost, count your columns. Each column of double crochets should line up vertically. If you notice your edges are getting wider or narrower, double-check that you aren’t skipping the turning chain at the end of the row. Beginners often forget the final stitch of the row because the turning chain looks like a post, but it is just as important as a regular double crochet!
Common Mistakes to Avoid
- The “Twisted” Foundation: When you make your long starting chain, lay it flat on a table before you make your first row. A single twist will ruin the entire piece.
- Skipping the Turning Chain: If your piece is turning into a triangle, you are likely missing that last stitch of the row. Every row must start and end with a stable double crochet.
- Tension Mismatch: If your chain spaces are significantly larger than the double crochets, your mesh will look floppy. Try to keep your tension consistent by pulling your loops up to the height of your dc stitches.
- Counting Errors: Because filet is a grid, one wrong stitch ruins the pattern. Mark every 5th or 10th row with a stitch marker so you don’t lose your place.
Pro Tips for a More Beautiful Result
- Blocking is Non-Negotiable: Filet crochet rarely looks good immediately off the hook. Once finished, soak your project in cool water with a little yarn wash, squeeze out excess water, pinning it firmly (but not stretching it out of shape) onto a blocking board. Let it dry completely. You will be shocked at how the “windows” pop open.
- Yarn Choice Matters: Avoid dark, hairy yarns like mohair or dark navy wool. The beauty of filet is the geometry; you need high-visibility, smooth cotton to really see the lace effect.
- Consistent Hooking: If you are a naturally tight crocheter, go up a half-size in your hook. The mesh needs to be flexible to drape correctly.
Variations and Personalization Ideas
- The Keepsake Version: Use a thinner lace-weight thread and a steel hook to create a beautiful, delicate coaster.
- The Home Decor Twist: Chain a longer foundation row to turn this into a runner for a coffee table or a window valance.
- Color Blocking: Why stick to one color? Change colors every 10 rows to create a stunning chevron or ombre effect.
- The Modern Beginner: If you find the grid too boring, try adding “bobble” stitches into every third open square to create a textured, pop-out effect on your lace.
Care Instructions
Since we are using cotton yarn, caring for your lace is straightforward. Simply hand-wash your item in cool water using a gentle detergent. Avoid wringing or twisting it, which can pull the delicate posts out of shape. Instead, lay it flat on a clean towel, roll the towel up to absorb excess moisture, and then lay it flat on a mesh drying rack. If it loses shape over time, a quick re-soak and pin-down blocking will bring it back to its original beauty instantly.
FAQ
How do I read a filet crochet chart?
Filet charts are read from the bottom up. Each square represents a stitch or a space. Typically, an “X” or a filled square indicates a block (3 dc into the space or 1 in a dc plus 2 in the space), while an empty square stands for an open mesh (dc, ch 2, dc).
Why are my edges uneven?
This is almost always due to the turning chain. If you are using a ch-3 as your first stitch, make sure you are stitching into the top of that chain at the end of the next row. It creates a much cleaner, straighter vertical line.
Can I use acrylic yarn for filet crochet?
You can, but it is not recommended for beginners. Acrylic has a “bounce” that can make the grid look uneven. If you use it, choose a high-quality, smooth acrylic that doesn’t have a halo, and work your stitches slightly tighter than usual.
How do I fix a mistake three rows back?
Don’t fear the “frog”! Sometimes it is better to gently pull out your stitches (the “ribbit-ribbit” sound of ripping out yarn). If you notice a mistake early, take the time to go back. Filet crochet is very unforgiving because the grid is so visible—a mistake in one row will be noticeable for the rest of the project.
Is blocking really necessary?
Truly, it is the secret sauce. Without blocking, filet crochet looks like a lumpy, tangled mess of knots. Blocking is the final 10% of the project that gives you 90% of the professional, polished look. Never skip it!
Conclusion
Filet crochet is one of the most rewarding skills you can add to your fiber arts repertoire. It takes the simplicity of the double crochet stitch—something every crocheter knows—and elevates it into a sophisticated textile that looks like it belongs in an airy, sun-drenched boutique. Remember, your first square might not be perfect, and that is absolutely okay. Every row you complete is proof of your growing patience and precision.
I encourage you to grab a hook, pick a lovely cotton yarn, and start your first grid. Whether you finish this as a single piece of decor or start a larger project, you are building something beautiful with your own two hands. Don’t forget to take a photo of your work when you’re done, and if you found this tutorial helpful, share it with a friend who might be looking for a new, relaxing challenge. Happy hooking!