
Introduction
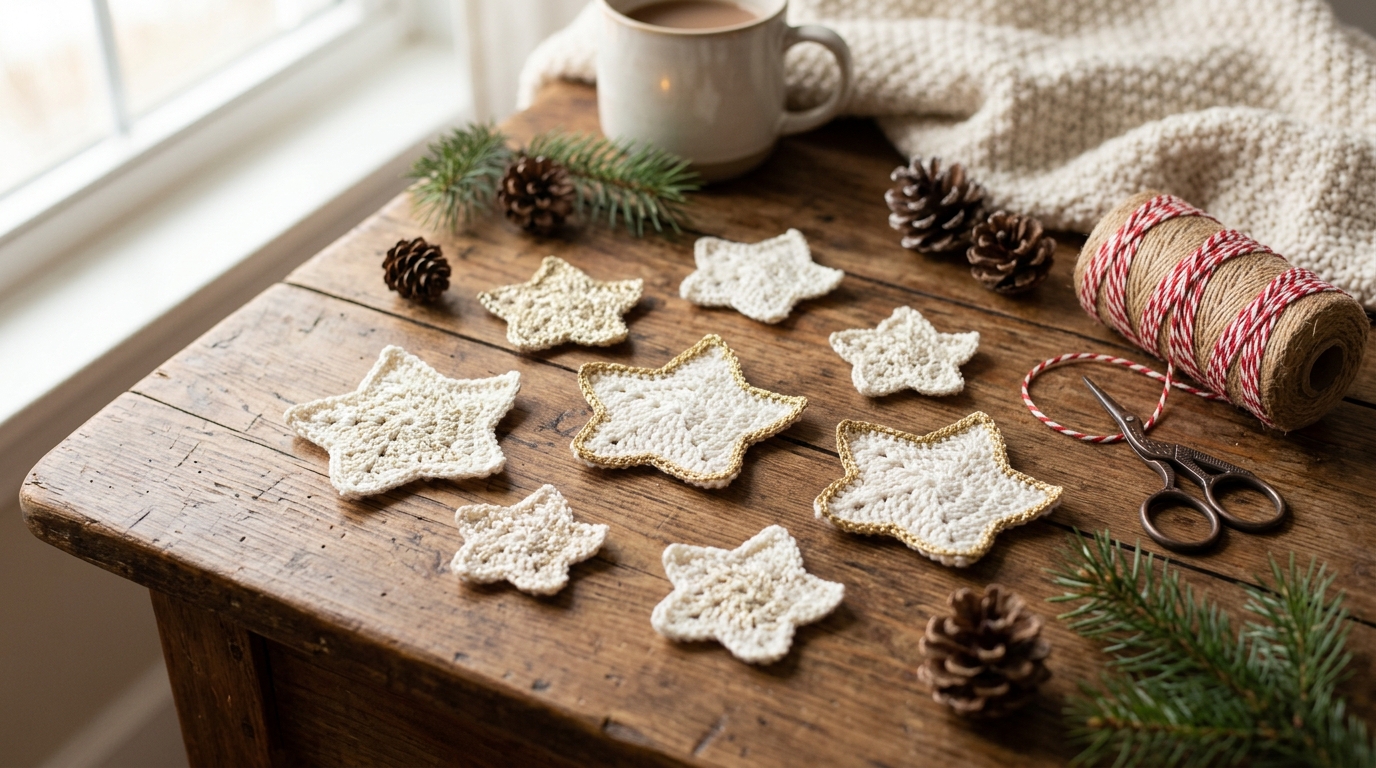
There is something truly magical about the arrival of the holiday season, when our homes transform into cozy sanctuaries filled with warmth, twinkly lights, and the spirit of gift-giving. For those of us who love to pick up a crochet hook, this is the most wonderful time of the year to create. One of the most classic, versatile, and beginner-friendly projects you can add to your collection is the humble crochet star. Whether you are aiming to brighten up your Christmas tree, add a handmade touch to a gift-wrapped package, or create a festive garland for your fireplace, these adorable appliques are the perfect solution.
Crochet stars are wonderful because they are quick to whip up—you can often create a whole handful in a single evening while watching your favorite seasonal movies. Because they use so little yarn, they are an excellent way to use up those precious remnants from your yarn stash. If you are a beginner, this project is a gentle introduction to working in the round and mastering stitch height variations. If you are an experienced crocheter, you will love how quickly these work up for last-minute gifts or as embellishments for larger projects. Let’s dive into the process of creating these charming little stars with a pattern that is easy to follow and absolutely timeless.
Quick Overview
This project is perfectly suited for beginners looking to practice working in a round, while offering enough charm for intermediate crocheters who want a quick, satisfying stash-buster. It will take you approximately 15 to 20 minutes to complete each star once you get into the rhythm. These stars are delicate, lightweight, and incredibly versatile; they work beautifully as tree ornaments, package toppers, wall-hanging decor, or even as applique motifs for clothing and blankets. You will love how the structure of the star comes to life with just a few simple stitches.
Materials or Tools Needed
To create your crochet stars, you do not need much, which is part of their appeal.
- Yarn: Any weight of yarn works well, but a worsted weight (Category 4) acrylic or cotton blend is fantastic for beginners because it is easy to see your stitches. For a more delicate, heirloom look, you might choose a fingering or sport weight cotton thread.
- Crochet Hook: Choose a hook that corresponds to your yarn weight. For worsted weight yarn, an H/8 (5.0 mm) hook is a great starting point. If you want a tighter, stiffer star, go down a half size.
- Stitch Marker: Extremely helpful for keeping track of the start of your round, especially if you are new to working in the round.
- Scissors: Any pair of sharp craft scissors will do.
- Tapestry Needle: You will need this for weaving in your ends securely once the star is finished.
- Optional: A bit of ribbon for hanging, or craft glue if you plan on adding a dusting of glitter or using them for scrapbooking.
Crochet Terms and Stitches
Before we begin, let’s get comfortable with the terminology used in this pattern. We will be using standard U.S. crochet terms.
- Slip Knot: The starting loop on your hook.
- Chain (ch): Yarn over and pull through the loop on your hook.
- Slip Stitch (sl st): Insert your hook, yarn over, and pull through both the stitch and the loop on your hook. This is mostly used to join rounds or move across the work without creating height.
- Single Crochet (sc): Insert your hook into the stitch, yarn over, pull up a loop, yarn over, and pull through both loops on the hook.
- Half Double Crochet (hdc): Yarn over, insert your hook into the stitch, yarn over, pull up a loop, yarn over, and pull through all three loops on the hook.
- Double Crochet (dc): Yarn over, insert your hook into the stitch, yarn over, pull up a loop, yarn over, pull through two loops, yarn over, and pull through the final two loops.
- Treble Crochet (tr): Yarn over twice, insert your hook, yarn over, pull up a loop, (yarn over and pull through two loops) three times. This creates the tall points of our star.
Helpful Notes Before You Start
Working in a circle can sometimes be tricky for beginners, so keep your tension consistent. If you find your star is curling, it might mean your stitches are a little too tight, specifically the chain stitches. Try to keep those chains nice and loose. On the other hand, if your star is wavy, you might be working too loosely.
Remember, these motifs are small, so don’t be discouraged if your first attempt isn’t perfect. Blocking your finished stars—simply pinning them to a flat surface, misting them with water, and letting them dry—can work wonders for defining the points and making them look professional.
Main Tutorial: Classic Five-Pointed Star
This pattern is worked in two rounds. The first round creates the base, and the second round builds the points.
Round 1
Start by making a magic ring (or chain 4 and join with a slip stitch to the first chain to form a ring).
Round 1: Chain 1 (does not count as a stitch), work 10 single crochet into the ring. Join with a slip stitch to the first single crochet. You should now have 10 stitches in your ring.
Round 2
This is where the star shape forms. We will be creating the points as we go around.
Round 2: Chain 6. Starting in the second chain from the hook, work 1 slip stitch, 1 single crochet, 1 half double crochet, 1 double crochet, and 1 treble crochet. Now, skip the next stitch of your foundation round and slip stitch into the following stitch.
Repeat from to four more times until you have five points total. After the final point, slip stitch into the base to join. Fasten off, leaving a long enough tail to weave in securely.
Step-by-Step Explanation
When you finish Round 1, you will have a small, tight circle of 10 single crochets. Do not worry if it looks a bit small! The magic happens in Round 2.
As you start your chain of 6 for the first point, think of it as building a small ladder. By working back down the chain with increasingly taller stitches—from the slip stitch at the tip down to the treble crochet at the base—you create that iconic tapered “spike.” Skipping one single crochet at the base of the ring is what keeps the points separated. If you don’t skip that stitch, your points will crowd together and the star will look more like a ruffled flower. It may feel a bit fiddly the first time, but your fingers will quickly learn the rhythm of moving from the stitch on the ring to the chain-up for the next point.
Common Mistakes to Avoid
- Tight Starting Chains: If your points look short or won’t lay flat, it is almost always because the chain stitches are gripped too tightly. Relax your hand!
- Miscounting the Ring: If you accidentally have 11 or 12 stitches in your first round, your star will look lumpy. Always count your stitches in the ring before joining.
- Skipping the Wrong Stitch: Ensure you are skipping exactly one stitch on the ring between each point. If you miss this, the star will collapse into a circle.
- Mixing Up UK/US Terms: Remember, this tutorial uses US terms. If you use a pattern that uses UK terms, a “double crochet” there is actually a “single crochet” here. Always check if you are ever in doubt!
- Fastening Off Too Short: Don’t trim your yarn too close to the work. You need enough length to weave the tail back and forth through the stitches so the star doesn’t unravel later.
Pro Tips for a Better Result
- The Power of Blocking: Even a slightly lopsided star will look perfect after blocking. Stretch those points out firmly when pinning them down.
- Stiffening: If you want your stars to be hard enough to hold their shape on a tree, you can brush them lightly with a mixture of half water and half white glue, or use a commercial fabric stiffener found at craft shops.
- Color Play: Using variegated or metallic thread can add a gorgeous holiday shimmer without needing to change colors mid-project.
- Center Detail: If you want a fun contrast, use a different color for the center ring than you use for the points. Join the new color when starting your chain of 6 for the first point.
Variations and Personalization Ideas
- Garland Style: Crochet twenty stars in various colors and string them along a piece of twine or ribbon using a tapestry needle.
- Gift Embellishment: Instead of a traditional yarn tail, tie a piece of jute string to your star and use it as a rustic gift tag, writing the recipient’s name on a small wooden bead attached to the string.
- Double-Layered Star: Make two stars and sew them together back-to-back with a small amount of polyester fiberfill inside to create a 3D padded ornament.
- Size Variation: Want a bigger star? Replace the chain of 6 with a chain of 8 or 10, and simply add more tall stitches (like double or treble crochets) as you work your way back down the chain.
Care, Storage, and Next Steps
Once your stars are finished, store them in a small linen bag or a flat box with tissue paper between layers to prevent them from getting tangled or crushed. If they become dusty, a quick dip in cool water with a tiny drop of dish soap, followed by a gentle squeeze and reshape, will refresh them for the next holiday season.
Now that you have mastered the star, why not try to adapt the same logic to other shapes? You can create flowers by changing the stitch pattern of the points, or even attempt a more complex snowflake by adding picot stitches (a small loop of chains) to the ends of your points. The more you practice these foundational techniques, the more confident you will become in turning your yarn into something beautiful.
FAQ
Can I use cotton yarn for these stars?
Absolutely! Mercerized cotton yarn is actually one of the best choices because it has excellent stitch definition and holds its shape very well, which is perfect for ornaments.
How do I make the star points look sharper?
Blocking is the secret. Use rust-proof sewing pins to anchor each point of the star to an ironing board or blocking mat, pull them tight, and mist with water. Allow them to dry completely before removing the pins.
Why does my star look like a circle instead of a star?
This usually happens if you aren’t skipping the stitches in the foundation ring correctly, or if your stitch tension is too loose. Ensure you have 10 stitches in your ring and that you are skipping one stitch between every point.
What is the advantage of using a magic ring?
A magic ring allows you to pull the center point of your work completely closed, leaving no visible hole. It makes the project look much more professional than starting with a traditional chain-and-join method.
Can I make these in a thicker yarn like wool?
Yes, you can. However, keep in mind that the star will be much larger and chunkier. This is actually a great look for a farmhouse-style holiday wreath!
Conclusion
Creating handmade decor is one of the most rewarding ways to spend your time during the holiday season. These little stars are more than just yarn on a hook; they are tiny vessels of your effort, care, and creativity. Whether you make one to hang on your own tree or a dozen to surprise friends and neighbors, you are sharing the joy of fiber arts. I hope this tutorial has been a helpful guide for your project and that you feel empowered to experiment with colors, textures, and sizes. Remember, the beauty of crochet is in the process—the quiet moments, the rhythm of the hook, and the satisfaction of seeing a shape emerge from a simple strand of yarn. Happy crocheting, and may your holiday season be filled with cozy stitches and much happiness!