
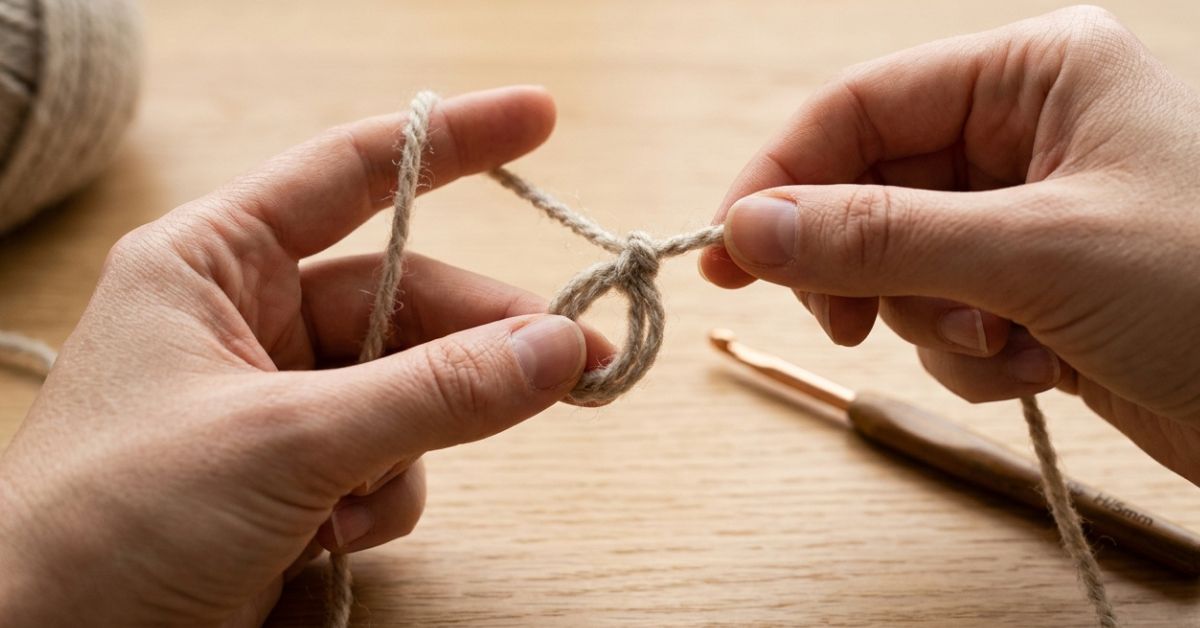
There is something undeniably magical about taking a single strand of yarn and, with the help of a simple hook, turning it into something warm, cozy, and entirely made by your own two hands. If you have been feeling that “itch” to start your crochet journey, you might have noticed one recurring hurdle: the slip knot. It is the very first step of almost every project you will ever undertake. While it might seem like a tiny detail, mastering this single loop is the gateway to confidence. It is the foundation upon which your blankets, sweaters, and handmade gifts will be built.
We have all been there—fumbling with the yarn, feeling like we have too many fingers, or getting frustrated when the knot doesn’t sit quite right. But please, take a deep breath. You are exactly where you need to be. This guide is designed to take the mystery out of that first movement. Whether you are a complete beginner picking up your first hook today, or an intermediate crocheter looking to refine your technique for a smoother start, consider this your gentle, expert hand-holding. Let’s turn that uncertainty into a rhythmic, joyful creative practice.
The Foundation of Your Journey: The Slip Knot
Before we dive into the pattern, let’s demystify the slip knot. Think of it as your secure starting point. You want it tight enough to stay put on your hook, but loose enough that it doesn’t fight against your yarn. To make one, start with your yarn tail facing toward you. Create a small loop by crossing the working yarn (the yarn connected to the ball) over your tail end. Reach through that loop, grab the working yarn, and gently pull it through. Tighten it onto your crochet hook, but remember: the loop should glide comfortably along the metal or wood. If you have to tug hard to slide it, your knot is too tight! A relaxed, fluid tension is the secret to a stress-free experience.
Quick Project Overview
To put your new skill to the test, we are going to create a “Cozy Mornings” Textured Mug Rug. It is a perfect beginner project that introduces the basic chain, the single crochet stitch, and the importance of checking your edges.
- Skill Level: Absolute Beginner
- Estimated Time: 1 to 2 hours
- Finished Size: Approximately 5 by 5 inches (perfect for a coffee mug or a scented candle)
- Best Use: A quick DIY gift or a “desk-warming” treat for your home office.
- Why You Will Love It: It is small, rewarding, and helps you practice your tension without the pressure of a large, complex garment.
Materials Needed
- Yarn: Worsted weight (Size 4) cotton yarn. Cotton is fantastic for beginners because it holds its shape well and doesn’t stretch too much.
- Crochet Hook: Size H/8 (5.0 mm). This is a “Goldilocks” hook size—not too big, not too small.
- Tools: A pair of sharp scissors and a tapestry needle for weaving in those final ends.
- Pro Tip: If you are using a dark-colored yarn, try to work in a well-lit area or place a light-colored cloth on your lap so you can see your stitches clearly.
Stitches and Abbreviations
- Slip Knot (sk): The starting loop on your hook.
- Chain (ch): The foundation of your work. Yarn over and pull through the loop on your hook.
- Single Crochet (sc): Insert hook into stitch, yarn over, pull up a loop (two loops on hook), yarn over, pull through both loops.
- Turn: Flip your work over like turning the page of a book.
- St (st): Stitch.
Pattern Notes Before You Start
Crochet is meant to be relaxing, not a test of perfection. If your first mug rug looks a little uneven, celebrate it! It is evidence of your learning process.
- Tension: Consistent tension comes with time. If your work feels like it is curling, you are likely working too tightly. If it looks full of holes, you might be working too loosely.
- The Turning Chain: For this pattern, we will chain one at the start of each row. This chain does not count as a stitch; it simply gives you enough “height” to transition to the next row.
- Counting: In every row, you should have 18 stitches. Periodically count them as you go to ensure you aren’t accidentally dropping edges, which is the most common reason for “triangular” squares!
Full Crochet Pattern
Part 1: The Foundation
Start by making your slip knot. Ensure it glides easily on your 5.0 mm hook. Chain 19. This gives you 18 chain stitches plus one “turning” chain.
Part 2: Working the Rows
Row 1: Insert your hook into the second chain from your hook. Work 1 single crochet in that stitch and in every chain across. You should have 18 single crochets. Chain 1, turn.
Row 2 through Row 18: Work 1 single crochet in each stitch across. At the end of each row, chain 1 and turn. Keep your rhythm steady—try to make each stitch have the same “tug” as the one before it.
Assembly and Finishing
Once you have finished row 18, cut your yarn, leaving a 6-inch tail. Pull the yarn tail all the way through the final loop on your hook to secure the knot. Use your tapestry needle to weave that tail back and forth through the back of your stitches. Trim any excess yarn.
Step-by-Step Tutorial Explanation
When you finish your first row, look at the top of your work. You will see what look like little “V” shapes. Those are your stitches. When you move to Row 2, you are going to slide your hook underneath both legs of those “V”s. When you insert your hook, you shouldn’t have to force it. If it feels like a struggle, your tension is likely too tight. As you grow more comfortable, you will find that you can feel the rhythm—a lovely, meditative flow of hook in, yarn over, pull up, yarn over, through two.
Common Mistakes to Avoid
The most common “beginner’s trap” is the Twisted Chain. When you finish your initial chain of 19, lay it flat on a table. If it looks like a spiral, just undo it and start again. A twisted base will make your entire project skew crookedly. Another common error is missing the very last stitch in a row—it often likes to hide! Always count your stitches at the end of each row to make sure you still have 18. If you have 17, look back at the end of the previous row; you likely missed the last loop.
Pro Tips for a More Beautiful Result
- Blocking: Once you finish, your mug rug might look a little wavy. This is normal! Simply mist the finished piece with a little water, lay it flat on a towel, and gently “block” it into a perfect square with your hands, pinning the corners if necessary. Let it air dry, and it will look professional and crisp.
- Weaving Ends: Never just snip your yarn close to the knot. It will unravel over time. Always weave your yarn tail over a one-inch path, changing directions at least once to ensure a secure, invisible finish.
- Yarn Choice: If you find the cotton yarn too stiff, try a soft acrylic blend for your first few practice swatches. It is more forgiving on the hands for long sessions.
Variations and Personalization Ideas
Once you have mastered the mug rug, you can play with color! Try switching colors every four rows for a striped effect. To do this, simply drop your old color at the last “pull through” of your final stitch in the row, pick up your new color, and continue. For a more sophisticated look, add a decorative border by single crocheting in a contrasting color all the way around the outside edge, placing 3 stitches in each corner to keep it flat.
Care Instructions
Since you used cotton yarn, this mug rug is very durable. If it gets a coffee stain, simply toss it in a mesh laundry bag and wash it on a gentle cycle. Reshape it while it is damp and lay it flat to dry. Avoid high heat in the dryer, as it can cause the natural cotton fibers to shrink slightly.
FAQ
How do I know if my tension is too tight?
If your work creates a bowl shape or feels stiff like cardboard, your tension is too tight. Try going up one hook size (e.g., to a 5.5 mm) for your next project, or consciously try to hold your yarn more loosely as it flows through your fingers.
Why does my project look like a trapezoid instead of a square?
This happens when you accidentally skip the first or last stitch of a row. Always count your stitches! It is much easier to unpick a few stitches than to finish a whole project only to realize the edges are uneven.
Can I use any yarn for a slip knot?
Technically, yes! However, for beginners, avoid “fuzzy” or “mohair” style yarns. They hide your stitches and make it nearly impossible to see where your hook should go. Stick to smooth, clearly defined yarns while you are learning.
Is there a “wrong” way to hold the hook?
Not at all. Some people hold the hook like a pencil, others like a dinner knife. What works for your hand and comfort is the “right” way. If your hand gets tired, try switching your grip or taking a short break to stretch your wrists.
How many projects can I make with one ball of yarn?
A standard ball of worsted weight yarn is quite generous. You could likely make four to six of these mug rugs from a single 50-gram ball of yarn. It is a very economical hobby!
Conclusion
Congratulations on taking that first, vital step! The slip knot is more than just a piece of string and a loop—it is the beginning of a lifetime of creativity. You have officially started your crochet journey, and I am so proud of you for leaning into the process. Remember, there is no such thing as a “perfect” crocheter, only someone who enjoys the act of creating. Whether you keep this mug rug for yourself or tuck it into a gift basket for a dear friend, know that you’ve created something genuine and uniquely yours. Keep your hook handy, trust your hands, and most importantly, keep stitching. There is a whole world of cozy textures and beautiful patterns waiting for your touch. Happy hooking!