
Introduction
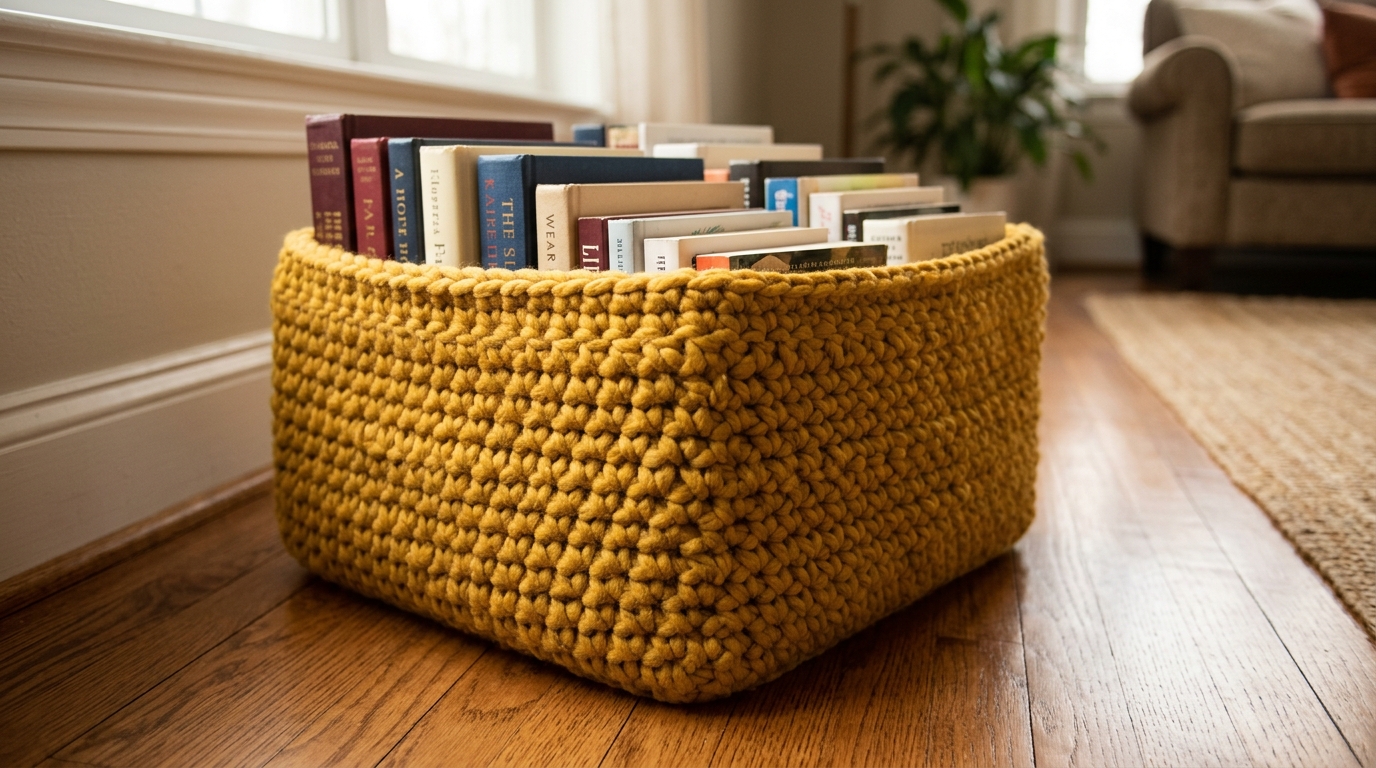
There is something deeply grounding about organizing your home with items you have crafted with your own two hands. Whether you are looking to corral stray yarn scraps, tidy up a bedside table, or create a beautiful home for your favorite indoor plants, a handmade crochet basket is the perfect solution. There is a special kind of magic in taking a skein of soft, chunky yarn and transforming it into a sturdy, functional vessel that brings warmth and texture into your living space.
If you have ever felt intimidated by the idea of making home decor, I want to reassure you: the crochet basket is one of the most forgiving and rewarding projects you can undertake. This project is specifically designed for those who appreciate a blend of rustic charm and modern functionality. Using thick, chunky yarn creates a dense fabric that holds its shape beautifully without the need for stiffeners or complex engineering. Even if you are a self-proclaimed beginner, you will find this process meditative and deeply satisfying. We will walk through the steps together, focusing on clear techniques to ensure your basket is not just pretty to look at, but sturdy enough to withstand the daily hustle of a busy home. Let’s grab our hooks and create something lovely together.
Quick Overview
This project is perfectly suited for anyone looking to master the fundamentals of working in the round while creating a practical home accessory.
- Skill Level: Beginner-Friendly. If you know how to make a magic ring (or a simple chain-loop) and can work basic single crochet stitches, you have all the skills required.
- Estimated Time: 2 to 3 hours, depending on your crochet speed.
- Finished Size: Approximately 8 inches in diameter and 7 inches tall, though you can easily adjust the size to fit your specific needs.
- Best Use: Storing crochet supplies, desktop organization, or as a cozy cover for a ceramic planter.
- Why You’ll Love It: The thick yarn works up incredibly fast, making this a perfect “instant gratification” project that yields a high-end, boutique-style result.
Materials Needed
To create a sturdy, lasting basket, the choice of materials is quite simple, but it plays a significant role in the final structure.
- Yarn: Super bulky (Level 6) weight yarn. Look for a cotton or jersey-style recycled yarn for the most structural integrity, but a high-quality acrylic blend will also work wonderfully. You will need approximately 150–200 yards.
- Hook: A size 10.0mm (N/P) or 12.0mm hook. A larger hook size relative to your yarn is key; we want the stitches to be tight to give the basket “walls” that stand up on their own, but not so tight that you can’t get your hook through comfortably.
- Stitch Marker: Essential for keeping track of your rounds, as we will be working in a continuous spiral to avoid a visible seam.
- Darning Needle: A large-eye, sturdy needle for weaving in the thick ends at the end.
- Scissors: Sharp enough to handle the thickness of chunky yarn.
Crochet Terms and Stitches
Before we dive into the pattern, let’s get comfortable with the terminology. We are using standard U.S. crochet terms.
- Magic Ring (MR): A technique for starting circular projects without a hole in the center.
- Single Crochet (sc): The workhorse stitch for this project; it creates a tight, dense fabric.
- Increase (inc): Working two single crochet stitches into the same stitch to expand the circle.
- Slip Stitch (sl st): Used to join rounds or create a clean finish.
- Back Loop Only (BLO): This specific technique is the secret to a sharp, crisp transition from the bottom of the basket to the vertical walls.
- Stitch Marker: We use this to mark the first stitch of every round so you never lose your place.
Helpful Notes Before You Start
The most important aspect of a sturdy basket is your tension. When working with chunky yarn, it is natural to want to loosen up, but for storage bins, we want to maintain a consistent, firm pull on the yarn. If your stitches feel a bit loose, try dropping down a hook size.
Another useful tip is to ignore the “seam.” Because we are working in a continuous spiral, the transition between rounds will naturally shift. This is expected and desirable, as it prevents a noticeable diagonal line running up the side of your basket. Finally, don’t worry if the basket seems slightly wavy while you are working the flat base. Once you start the walls, the fabric will naturally pull into a sturdy, upright shape.
Main Tutorial: Sturdy Chunky Basket
Part 1: The Base
We start with a flat circular base. This is the foundation that dictates how much your basket can hold.
- Round 1: Start with a magic ring. Work 8 single crochet (sc) stitches into the ring. Pull the ring closed tightly. Place your stitch marker in the first stitch of the round. (8 stitches)
- Round 2: Work 2 sc in each stitch around. Move your marker up as you go. (16 stitches)
- Round 3: 1 sc in the next stitch, 2 sc in the next stitch. Repeat from to around. (24 stitches)
- Round 4: 1 sc in each of the next 2 stitches, 2 sc in the next stitch. Repeat from to around. (32 stitches)
- Round 5: 1 sc in each of the next 3 stitches, 2 sc in the next stitch. Repeat from to around. (40 stitches)
Note: For a larger basket, simply continue this increasing pattern (adding one additional sc between increases each round) until your base reaches your desired diameter.
Part 2: Building the Walls
Now we turn the circle into a bowl. This is where your basket begins to take shape.
- Round 6 (Transition Round): Work 1 sc in the Back Loop Only (BLO) of every stitch around. Do not increase. You will notice the fabric immediately wants to fold upward. (40 stitches)
- Round 7 through 14: Work 1 sc in each stitch around (working through both loops now). Continue in a continuous spiral until the walls reach your desired height or you run low on yarn.
- Finishing the Rim: Once you reach your final round, work a round of slip stitches loosely around the entire top edge. This creates a refined, finished look and adds a bit of stability to the opening. Fasten off and cut your yarn, leaving a 6-inch tail.
Part 3: Finishing and Weaving
Using your darning needle, weave the tail end through the stitches on the inside of the basket. Because the yarn is bulky, try to weave it in a “zig-zag” pattern through the interior loops so that the end is completely hidden and secure. If you have a tail from the initial magic ring, pull it firmly one last time and weave it into the center of the base to ensure the hole remains completely closed.
Step-by-Step Explanation
Think of this project in two distinct phases. Phase one is the expansion—the base. You are essentially creating a flat pancake of stitches. If the fabric starts to curl like a bowl during this phase, your tension is likely too tight; if it starts to ripple like a ruffle, your tension is too loose. Aim for a flat, firm circle.
Phase two is the transition. By working in the Back Loop Only for just one round, we create a hinge-like structure. This acts as a sturdy corner, forcing the crochet fabric to stand vertically rather than continuing to expand. Once you turn that corner, the rest of the project is simply “around and around.” It is repetitive and deeply soothing, perfect for listening to a podcast or enjoying some quiet time.
Common Mistakes to Avoid
Even experienced crocheters run into these common pitfalls when working with bulky materials:
- The “Hole” in the Center: Beginners often struggle to close the magic ring fully. If you find a visible gap, simply thread your starting tail through a needle and use it to sew the center of the ring together from the back side.
- Losing Count: With chunky yarn, it is easy to accidentally skip a stitch. Always move your stitch marker to the newest stitch immediately after you make it. Do not rely on your memory!
- Over-stretching the Yarn: Some jersey-style yarns have a slight elastic quality. If you over-stretch the yarn while working, your basket may lose its shape after it relaxes. Try to work with a relaxed hand.
- Inconsistent Transitions: If you see a “step” in your work where the rounds meet, don’t stress. This is common when working in spirals. Using the slip stitch finish in the final round helps hide any unevenness.
Pro Tips for a Better Result
- The “Stiffener” Trick: If you find your basket isn’t quite as sturdy as you’d like, you can lightly spray the inside with a fabric starch or use a bit of clear glue mixed with water on just the bottom base to give it extra “stay-put” power.
- Steam Blocking: If your basket looks a bit lopsided, you can gently steam the piece using a garment steamer or the steam setting on your iron (hold it a few inches away—never touch the iron directly to the yarn!). Gently shape the basket with your hands while it is warm and damp, then let it sit undisturbed until cool. It will “set” into the perfect shape.
- Color Blocking: If you have leftover yarn, try changing colors at the transition round. A neutral base with a pop of color for the walls is a classic, designer-look combination.
Personalization Ideas
The beauty of this pattern is its versatility. Here are a few ways to make it your own:
- Leather Handles: Once finished, punch two small holes on opposite sides near the top rim and attach small leather drawer pulls or fabric scraps using brass Chicago screws. It instantly elevates the basket to a professional-looking home decor piece.
- Add a Liner: Cut a piece of linen or canvas to fit the interior of your basket. You can secure it with a few whip stitches along the top rim. This keeps small items from poking through the gaps in the crochet stitches.
- The “Squat” Basket: Make a basket with a very wide base but only 3 or 4 rounds of walls. These make perfect “catch-all” trays for keys or jewelry in an entryway.
Care and Next Steps
To keep your handmade basket looking fresh, treat it like any soft home accessory. If it gathers dust, you can use a lint roller or a hand vacuum on the low setting. If it becomes stained, spot clean it with a damp cloth and a mild soap. It is generally not recommended to put structural crochet items in a washing machine, as the agitation can distort the shape.
Now that you have mastered the sturdy crochet basket, you are ready for more home projects. Consider trying a matching set in different sizes, or perhaps experiment with adding decorative pom-poms or tassels to the rim!
FAQ
How do I stop my base from curling while I crochet?
If your circle is curling upward like a bowl while you are working the base, your stitches are likely too tight. Try relaxing your tension or going up a half-size in your hook. If the base is rippling like a skirt, your stitches are too loose and you are increasing too much.
Can I use thinner yarn for this basket?
Yes, but you will need to hold two or three strands of thinner yarn together to achieve the “super bulky” thickness required for structure. Alternatively, you can use a smaller hook to create a tighter fabric, but the basket will be smaller in size.
Why is my basket lopsided?
Working in a continuous spiral can sometimes make the join look uneven. To fix this, ensure you are counting your stitches at the end of every round. If your stitch count is correct, the lopsided look is often remedied by steam blocking.
Can this pattern be made into a square basket?
Yes, you can turn this into a square by changing your increase points. Instead of increasing evenly around the circle, you would work 3 stitches into each of the four “corner” stitches to create a square shape.
How do I fix a mistake in a previous round?
With bulky yarn, it is quite easy to “frog” (unravel) your stitches. Don’t be afraid to pull back your work to the point of the mistake. It takes far less time to fix a stitch than it does to look at a mistake for the lifetime of the project!
Conclusion
Creating your own storage solutions is one of the most rewarding ways to practice crochet. Not only do you end up with a beautiful piece of home decor that is uniquely yours, but you also hone your skills in tension and shaping—skills that will serve you well in every future project you undertake.
Remember, every stitch is an opportunity to learn. If your basket isn’t perfect the first time, carry that experience into your next project. Handmade items carry the love and energy you put into them, and that is what makes them so much more special than anything you could buy in a store. Keep practicing, keep enjoying the rhythm of your hook and yarn, and most importantly, keep creating. I cannot wait to see the lovely baskets you build for your homes!