
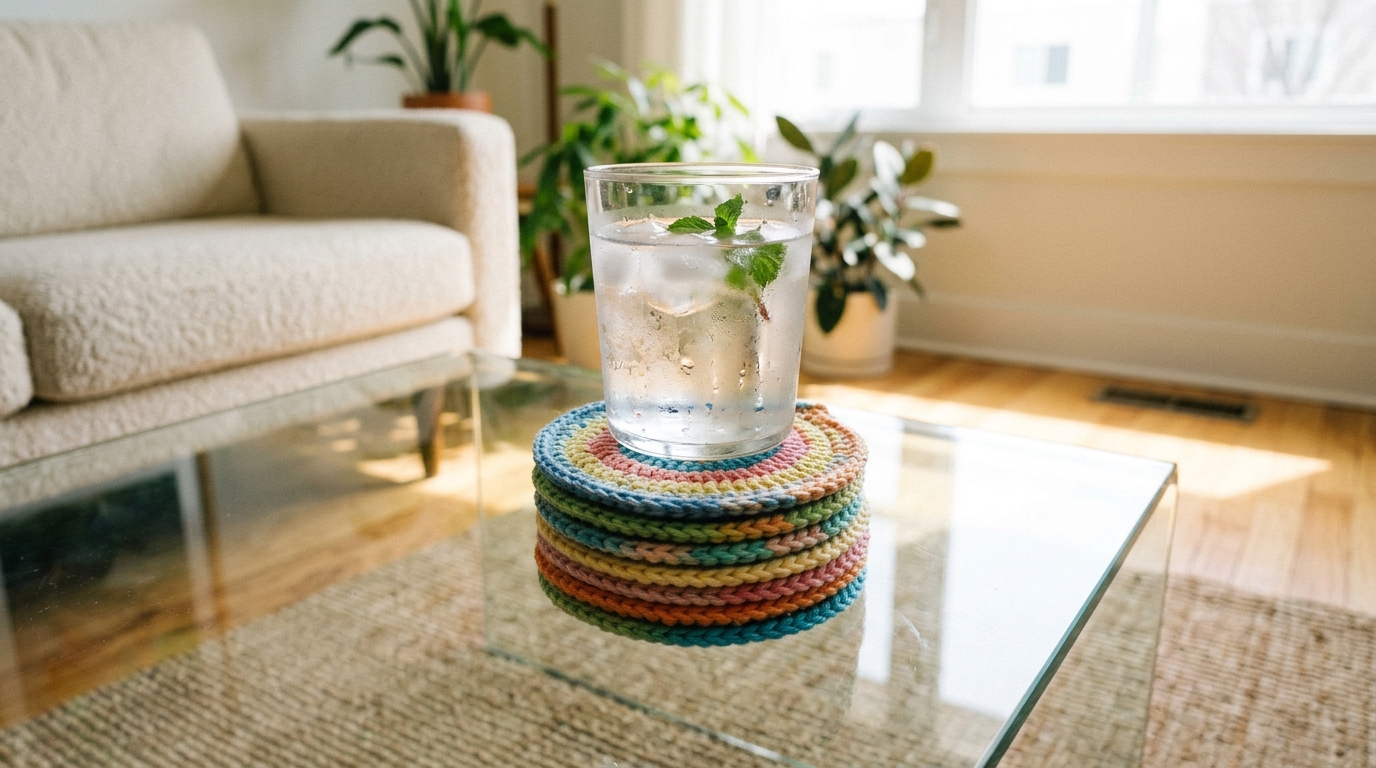
There is something immensely satisfying about sitting down with a cup of tea or coffee, knowing that the humble coaster beneath it was crafted by your own two hands. We all have those overflowing baskets of “leftover yarn”—the ends of balls from larger projects that are too precious to throw away but too small for a sweater or a baby blanket. Crochet coasters are the perfect solution. They are quick, practical, and offer a wonderful canvas to experiment with new stitches or color combinations without the commitment of a large-scale project.
Whether you are a newcomer to the craft looking for your very first project or a seasoned crocheter seeking an afternoon of mindful, relaxing stitching, these simple round patterns are designed to bring a touch of handmade joy to your home. They make thoughtful, personalized gifts for friends, teachers, or even as a little “something extra” in a housewarming basket. Let’s dive into the world of circular crochet and transform that stash of yarn into something truly beautiful.
Quick Overview
This guide is designed for anyone with a crochet hook and a scrap of yarn. We will be focusing on the classic, circular coaster—a staple in any crocheter’s repertoire.
- Skill Level: Beginner-friendly.
- Estimated Time: 15 to 20 minutes per coaster.
- Finished Size: Approximately 4 inches in diameter (easily adjustable).
- Best Use: Use up “scrap” yarn, practice round-to-round work, or create quick DIY gifts.
- Why You’ll Love It: You will learn the fundamentals of working in the round, managing stitch count increases, and giving your home a cozy, curated touch.
Materials and Tools Needed
To keep things accessible, we are sticking to pantry-staple materials:
- Yarn: Any Medium (Worsted) weight cotton yarn is ideal. Cotton is preferred for coasters because it is absorbent, heat-resistant, and holds its shape beautifully over time.
- Crochet Hook: A size H/8 (5.00mm) hook is a great starting point for worsted-weight yarn. If you prefer a tighter, denser fabric, you might drop down to a G/6 (4.00mm) hook.
- Scissors: Any sharp pair will do to snip your yarn.
- Yarn Needle: Essential for weaving in your ends securely so your coasters don’t unravel.
- Stitch Marker: Optional, but extremely helpful if you find yourself losing track of where your rounds begin and end.
Crochet Terms and Abbreviations
Before we pick up our hooks, let’s get familiar with the common U.S. terminology we will be using throughout these patterns:
- Chain (ch): Yarn over, pull through the loop on your hook.
- Single Crochet (sc): Insert hook into stitch, yarn over, pull up a loop, yarn over, pull through both loops on the hook.
- Double Crochet (dc): Yarn over, insert hook into stitch, yarn over, pull up a loop, yarn over, pull through two loops, yarn over, pull through remaining two loops.
- Slip Stitch (sl st): Insert hook into stitch, yarn over, pull through the stitch and immediately pull through the loop on your hook.
- Round (rnd): A full circle worked in the round.
- Increase (inc): Working two or more stitches into the same stitch to expand the circle.
Helpful Notes Before You Start
Working in the round requires a bit of attention to your stitch counts to ensure the coaster stays flat rather than rippling like a ruffled skirt or curling like a bowl.
- Tension: Try to keep your tension consistent throughout. If your coasters are curling, your stitches might be too tight. If they are ruffling, you might be adding too many increases.
- Joining: In these patterns, we join each round with a slip stitch. This ensures the circle stays neat and tidy.
- Weaving Ends: Because coasters are meant to be used on tables and handled frequently, make sure you weave in your starting and ending tails back and forth in different directions at least three times to lock them in.
Classic Double Crochet Coaster Pattern
This pattern is a foundational build-up, perfect for learning how circles grow.
Round 1: Start with a magic ring or chain 4 and sl st into the first chain to form a ring. Ch 2 (does not count as a stitch, as we will be using the standing stitch method or joining into the first actual stitch). Work 12 dc into the ring. Join with a sl st to the first dc. (12 sts)
Round 2: Ch 2. Work 2 dc in each stitch around. Join with a sl st to the first dc. (24 sts)
Round 3: Ch 2. Work 1 dc in the first stitch, 2 dc in the next stitch. Repeat from to around. Join with a sl st to the first dc. (36 sts)
Round 4 (Optional border): Ch 1, sc in each stitch around. Join with a sl st to the first sc and fasten off.
Simple Single Crochet Spiral Coaster
If you want a modern, farmhouse-style coaster without visible seam lines, the spiral method is your best friend.
Round 1: Start with a magic ring. Work 6 sc into the ring. Do not join. Place a stitch marker in the first stitch.
Round 2: Work 2 sc in every stitch around. (12 sts)
Round 3: 1 sc in the next stitch, 2 sc in the next. Repeat from to around. (18 sts)
Round 4: 1 sc in each of the next 2 stitches, 2 sc in the next. Repeat from to around. (24 sts)
Continue increasing following this pattern (adding one more single stitch between increases each round) until your coaster reaches your desired size. To finish, sl st in the next few stitches to “smooth out” the edge, then fasten off.
Step-by-Step Explanation of the Growth Logic
When you are crocheting a circle, you are essentially following a mathematical rule. To keep a circle flat, you must add an equal number of stitches as you had in your first round.
If you started with 12 dc stitches, you added 12 in the second round (2 in each), and 12 in the third (1, then 2). This “constant addition” is what prevents the piece from buckling. If you ever find your project looking like a bowl, it is a sign you need to stop increasing and just work even for a few rounds, or that you didn’t add quite enough stitches in the last round. Beginners often get nervous about stitch counts, but remember: if it lays flat on your table, you’ve succeeded!
Common Mistakes to Avoid
Even the most experienced crocheters occasionally find their circles going wonky. Here are a few things to watch out for:
- The “V” Gap: Often, when joining rounds with a slip stitch, a visible gap appears. To minimize this, pull your slip stitch tight after completing the round.
- The Twisted Chain: If you start with a chain and join it, make sure the chain isn’t twisted before you work your first round of stitches.
- Hidden Stitches: In the later rounds, the slip stitch used to join the previous round can sometimes look like a real stitch. Always take a moment to identify which loop is your actual starting stitch to keep your count accurate.
- Wrong Yarn Choice: Avoid using scratchy acrylics or fuzzy novelty yarns for coasters. These don’t absorb condensation from glasses very well and can snag easily. 100% cotton is consistently the best choice.
Pro Tips for a Polished Result
If you want your coasters to look like they came from a high-end boutique, consider these small details:
- Block Your Work: Even a simple cotton coaster can benefit from blocking. Once finished, give it a light steam or dampen it, lay it flat on a towel, and gently stretch it into a perfect circle, pinning if necessary. It makes a world of difference.
- Color Blocking: If you have multiple half-skeins, try changing the color of your yarn every round. Creating a “sunset” or “ombre” effect with your scraps adds a designer flair to a simple round project.
- The Invisible Fasten Off: Instead of just cutting and pulling through your yarn, try using a yarn needle to recreate the top of the final stitch. It makes your ending point practically invisible.
Variations and Personalization
Coasters are incredibly versatile. Once you master the basic circle, you can start playing with style:
- Textured Border: Instead of a plain single crochet edge, try a “crab stitch” (also known as reverse single crochet). It creates a lovely, rope-like border that adds weight and durability to the coaster.
- Floral Accents: After finishing your circle, use a contrast color yarn to surface-slip-stitch a flower or a simple star pattern right into the center.
- Seasonal Themes: Use sage green or rust orange for fall, red and green for Christmas, or soft pastels for spring. They are small enough that you can easily swap out your home decor for each season.
Care and Next Steps
Because these are cotton, they are very easy to maintain. If they get a coffee ring or a water spot, you can simply toss them in a mesh laundry bag and wash on a gentle cycle, then lay them flat to dry. Do not put them in the dryer, as cotton has a tendency to shrink slightly or lose shape under high heat.
Now that you have mastered the simple coaster, where should you head next? The skills you learned here—working in the round, increasing, and slip stitching—are the exact same techniques used for creating hats, baskets, and even round crochet rugs. You might want to try making a slightly larger version to serve as a trivet for your hot pots, or look into simple amigurumi shapes, which also rely on these same principles of circular growth.
FAQ
How do I know if I am increasing correctly?
The easiest way to check is to lay your project on a flat surface every time you finish a round. If it lays perfectly flat without rippling, your distribution of increases is correct. If it bubbles, you have too many stitches; if it curls up at the edges, you have too few.
Can I use acrylic yarn instead of cotton?
While you can technically use acrylic, it is not recommended for coasters. Acrylic does not absorb moisture, so the “sweat” from a cold glass will simply slide off onto your wooden table. Cotton is highly absorbent, which is why it is the gold standard for home decor that interacts with liquids.
Why do my coasters always have a visible seam?
The seam is a natural byproduct of joining in the round. You can minimize this by using the “join-as-you-go” method or by working in a continuous spiral without joining, which eliminates the seam entirely.
How do I stop my coaster from sliding on the table?
If you are worried about your coasters sliding around, you can purchase small adhesive felt or silicone dots to place on the bottom of each one. This also protects your furniture from any potential friction.
Can I make these in a square shape?
Absolutely! To turn a circle into a square, you simply change your increase grouping. Instead of adding stitches evenly around, you would place your increases at four set intervals (representing the corners) to force the circle into a square shape. However, for a beginner, mastering the circle is the best place to start.
Conclusion
There is a quiet, meditative beauty in the rhythm of a crochet hook moving through a circle of yarn. We hope this guide has given you both the confidence and the inspiration to turn your scrap yarn into a collection of charming coasters. Remember, every stitch is an opportunity to practice, and there is no such thing as a “perfect” project—only a handmade one defined by your unique style.
Don’t feel the need to rush through these. Put on a favorite podcast, reach for that stray ball of cotton you’ve been saving, and enjoy the process. Once you’ve made one or two, you’ll find that coasters become the ultimate “go-to” gift, and your friends will love having a little piece of your creativity sitting on their coffee tables. Happy stitching!