
Introduction
There is something truly magical about the way a simple hook and a skein of yarn can transform into something with incredible depth and personality. If you have been looking for that “secret ingredient” to elevate your handmade beanies from basic to boutique-quality, you have come to the right place. The puff stitch is one of those timeless crochet techniques that instantly adds charm, squishiness, and a lovely, sophisticated 3D texture to any project. It feels plush to the touch, making it the perfect choice for chilly mornings walking the dog or cozy evenings curled up with a cup of herbal tea.
Many crocheters shy away from textured stitches, assuming they are overly complicated or reserved for experts. I am here to tell you that the puff stitch is much friendlier than it looks! It is essentially a variation of a cluster stitch that creates a soft, rounded “puff” of yarn. Once you understand the rhythm of wrapping your yarn and pulling through, it becomes a relaxing, meditative motion that you can easily incorporate into your favorite hat patterns. Whether you are a beginner looking to expand your stitch library or an intermediate crocheter eager to add a professional, high-end finish to your seasonal gifts, this guide will walk you through the process with ease, patience, and plenty of heart.
Quick Overview
This guide is designed to take the intimidation out of 3D crochet. You will learn the exact anatomy of a puff stitch, how to troubleshoot common tension issues, and how to seamlessly weave this technique into your next beanie project.
- What you will learn: How to execute a perfect puff stitch, how to control your tension for consistent “puffs,” and tips for integrating this stitch into hat rounds.
- Who this guide is for: Both beginners who have mastered the basic double crochet and intermediate makers who want to refine their stitch definition.
- Why this matters: Textured stitches like the puff create air pockets that trap heat, making your beanies not just beautiful, but significantly warmer and more durable than those made with flat stitches.
Materials to Have on Hand
You do not need a fancy set of tools to master this technique, but having the right basics makes a world of difference.
- Yarn: For learning, I highly recommend a smooth, medium-weight (worsted/aran) acrylic or wool blend. Avoid dark, fuzzy, or novelty yarns for your first attempt; they make it difficult to see where to insert your hook.
- Crochet Hook: A US size H/8 (5.0 mm) or I/9 (5.5 mm) is perfect for practicing.
- Extras: A yarn needle for weaving in ends and at least one locking stitch marker. Stitch markers are your best friends when working in the round to help you keep track of where a round begins and ends!
Understanding the Puff Stitch Concept
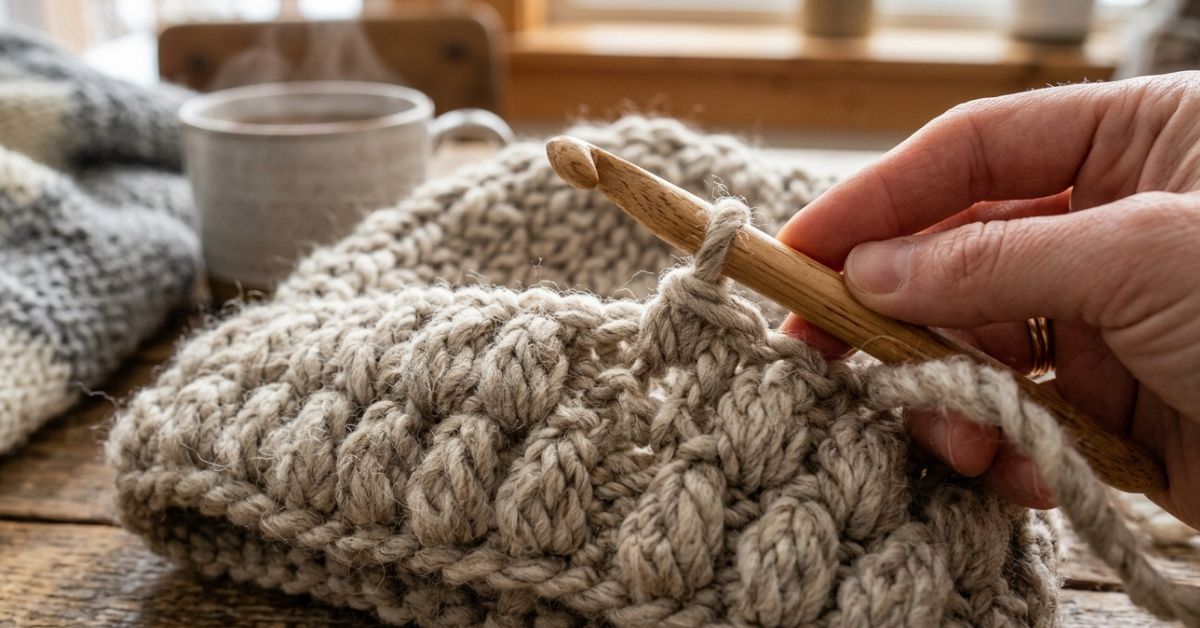
The puff stitch is often confused with the bobble or the popcorn stitch, but it has a unique character all its own. While a bobble is usually made by creating multiple complete stitches in one space, a puff stitch is created by pulling up multiple “loops” before closing them all together at once.
Think of it as a series of partial yarn-overs. Instead of finishing each stitch, you keep all those loops on your hook, then pull through all of them simultaneously. This creates that characteristic soft, rounded shape that doesn’t feel as stiff as a bobble. It is the texture that gives a hat that “cabled” or “knit-like” appeal without the difficulty of actually knitting.
Helpful Notes Before You Start
Before you pick up your hook, keep these three golden rules in mind:
- Tension is Key: The most common mistake beginners make is pulling the yarn too tightly while working the loops. If you pull too hard, you won’t be able to fit your hook through all those loops at the end! Keep your tension relaxed and consistent.
- Counting is Critical: Because the puff stitch creates a “thick” stitch, it can sometimes hide the space where your next stitch should go. Always check your work after completing a puff to ensure you haven’t accidentally skipped a stitch or merged two together.
- The “Ch-1” Anchor: Most patterns will ask you to chain one immediately after closing a puff stitch. Do not skip this! That chain stitch acts as an anchor to lock the puff in place and gives you a clear space to work into for the following row or round.
How to Work a Standard Puff Stitch
Follow these steps slowly. It helps to practice this on a flat swatch before starting your beanie.
- Yarn over (YO): Wrap the yarn around your hook from back to front.
- Insert hook: Put your hook into the indicated stitch or space.
- Pull up a loop: YO and pull a loop through. You should now have 3 loops on your hook.
- Repeat: Repeat steps 1 through 3 until you have the desired number of loops on your hook (usually 7 or 9 loops total, depending on the pattern’s instructions).
- The Big Finish: YO one last time and pull through all the loops currently on your hook. You might need to rotate your hook slightly so that the hook head faces downward—this prevents the hook from snagging on the yarn as you pull through.
- Close: YO and pull through the final loop on your hook to secure the stitch. Follow with a chain-1 if the pattern requires it.
Step-by-Step for a Textured Beanie
To create a beanie that showcases the puff stitch, you will typically work in joined rounds.
Starting the Base
Begin by working your standard beanie brim (often in half-double crochet in the back loop only for that ribbed look). Once you reach the main body of the hat, you will transition to your puff stitch rows.
The Puff Round
After your starting row, begin your puff round. If you are working in rounds, you will usually alternate between a puff stitch and a regular stitch (like a single crochet or double crochet) to give the puffs room to “breathe” and pop out.
The Cleanup Row
After a round of puff stitches, you will usually work a row of single crochet. You will work one single crochet into the top of each puff stitch and one into each chain-1 space created in the previous row. This “straightens out” the fabric and prepares the foundation for your next set of stitches.
Consistent Growth
If you are increasing for the crown of the hat, be sure to place your increases in the plain stitch rounds, not in the puff stitch round. This keeps the texture uniform and prevents the hat from warping.
Common Mistakes to Avoid
Even experienced crocheters occasionally trip up when moving to textured work. Here is how to keep your projects looking clean.
- The “Tight Hook” Syndrome: If you cannot pull your yarn through all the loops at the end of the puff, you are likely gripping the yarn too hard. Try to consciously relax your hands or use a slightly larger hook for the puff rounds to keep the stitches loose.
- Neglecting the Anchor: If your puff stitches look slightly “lopsided,” you might be failing to secure them with a chain stitch. That little chain is what centers the puff.
- Incorrect Stitch counts: It is very easy to lose count of how many loops you have on your hook. Count them aloud as you pull them up—”1, 2, 3, 4″—to ensure every puff is the exact same size.
Pro Tips for a Polished Result
If you want your hand-crafted gifts to look like they came from a boutique, consider these final touches.
- Blocking: Once your beanie is finished, give it a light steam block. This relaxes the fibers and helps the puff stitches really “bloom” and stand out against the flatter parts of the hat.
- Color Choices: Cream, soft grey, and dusty rose yarns show off texture beautifully. If you choose a very dark yarn (like navy or black), the texture will be subtler; if you choose a light, solid color, the 3D effect will be the star of the show.
- The Pom-Pom Factor: A beanie with significant texture is the perfect candidate for a matching pom-pom. Whether you make a yarn pom-pom or use a faux-fur style, it draws the eye upward and balances the squishiness of the puff stitches.
Variations and Personalization
- The “Half-Puff”: If you feel a full puff makes the beanie too bulky, simply pull up fewer loops (e.g., 5 instead of 7) for a more delicate, subtle texture.
- Color Blocking: Try working the puff stitch round in a contrasting color from the rest of the beanie. This creates a bold, geometric look that is very popular in modern winter fashion.
- Mixed Texture: Alternate one round of puff stitches with one round of moss stitch or simple double crochet. This breaks up the texture and creates a unique, woven appearance.
Care and Next Steps
To keep your textured beanie looking new, always hand wash it in cool water with a gentle wool wash. Lay it flat to dry on a towel. Avoid hanging it while wet, as the weight of the water can stretch out the stitches and cause the puff stitches to lose their shape over time.
As for your next steps, once you feel confident with the puff stitch, try experimenting with the “cluster” or “popcorn” stitch. They are cousins to the puff and follow many of the same principles. You are well on your way to becoming a master of texture!
FAQ
How many loops should a standard puff stitch have?
Most standard puff stitches use 7 loops, but this can vary depending on the yarn weight. If you use a thicker yarn, you might only need 5 loops to achieve a full look; with thin yarn, you may need 9 or 11.
Can I do a puff stitch if I am left-handed?
Absolutely! The technique is essentially the same. Simply follow the steps using your left hand to hold the hook and your right hand to manipulate the yarn. The resulting stitch will look identical.
Why do my puff stitches look flat?
Puff stitches often look a bit “squashed” while you are working on the piece. Don’t worry! Once the hat is complete and you have blocked it, the stitches will naturally puff up and hold their shape better.
Should I use a different hook size for my puff stitches?
Some crocheters find it helpful to move up one hook size (e.g., from an H to an I) just for the puff rounds to ensure they don’t get too tight. Try a small sample swatch both ways to see which one feels more natural for your personal tension.
Can I add puff stitches to any hat pattern?
Yes, you can! Just replace a row of double crochet stitches with a row of “puff, skip one, puff.” Just remember to adjust your stitch count so that your base remains correctly sized.
Conclusion
Mastering the puff stitch opens up a world of creativity in your crochet journey. It is one of those techniques that feels intimidating at first, but once you master those rhythmic pulls, you will find yourself wanting to add it to every blanket, scarf, and hat you make. Remember that crochet is a journey, not a race. If your first few puffs look a little uneven, be kind to yourself! That is simply the signature of an authentic, handmade item. You are creating something with warmth, love, and your own two hands—and that is always beautiful. Keep practicing, keep experimenting with colors, and most of all, enjoy the cozy rhythm of your hook as you bring your next beautiful project to life.