
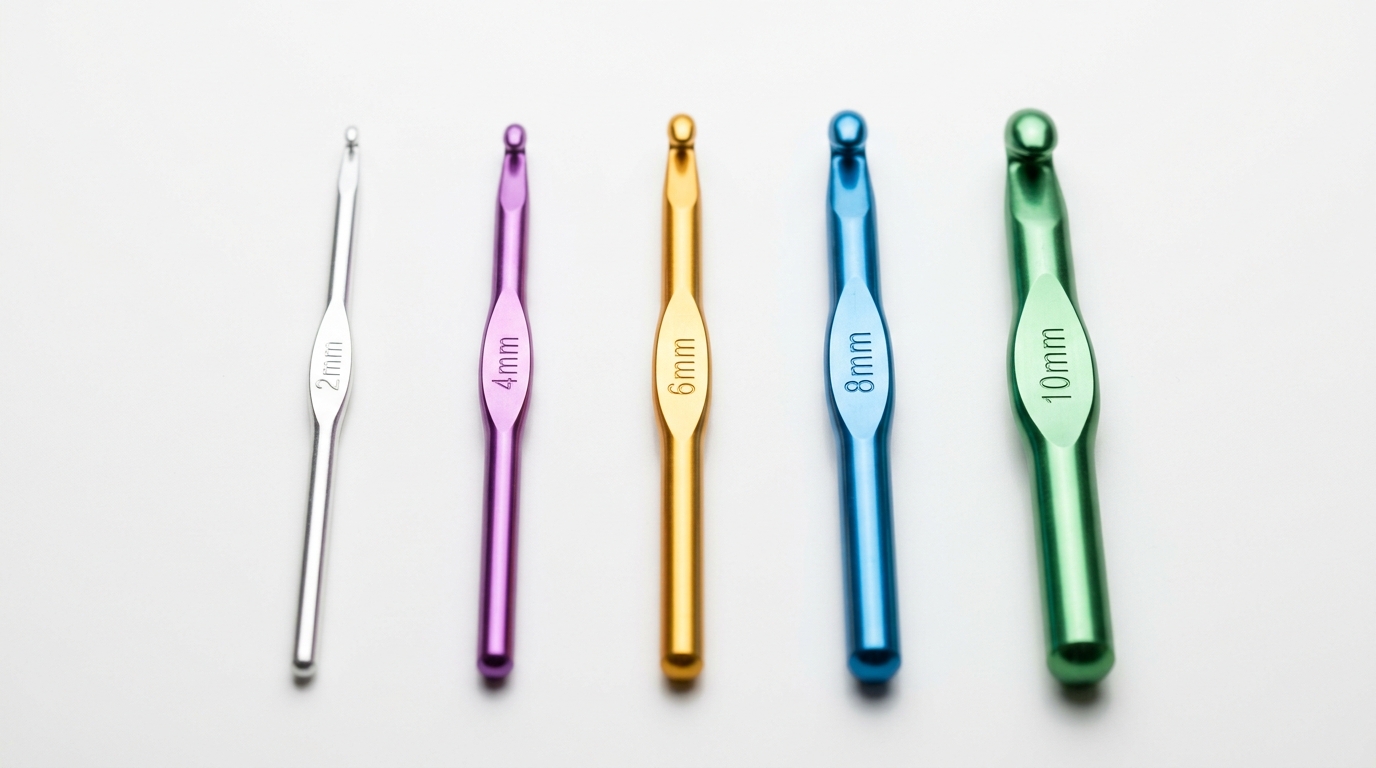
There is something truly magical about picking up a crochet hook for the very first time. Whether you have been dreaming of creating a cozy heirloom blanket, a stylish seasonal accessory, or a charming little gift for a friend, that small, humble tool is your gateway to a world of endless creativity. For many, the choice of a crochet hook feels like a minor detail, but it is actually the most foundational decision you will make. Using the right hook for your yarn weight is the secret to consistent stitches, a relaxed hand, and a finished project that looks professional rather than frayed or stiff.
As you embark on your first project, you might feel a little overwhelmed by the rows and rows of aluminum, bamboo, and plastic hooks lining the craft store aisles. Please rest assured that you do not need a fancy collection to start. In fact, most of the beautiful items featured in magazines were crafted with simple, comfortable tools. This guide is designed to walk you through the anatomy of a hook, how to match it to your yarn, and finally, how to put that knowledge to work with a beginner-friendly project that will leave you feeling proud and inspired. Let’s sit down with a cup of tea and get you ready to crochet your first masterpiece.
Quick Project Overview
To help you feel confident as you begin, we are going to make a “Cozy Keepsake Mug Rug.” This is a perfect beginner project because it works up quickly, uses only essential stitches, and serves as a functional piece of home decor that protects your favorite coffee table.
- Skill Level: Beginner
- Estimated Time: 1 to 2 hours
- Finished Size: Approximately 4 inches by 4 inches
- Best Use: Everyday home decor or a thoughtful handmade gift
- Why You’ll Love It: You will practice your tension, master the basic stitches, and gain immediate satisfaction from finishing a project that you can use right away.
Materials Needed
For this project, you will need a few simple supplies. If you are shopping for your first set of tools, keep these recommendations in mind:
- Yarn: One skein of worsted weight (Category 4) cotton yarn. Cotton is fantastic for beginners because it is durable and the stitches are easy to see.
- Crochet Hook: A size H/8 (5.0 mm) hook. This is the “goldilocks” hook size; it’s not too thin and not too thick, making it ideal for learning.
- Tapestry Needle: Used for weaving in your ends.
- Scissors: Any sharp pair will do.
- Measuring Tape: To keep your dimensions consistent.
Stitches and Abbreviations
We will be using standard U.S. terminology throughout this pattern. Here are the stitches you need to know:
- Ch (Chain): Yarn over the hook and pull through the loop on your hook.
- Sc (Single Crochet): Insert the hook into the stitch, yarn over, pull up a loop, yarn over again, and pull through both loops on your hook.
- Hdc (Half Double Crochet): Yarn over, insert the hook into the stitch, yarn over, pull up a loop (three loops on hook), yarn over, and pull through all three loops on your hook.
- St(s) (Stitch/Stitches): The individual loops of your work.
- Sl St (Slip Stitch): Insert the hook into the stitch, yarn over, and pull through both the stitch and the loop on your hook.
Pattern Notes Before You Start
Before you make your first chain, remember that tension is the key to a beautiful project. Tension refers to how tightly you hold your yarn as you work. If you find your hook difficult to pull through the loops, your grip is likely too tight—try to loosen up and let the hook do the movement. Conversely, if your stitches look very gapped or uneven, you might be holding the yarn too loosely. Be patient with yourself; your hands need time to build “muscle memory.” Don’t worry if your first few rows look a bit shaky; that is perfectly normal!
Full Crochet Pattern
The Cozy Keepsake Mug Rug is worked in rows using the half double crochet stitch, which provides a lovely, dense texture that is perfect for protecting surfaces from hot mugs.
Part 1: The Foundation
Start by making a slip knot and placing it on your hook.
Chain 16. This provides a base width of roughly 4 inches using a standard worsted weight yarn.
Part 2: Working the Rows
Row 1: Hdc in the third chain from the hook and in each chain across. Turn your work. (14 stitches)
Row 2: Chain 2 (this counts as your first stitch), hdc in the next stitch and in each stitch across until the end. Make sure to place your final hdc in the top of the turning chain from the previous row. Turn your work.
Rows 3–12: Repeat Row 2.
Part 3: The Border
To give your project a polished, professional look, we will add a simple border of single crochet stitches.
After completing Row 12, do not fasten off. Chain 1, then work one single crochet into each stitch around the entire perimeter of the square. At each corner, make 3 sc in the same space to help the work lay flat.
Finishing
Once you reach the beginning of your border, join with a slip stitch to the first sc. Fasten off your yarn, leaving about 6 inches of tail. Using your tapestry needle, weave the tail firmly into the back of the work to secure it. Trim any excess yarn.
Step-by-Step Tutorial Explanation
If the written pattern feels a bit daunting, let’s break down the physical process. As you work your first few rows, look for the “V” shapes at the top of your stitches. When you insert your crochet hook, you want to go through both loops of that “V” unless otherwise specified. This keeps your fabric strong.
During the border phase, you are essentially “going for a walk” around the edge of your square. Because the edges of your rows are not as clearly defined as the tops of your stitches, aim for the gaps between the rows. Don’t stress about counting every single edge stitch perfectly; as long as your border looks smooth and there are no large gaps, you are doing a wonderful job.
Common Mistakes to Avoid
Even experienced crocheters make mistakes! Here is how to troubleshoot the most common ones:
- The “Twisted” Chain: If your turning chain looks like a corkscrew, you probably accidentally twisted your base chain before starting the first row. Double-check that your foundation is flat before the first stitch.
- The Disappearing Stitch: Beginners often miss the very last stitch of a row, which causes the project to taper inward like a triangle. If your square is getting narrower, count your stitches at the end of every row.
- Wrong Hook Size: If your fabric feels like a stiff board, your hook is likely too small for the yarn weight. If it feels like a loose, holey net, the hook is too big. Always check the yarn label for the suggested hook size as a starting point.
Pro Tips for a More Beautiful Result
To take your crochet skills to an intermediate level, focus on two things: finishing and blocking.
- Weaving Ends: Never just tie a knot and cut; your project may unravel after a wash. Weave your yarn ends in opposite directions through the crochet stitches several times to lock them in place.
- Blocking: This refers to gently wetting or steaming your finished piece and pinning it into a perfect square until it dries. It transforms a “handmade” look into a “boutique” look by evening out all the stitches.
- Yarn Choice: As you progress, try switching to an animal fiber like wool for warmth, or a bamboo blend for a luxurious drape.
Variations and Personalization Ideas
Once you have mastered the basic square, the creative possibilities are endless:
- Seasonal Stripes: Carry two colors of yarn to create seasonal stripes—red and green for Christmas, or soft pastels for spring.
- Gift Tags: Crochet a mini-version of this rug and use it as a gift tag on a bottle of wine or a handmade jar of jam.
- Size Expansion: Want a coaster for a larger teapot? Simply chain more for your foundation and add more rows. The math is easy; just ensure the number of rows matches the width for a perfect square!
Care Instructions
Because this project is likely made of cotton yarn, it is fairly easy to maintain. Hand wash your mug rug in cool water with a tiny drop of mild detergent. Roll it in a clean towel to squeeze out excess moisture (do not wring it), and lay it flat to dry on a hard surface. Avoid hanging it to dry, as the weight of the water can cause it to stretch out of shape.
FAQ
How do I know if I have the right hook size?
The best way to check is to look at the yarn label. It will usually have a recommended hook size. If you want a tighter, stiffer fabric (like for a basket), go down a size. If you want a drapeable, soft fabric (like for a shawl), go up a size.
Does the material of the hook matter?
It is a matter of preference! Aluminum is smooth and great for speed. Bamboo or wood hooks are slightly “grippier,” which can be very helpful for beginners who find the yarn sliding off their hook too easily.
Why does my crochet project keep shrinking?
This usually happens because you are accidentally skipping the first or last stitch of each row. Always count your stitches at the end of your row to ensure you have the same number you started with.
How do I hold the yarn properly?
There is no single “right” way! Try wrapping the yarn around your index finger or weaving it between your fingers to create tension. Experiment until you find a grip that doesn’t make your hand ache.
Can I fix a mistake without undoing the whole row?
Yes! Don’t be afraid to utilize the “frogging” method—pulling the working yarn until you reach the stitch before the mistake, putting your hook back in, and trying again. We call it frogging because you “rip it, rip it.” It’s part of the process!
Conclusion
You have just taken the first step into a lifelong hobby that brings warmth and creativity into your home. Crocheting is a journey, and every stitch you make is practice toward becoming more confident and fluid in your craft. Remember that the goal is not perfection, but the joy of creating something with your own two hands. Keep your hook handy, your yarn stash growing, and your heart open to the beautiful things you are going to create. If you found this tutorial helpful, be sure to save it for your next project, and happy crocheting!