
Introduction
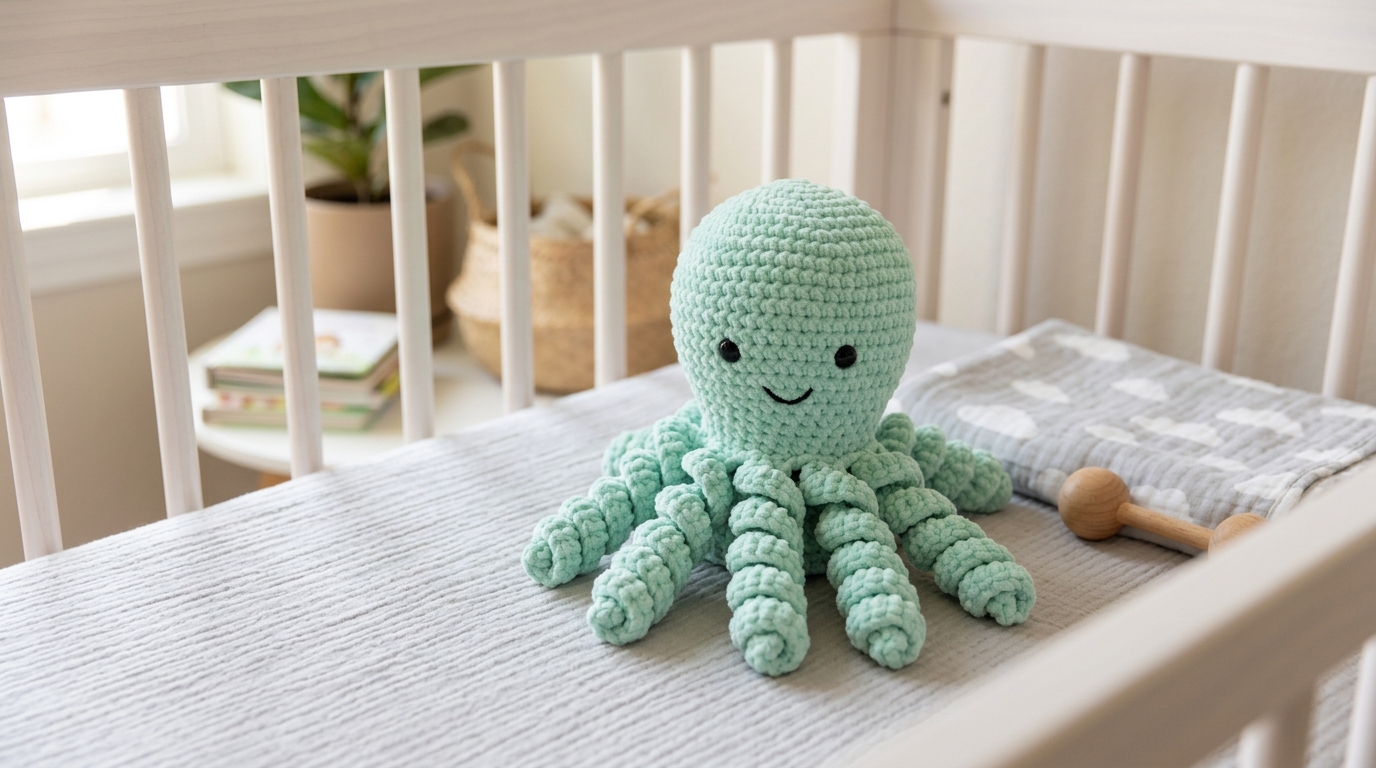
There is something truly magical about the bond between a new baby and their very first handmade toy. Among all the gifts you can create for a little one, the crochet octopus holds a special place in my heart. Not only is it an adorable companion for a nursery, but it has become a cherished staple in hospital NICUs around the country. The gentle curl of the eight tentacles is thought to mimic the sensation of the umbilical cord in the womb, providing a soothing sense of security for premature infants and newborns alike.
If you are a beginner looking for your first amigurumi project, or an experienced crocheter searching for a quick, meaningful gift, this tutorial is written just for you. This pattern is designed to be simple, repetitive, and incredibly rewarding. We will walk through everything from choosing the right yarn for delicate skin to mastering those playful, springy tentacles. You don’t need any fancy techniques or years of experience—just a sprinkle of patience and a bit of yarn. By the end of this guide, you will have created a beautiful, soft, and safe treasure that will be loved for years to come.
Quick Overview
This project is a perfect entry point into the world of stuffed crochet toys. It is designed to be beginner-friendly, requiring only basic knowledge of standard stitches.
- Skill Level: Beginner-Friendly
- Estimated Time: 3 to 5 hours
- Finished Size: Approximately 6 to 8 inches in height, depending on yarn weight and tension.
- Best Use: Baby shower gifts, NICU donations, or nursery decor.
- Why You’ll Love It: The tentacles are worked directly into the base, meaning minimal sewing, and it uses very little yarn—a perfect scrap-busting project!
Materials or Tools Needed
To ensure your little octopus is soft, safe, and durable, your choice of materials is key.
- Yarn: 100% cotton yarn (Sport or Worsted weight) is highly recommended. Unlike acrylic, cotton is breathable, holds its shape well, and stands up beautifully to repeated washing.
- Crochet Hook: A size smaller than what is recommended on your yarn label (typically a 3.25mm or 3.5mm hook for cotton yarn). Using a smaller hook ensures the stitches are tight so the stuffing doesn’t peek through.
- Safety Eyes: 6mm or 8mm plastic safety eyes. Important Note: If making this for a newborn, please skip the plastic eyes and embroider the features with black embroidery floss instead to ensure the toy is strictly infant-safe and poses no choking hazard.
- Fiberfill Stuffing: High-quality, hypoallergenic polyester toy stuffing.
- Stitch Marker: Essential for tracking the rounds.
- Tapestry Needle: For weaving in your ends.
- Scissors: A sharp pair for clean yarn cuts.
Crochet Terms and Stitches
Before we begin, let’s get comfortable with the vocabulary. All instructions use standard U.S. crochet terminology.
- Magic Ring (MR): A way to start your project in the round with no hole in the center.
- Chain (ch): Yarn over and pull through the loop.
- Single Crochet (sc): Insert hook in stitch, yarn over, pull up a loop, yarn over, pull through both loops on hook.
- Increase (inc): Work two single crochet stitches into the same stitch.
- Decrease (dec): Known as “single crochet two together” (sc2tog). Insert hook in stitch, pull up a loop, insert hook in next stitch, pull up a loop, yarn over, pull through all three loops on your hook.
- Slip Stitch (sl st): Insert hook, yarn over, pull through stitch and loop on hook.
Helpful Notes Before You Start
Crocheting for babies requires a bit more care regarding safety and tension.
- The “Tightness” Rule: Because we are creating a container for stuffing, your stitches need to be tight. If you notice gaps where the stuffing is visible, go down another hook size.
- Stitch Markers are Your Friend: When working in a spiral (the standard for amigurumi), it is incredibly easy to lose your place. Use a stitch marker to mark the first stitch of every round.
- Consistent Tension: Tension is the “personality” of your crochet. Try to keep your yarn hold consistent throughout the session. If you feel tired or frustrated, take a break; your hands will thank you, and your stitches will look much neater.
Main Tutorial: The Little Octopus
The body of the octopus is worked in one continuous spiral. We will then build the tentacles off the bottom edge.
Round 1: The Base
Start with a Magic Ring.
Work 6 sc into the ring. Pull the tail tight to close the circle. (6 stitches)
Round 2: The Increases
Work 2 sc in each stitch around. (12 stitches)
Round 3: Expansion
1 sc in the first stitch, 2 sc in the next stitch. Repeat this pattern around. (18 stitches)
Round 4: Continuing the Circle
1 sc in the next 2 stitches, 2 sc in the next stitch. Repeat around. (24 stitches)
Round 5: Steady Growth
1 sc in the next 3 stitches, 2 sc in the next stitch. Repeat around. (30 stitches)
Rounds 6 to 12: The Body
Work 1 sc in each stitch around for 7 rounds. This builds the height of the head. (30 stitches per round)
Round 13: Shape and Decrease
1 sc in the next 3 stitches, sc2tog. Repeat around. (24 stitches)
Round 14: Continuing the Decrease
1 sc in the next 2 stitches, sc2tog. Repeat around. (18 stitches)
Before finishing this round, add your safety eyes between Rounds 9 and 10, spacing them about 4 stitches apart.
Round 15: Final Shapes
1 sc in the next 1 stitch, sc2tog. Repeat around. (12 stitches)
Stuff the head firmly with fiberfill.
Round 16: Closing the Base
Sc2tog around. (6 stitches)
Fasten off, leaving a long tail for sewing. Use your tapestry needle to weave the thread through the remaining stitches and pull tight to close the bottom.
Adding the Tentacles
Attach your yarn to one of the bottom stitches of the body.
Chain 40 to 50 (depending on how long you want them).
Work 3 sc in the second chain from the hook and in every chain stitch back to the base. You will see the yarn naturally begin to curl as you increase.
Sl st into the next stitch on the head base.
Repeat this process for all 8 tentacles, spacing them evenly around the bottom circumference.
Step-by-Step Explanation
Think of this project in three phases. First, the “Bubble Phase” (Rounds 1–5), where we create the top of the head. It feels like making a flat coaster at first, but it quickly rounds out. Second, the “Height Phase” (Rounds 6-12), which is the most meditative part—just keep going in circles! Finally, the “Detail Phase” (Rounds 13-16 and tentacles). Adding the tentacles is where the “octopus” personality really pops out. Don’t worry if your first few chain stitches look a little uneven; the curl hides a lot of minor tension variations.
Common Mistakes to Avoid
- The “Twisted Chain” Trap: When starting your tentacles, make sure your initial chain doesn’t twist before you start adding the sc stitches.
- Stuffing Issues: Over-stuffing can cause the stitches to stretch and show gaps. Under-stuffing will make the head look “sad” and saggy. Aim for firm but springy.
- The Invisible Join: Beginners often finish with a hard knot. Instead, use a tapestry needle to weave the end back into the body of the octopus repeatedly, trimming the yarn close to the surface so the knot disappears inside.
Pro Tips for a Better Result
- Block Your Tentacles: If your tentacles aren’t curling as tightly as you’d like, gently pull and stretch them after you fasten off. The action of working multiple stitches into one chain naturally creates the spiral, but a little physical guidance helps!
- Color Choices: While bright colors are fun, consider monochromatic sets (like soft greys or blues) for a modern, sophisticated nursery look.
- Embroidering instead of Safety Eyes: If you are nervous about safety eyes, use a simple “Y” shape with dark brown yarn to create a sleepy face for the octopus. It gives the toy a sweet, vintage handmade feel.
Variations and Personalization
- The “Happy” Octopus: Add a small back-stitched smile under the eyes using a small bit of pink or red yarn.
- Different Textures: Try using cotton-bamboo blend yarn if you have a recipient with very sensitive skin; it is exceptionally soft.
- Size Matters: You can make a “Mama and baby” set by using bulky yarn for one and fingering weight for the other, sticking to the same pattern instructions.
Care and Next Steps
Because these are often cuddled by babies, they need to be washable. Place your finished octopus in a mesh laundry bag and wash on a cold, delicate cycle. Air dry by laying it flat on a towel in a sunny spot.
Once you’ve mastered this little guy, you are ready to explore other classic amigurumi shapes! Try a simple sphere next, which acts as the building block for almost every crochet animal imaginable. You’ve just learned how to increase, decrease, and work in the round—three pillars of the crochet craft.
FAQ
Is it safe to give an amigurumi octopus to a newborn?
Yes, provided you follow safety protocols: use 100% cotton yarn (no wool allergies), ensure eyes are embroidered rather than plastic, and make sure all ends are securely woven in so no loose threads are present.
Why do my tentacles look flat instead of curly?
The “curl” comes from the increased number of stitches in each foundation chain. Ensure you are putting 3 single crochet stitches into every single chain stitch. If that still doesn’t curl, try increasing to 4 sc per chain.
How do I stop my stitches from leaning?
In spiral crochet, a slight slant is a natural byproduct of the stitch construction. To minimize it, ensure your “invisible decrease” technique is consistent, and try to keep your tension tight.
Can I use acrylic yarn instead of cotton?
While you can, cotton is preferred for baby toys because it is naturally textured, doesn’t pill as easily, and is firmer. Acrylic can become “fuzzy” or limp after multiple washes, which may make the toy less durable.
What is the purpose of the magic ring?
The magic ring is the only way to get a perfectly closed center for rounds. It prevents that pesky little hole in the top of the head that lets stuffing pull out. It is a fundamental skill for all amigurumi projects.
Conclusion
Creating your own crochet octopus is a wonderful milestone in your crafting journey. You have taken a simple ball of yarn and transformed it into a soft, textured, and delightful friend. Whether this piece finds its way to a NICU donor bin or into the crib of a cherished baby, know that your hands have made something full of love and intention.
Don’t be afraid to make a second or third one—each time you follow the pattern, your hands will get faster, your stitches will become more uniform, and your confidence will grow. Keep your hook handy, keep your stitches tight, and most importantly, enjoy the beautiful, rhythmic process of making something special. Happy hooking!