
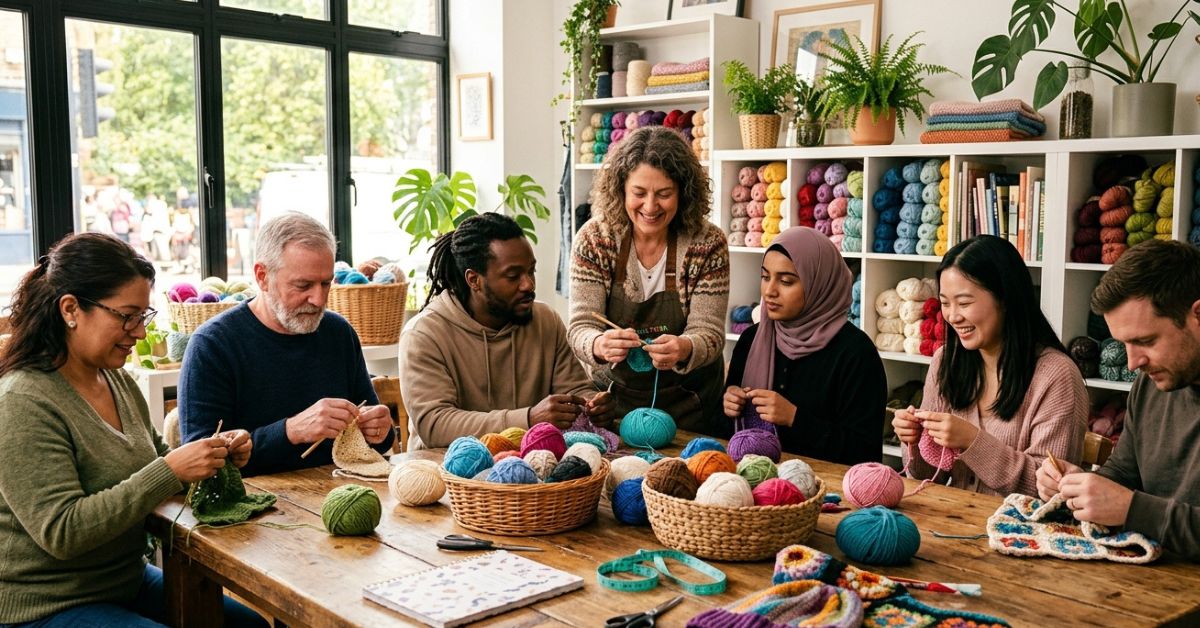
There is an undeniable magic in turning a single strand of yarn into something tangible, warm, and uniquely yours. Whether you are seeking a creative escape from the bustle of daily life or hoping to master a craft that allows you to create handmade heirlooms, learning to crochet is a journey well worth taking. As we look toward 2026, the movement toward slow, intentional craftsmanship is stronger than ever. While online tutorials are wonderful, nothing quite replaces the tactile experience of a live crochet class. There, a skilled instructor can gently correct your tension, show you how to hold your hook comfortably, and share those “aha!” moments that turn a frustrating tangle of knots into beautiful, rhythmic stitches.
In this guide, we aren’t just talking about why you should learn to crochet; we are going to dive deep into how to find the perfect workshops in your area and how to make the most of your learning experience. To put your new skills to the test, I have included a beginner-friendly “Evergreen Cozy Cotton Basket” pattern. This project is the perfect stepping stone for anyone wanting to build confidence with core stitches while creating something genuinely useful for your home. Let’s prepare your hook, choose your favorite yarn, and begin this creative adventure together.
Finding the Best Crochet Workshops Near You
When you begin searching for “crochet classes near me,” it can feel a bit overwhelming, but the local fiber arts community is usually incredibly welcoming. To find the best instruction, start by checking your local independent yarn shops—often called LYS by enthusiasts. These shops are the heartbeat of the craft and frequently host weekend workshops or ongoing instructional nights. If you don’t have a dedicated yarn shop within driving distance, check the craft department or education centers at local community colleges or libraries. Many community education programs offer affordable “fiber arts essentials” courses that are perfect for beginners.
When evaluating a potential class, look for instructors who provide a small class size (usually 6 to 10 students). Crochet is a very hands-on skill; you want to make sure the teacher has enough time to walk around, look at your stitches, and help you troubleshoot. Don’t be afraid to ask if the class includes supplies. Sometimes, a “materials included” fee is worth it because the instructor will provide high-quality yarn that is much easier to work with than the bargain-bin varieties often found in big-box stores.
Quick Project Overview
For this project, we are making the “Evergreen Cozy Cotton Basket.” It is the perfect beginner-friendly home décor piece that looks stunning on a craft room shelf or a bedside table.
- Skill Level: Beginner-friendly.
- Estimated Time: 2 to 3 hours.
- Finished Size: Approximately 6 inches in diameter and 5 inches high.
- Best Use: Organizing crochet notions, holding small potted plants, or as a thoughtful DIY gift.
- Why You’ll Love It: It uses only basic stitches, works up quickly, and uses sturdy cotton yarn that holds its shape beautifully.
Materials Needed
To create this basket, you will need to gather a few simple supplies.
- Yarn: 1 skein of Worsted Weight (Category 4) 100% Cotton Yarn. Cotton is ideal because it has little stretch and is sturdy.
- Hook: Size H/8 (5.0 mm) crochet hook.
- Tapestry Needle: For weaving in your ends.
- Stitch Marker: Essential for keeping track of your rounds.
- Scissors: Any sharp pair will do.
Stitches and Abbreviations
- ch (chain): Yarn over, pull through the loop on the hook.
- sc (single crochet): Insert hook into stitch, yarn over, pull up a loop, yarn over, pull through both loops on your hook.
- inc (increase): Two single crochet stitches worked into the same stitch to expand the circle.
- sl st (slip stitch): Insert hook, yarn over, pull through the stitch and the loop on your hook.
- blo (back loop only): This creates a ridge and helps your basket walls stand up straight.
Pattern Notes Before You Start
Tension is the secret to a professional-looking basket. Because you are working with cotton, it can be a bit stiffer on the hands than acrylic. If your hands begin to cramp, take a break! The structure of the basket relies on the “inc” rounds. If you notice your circle starting to ruffle, you might be adding too many stitches; if it starts to cup prematurely like a bowl, you might be working too tight. Aim for a flat circle that lies nicely on your table.
Full Crochet Pattern
Part 1: The Base
The base is worked in continuous rounds. Use your stitch marker to keep track of the first stitch of each round.
Round 1: Magic ring, ch 1, work 6 sc into ring. (6 stitches)
Round 2: 2 sc in each sc around. (12 stitches)
Round 3: 1 sc in next st, 2 sc in next st repeat from to around. (18 stitches)
Round 4: 1 sc in next 2 sts, 2 sc in next st repeat from to around. (24 stitches)
Round 5: 1 sc in next 3 sts, 2 sc in next st repeat from to around. (30 stitches)
Round 6: 1 sc in next 4 sts, 2 sc in next st repeat from to around. (36 stitches)
Round 7: 1 sc in next 5 sts, 2 sc in next st repeat from to around. (42 stitches)
Your base should now be about 6 inches across.
Part 2: The Walls
Round 8: Work 1 sc in each stitch around, but work in the back loop only (blo). This creates the corner edge for your basket sides. (42 stitches)
Round 9–20: Work 1 sc in each stitch around (both loops). Continue until the basket reaches your desired height.
Round 21: 1 sc in next st, 1 dc in next st repeat around to create a textured edge. Join with a sl st to the first stitch.
Finishing
Fasten off your yarn, leaving a 6-inch tail. Use your tapestry needle to weave the tail in through the stitches on the inside of the basket base. Since it is cotton, it will be quite secure, but take care to weave in opposite directions to prevent it from coming undone.
Step-by-Step Tutorial Explanation
When you sit down to start, don’t worry about perfection. The “magic ring” can be tricky for the first few tries. If it feels too difficult, simply chain 4 and sl st into the first chain to form a ring to work into. As you work your base, visualize the circle growing like a pancake. When you move to the walls, you will notice the basket suddenly wanting to grow upward rather than outward. This is the “turning point.” Working in the back loop only is a pro tip that creates a distinct “seam” where the base meets the wall, giving your basket a clean, store-bought appearance.
Common Mistakes to Avoid
Even experienced crocheters have bad days, so don’t be discouraged if you encounter these hitches:
- Counting Errors: The most common mistake is losing track of stitches. Use your marker! It’s the best investment you can make for your sanity.
- The Twisted Chain: If you decide to join your rounds with a sl st instead of going in a continuous spiral, ensure your starting chain isn’t twisted before you join.
- Tight Tension: If you find the fabric is too stiff to get your hook into, you are likely gripping the yarn too hard. Relax your shoulders and take a few deep breaths; the tension will naturally even out.
- Uneven Edges: This usually happens if you accidentally skip a stitch. Always check your stitch count at the end of every round.
Pro Tips for a More Beautiful Result
To take your basket from “homemade” to “handmade professional,” try these tips. First, treat your yarn properly. If you use a recycled cotton that has some kinks, you can lightly steam it or wash the final project in a delicate bag and reshape it while damp. This is known as “blocking.” For a basket, you want it to be stiff. If your yarn feels soft, you can dampen the basket, shape it over a bowl, and let it air dry—the cotton will dry in that rigid, molded shape. Finally, when weaving in your ends, never cut your yarn right at the knot. Leave at least an inch and wiggle it through several stitches in different directions to ensure it never unravels.
Variations and Personalization Ideas
The beauty of this pattern is its versatility. Once you feel comfortable with the base, try adding a pop of color at the halfway point by switching to a contrasting yarn—this creates a lovely “dipped” effect. You could also attach decorative leather tags to the side for a modern farmhouse look, or add a braided handle made from your leftover yarn. If you’re making these as holiday gifts, fill them with local candies, a small candle, or a succulent to create a beautiful, personalized care package.
Care Instructions
Since this is a cotton basket, it is very durable. If it gets dusty, simply shake it out or use a lint roller. If you happen to spill something on it, you can hand-wash it in cool water with a gentle detergent. Re-shape it while it is still damp—this is vital—and allow it to air dry on a flat surface. Avoid tossing it in the dryer, as the heat can shrink the cotton and distort the shape you worked so hard to create.
FAQ
How do I know which hook size to use?
Every yarn label features a symbol indicating the recommended hook size. As a beginner, always stick to the recommended size. Once you gain experience, you can experiment with smaller hooks for a tighter, stiffer fabric or larger hooks for a looser, drape-heavy fabric.
Why does my crochet circle look like a wavy potato?
This happens when you have too many stitches. It is a very common issue! It means your increase rate is too fast for the yarn weight. Try removing one or two increase rounds and see if it lies flat.
How do I prevent my hands from cramping?
Take breaks every 20 minutes. Crochet is a rhythmic, repetitive motion; it is very similar to sports. Stretch your fingers, rotate your wrists, and shake out your arms regularly to keep your muscles loose.
Is it hard to learn to read a written pattern?
Following a pattern is a learned skill. If you find the abbreviations confusing, look for a “crochet-along” video to accompany the written text. Seeing the stitches formed in real-time will help you bridge the gap between text and action.
Can I change the size of this basket?
Absolutely! To make the base larger, simply continue the increase sequence (e.g., 1 sc in next 6 sts, 2 sc in next st) until the circle is the size you desire. Just remember that you will need more yarn if you make it significantly larger.
Conclusion
Learning to crochet is about more than just producing items; it is about finding a quiet, productive rhythm in a busy world. As you visit local classes in 2026, remember that everyone starts with a tangle of yarn and a bit of uncertainty. Whether you are aiming to craft cozy home decor or create sentimental gifts for those you love, remember that every stitch is progress. I encourage you to take the leap, head to a local workshop, and embrace the beautiful imperfections that come with being a beginner. Once you get those loops moving, your hands will find a language of their own. Keep your hooks steady and your heart open—the world of crochet is waiting for you to create something wonderful.