
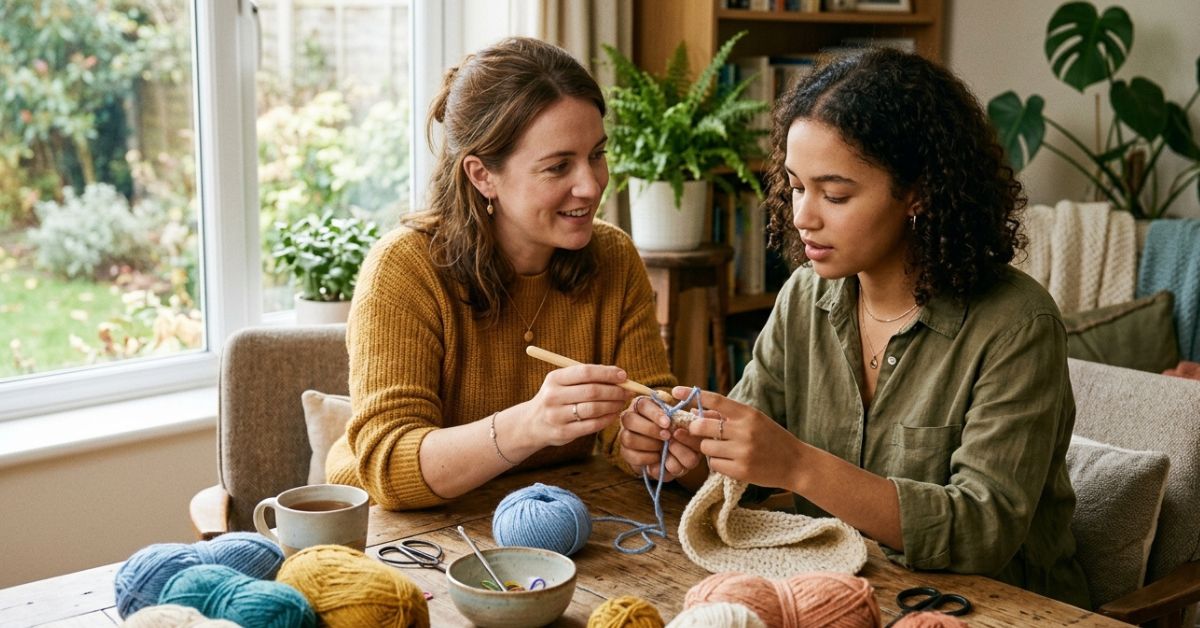
There is something truly magical about the moment a ball of yarn transforms into something tangible under your fingers. If you have ever felt that spark of joy and wanted to share it with a friend, parent, or child, you know that teaching someone else to crochet is a labor of love. It requires patience, a gentle touch, and the ability to turn a confusing tangle of string into a rhythmic, meditative practice. Whether your loved one is hesitant about their coordination or worried they aren’t “crafty” enough, the secret lies in how you introduce that first hook.
Helping a beginner find their rhythm—especially teaching them how to hold their hook and yarn—is the greatest gift you can give a budding fiber artist. It is not just about the mechanics; it is about building their confidence so they can find their own cozy corner in the world of handmade warmth. In this guide, we aren’t just looking at the technical side of holding a hook; we are walking through a beautiful, beginner-friendly “First Steps” project designed to foster success, minimize frustration, and ensure that your student falls just as deeply in love with crochet as you have.
Quick Project Overview
To make learning a joy, we need a project that feels sophisticated but uses only the most foundational skills. We are going to make the “Confidence-Builder Washcloth.”
- Skill Level: Absolute Beginner (with intermediate tips for finishing).
- Estimated Time: 1 to 2 hours.
- Finished Size: Approximately 8 x 8 inches.
- Best Use: A spa-day gift, a housewarming present, or your student’s very first “I made this!” accomplishment.
- Why You’ll Love It: This project utilizes only the chain stitch and the single crochet. It works up quickly, provides a consistent texture that is very forgiving of uneven tension, and gives the student a sense of accomplishment without the pressure of complex counting.
Materials Needed
- Yarn: One skein of Medium (4) weight 100% cotton yarn. Cotton is preferred for beginners because it has very little stretch, which makes it easier to see how the stitches are formed.
- Crochet Hook: Size H/8 (5.0 mm). This is a “Goldilocks” size—not too big, not too small—making it perfect for learning the grip.
- Notions: A yarn needle for weaving in ends and a pair of sharp scissors.
- Optional: A few stitch markers if the student struggles to identify the edges of their rows.
Stitches and Abbreviations
- Ch (Chain): The foundation of most projects. Yarn over and pull through the loop on your hook.
- Sc (Single Crochet): Insert hook into the next stitch, yarn over, pull up a loop, yarn over, and pull through both loops on the hook.
- St(s) (Stitch/Stitches): The individual loops into which you insert your hook.
- Turn: Turning your work at the end of a row so you can work back across the other way.
Pattern Notes Before You Start
Tension is the single biggest hurdle for new crocheters. Remind your student that their hands will feel “clumsy” at first—and that is perfectly normal! Their muscles are learning a new language.
Construction Method: This square is worked in rows. Each row will have the same number of stitches, teaching the student how to navigate the “edges” of their work.
Beginner-Friendly Tip: If your student is struggling with their grip, ask them to hold the hook like a pen (knife grip) or a knife (pencil grip) and see which one feels more natural. There is no one “right” way to hold a hook; there is only the way that keeps their hand from cramping.
Full Crochet Pattern
Getting Started
Start with a slip knot on the hook. Chain 30.
Row 1
Starting in the second chain from the hook, work one single crochet into each chain across to the end. You should have 29 single crochet stitches. Chain 1 and turn your work.
Row 2
Insert your hook into the first stitch (ensure you are going under both loops of the “V” shape at the top of the stitch). Work one single crochet into each stitch across. Chain 1 and turn.
Rows 3 through 30
Repeat Row 2 until the piece is square.
Finishing and Fastening Off
Once the square is complete, cut the yarn, leaving a six-inch tail. Pull the end of the yarn all the way through the final loop on your hook and pull tight to knot it. Thread the tail onto your yarn needle and weave it securely into the back of the work.
Step-by-Step Tutorial Explanation
When you sit down with your friend, start by having them hold the yarn in their non-dominant hand. Explain that the yarn tension is the “brake” and the hook is the “steering wheel.”
As they begin the row, show them the “V” at the top of the stitch. If they aren’t sure where to put their hook, have them look at the piece top-down. The “V” is the map. If they miss a stitch, don’t worry! For this first project, the goal is familiarity, not perfection. If the square comes out slightly trapezoidal, celebrate it as “character building.”
Common Mistakes to Avoid
- The “Death Grip”: Beginners often try to hold the yarn with a white-knuckled grip. Encourage them to relax their hands periodically; if their hand hurts, they are working too hard.
- Skipping the Edge Stitch: New students often miss the very last stitch of a row, which causes the edges to curve inward. Suggest they count the stitches at the end of every row until they get the rhythm.
- Uneven Tension: This usually manifests as a tighter tension toward the end of a row. Remind them to keep the yarn loop on their hook loose and relaxed.
- The Twisted Chain: If the starting chain looks like a spiral, show them how to lay it flat before the first row of single crochet.
Pro Tips for a More Beautiful Result
- Blocking: Even a simple cotton washcloth looks professional if you block it. Wet the finished square, lay it flat on a towel, and gently press it into a perfect square shape with your hands. Let it dry completely. This relaxes the stitches and makes them look even.
- Seaming: If they want to graduate to a larger project, teach them the whip stitch or mattress stitch for joining pieces together.
- Yarn Selection: Avoid dark colors (like black or navy) for the first project. The stitches are nearly impossible to see. Choose a light, cheerful color like sage green, soft pink, or buttery yellow.
Variations and Personalization Ideas
Once they master the basic square, the world opens up!
- Color Blocking: Suggest changing colors every five rows to create a striped washcloth.
- The “Lobby” Scarf: Change the starting chain to 20 and continue the same row pattern until the piece is 60 inches long. It’s an instant, cozy simple scarf that uses the exact same skills.
- Border Fun: After finishing the square, show them how to do a simple slip stitch border around the edge in a contrasting color to give it a polished appearance.
Care Instructions
Since this is a cotton project, it is durable and meant to be used.
- Washing: Machine wash on a warm, gentle cycle.
- Drying: Natural air drying is best to preserve the shape, though tumble-drying on low heat is acceptable for a more “lived-in,” soft texture.
- Storage: Keep in a dry place. If the weave feels a bit flat after a few months, use a steam iron on a low setting or a quick hand wash/reshaping to fluff the fibers back up.
FAQ
How do I help someone who is left-handed?
If you are right-handed, the easiest way to teach a left-handed friend is to sit opposite them. Think of it as looking in a mirror. You can also find excellent instructional videos that are mirrored specifically for lefties, which helps remove the guesswork.
Why does my project keep getting thinner?
This happens when stitches are being dropped at the ends of the rows. I always tell my students to count their stitches at the end of every single row. If you start with 29, you must end with 29. It feels tedious at first, but it builds the habit quickly.
What should I do if my student gets frustrated?
Stop! Crochet should never be a source of stress. When frustration sets in, put the yarn away, make a cup of tea, and talk about why they wanted to learn in the first place. Sometimes, taking a 24-hour break allows the brain to process the muscle memory, and the next day, they will pick it back up with ease.
How do I know if the hook is the right size?
The yarn label will almost always have a suggested hook size. Using that is a perfect starting point. If the fabric feels stiff like a board, suggest a larger hook. If it feels too loose and holes are appearing, suggest a smaller one.
Is it normal to have different tension than you?
Absolutely! Everyone has a unique “gauge.” One person might be a “tight” crocheter, while another is “loose.” Neither is wrong; it just means we might need to adjust our hook size to match the desired dimensions of a pattern.
Conclusion
Teaching someone to crochet is essentially planting a seed. You provide the tools, the technique, and the encouragement, but eventually, they will grow into their own unique style. That first washcloth may have a few extra loops or slightly wavy edges, but it marks the beginning of a lifetime of creating comfort with their own two hands.
As you guide your friend or loved one through these rows, remember that the most important thing you are teaching them isn’t the single crochet stitch—it is the patience to stick with something until it feels right. When they finish that final weave-in of the yarn, celebrate it together. Encourage them to keep those first few projects as a reminder of how far they have come, and invite them to explore the endless possibilities that lie ahead in their crochet journey. There is always a new stitch to learn, a new color to try, and a new friend to teach. Happy hooking!