
Introduction
There is something truly magical about turning a single strand of yarn into a beautifully textured fabric using just a crochet hook and your own two hands. If you have ever looked at a complex crochet diagram and felt intimidated, you are certainly not alone. The world of symbols and patterns can feel like looking at a different language, but here is the wonderful secret: it is essentially a visual roadmap. Once you learn to read the “lay of the land,” you will find that the physical act of crocheting becomes much more rhythmic and intuitive.
This guide is designed to be your companion as you decode the mystery of crochet charts. Whether you are a brand-new beginner picking up a hook for the first time or an intermediate crafter looking to transition from written instructions to visual charts, this walkthrough will bridge the gap. We are going to explore the journey from your very first foundation chain to the final polished flourish, helping you feel confident and capable. Crochet is a journey of patience and joy, and by understanding how these stitches are mapped out, you are unlocking a new level of creative freedom that will stay with you for every project to come.
Quick Overview
This educational guide is designed for anyone who wants to master the art of reading crochet charts. You will learn how to identify standard international symbols, how they correspond to common U.S. crochet terms, and how to track your progress row by row or round by round. This guide is for the visual learner, the hobbyist who loves clear organization, and anyone who wants to gain the foundational skills to tackle any pattern they see. Understanding charts matters because they transcend language barriers and often reveal the “architecture” of a design in a way that dense text sometimes masks. By the end of this article, you will feel ready to pick up a chart and confidently create something beautiful.
What You Should Know Before Starting
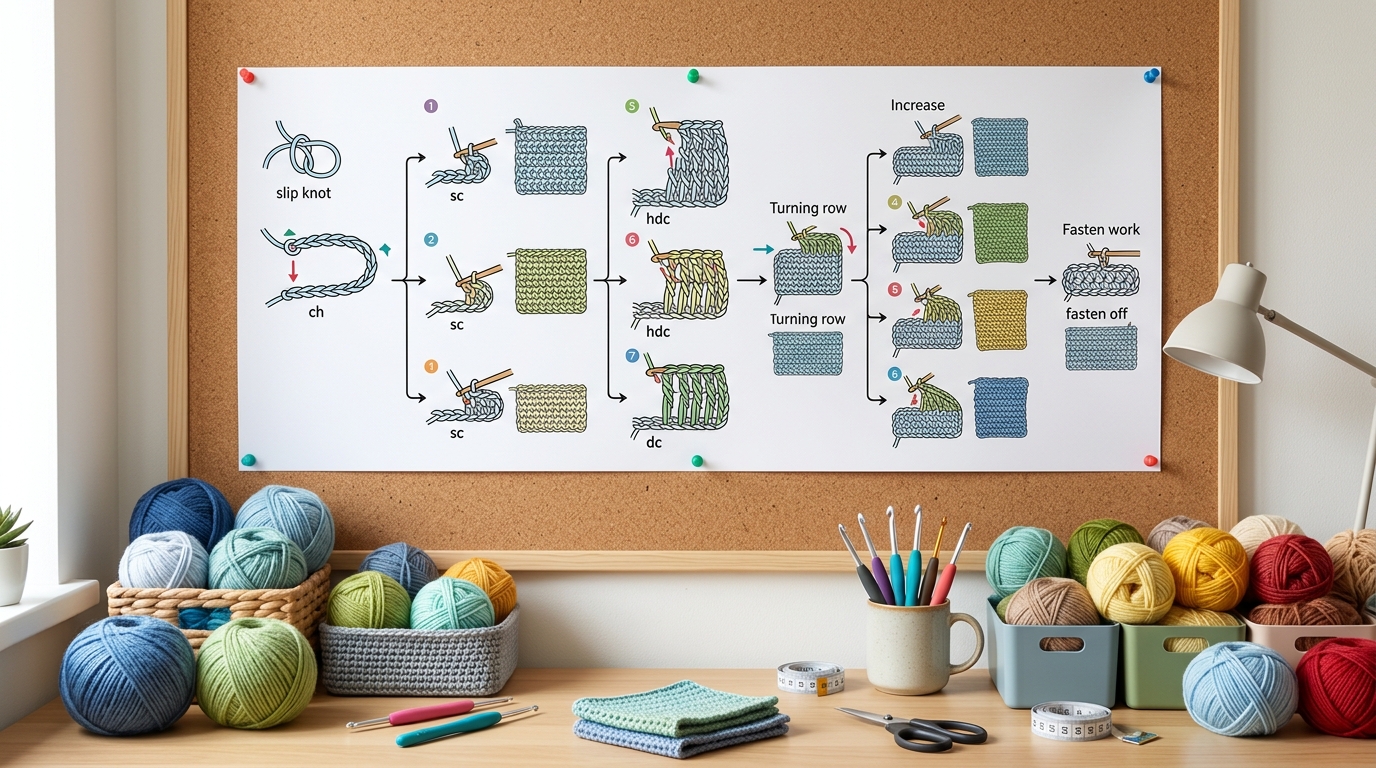
Before you dive into reading a chart, it is helpful to understand the basic philosophy of crochet patterns. A chart is simply a bird’s-eye view of your work. Unlike written patterns that use abbreviations like “sc” or “dc,” charts use icons—small shapes that tell you exactly where to insert your hook and what stitch to perform.
First, ensure you are comfortable with basic terminology. In U.S. crochet, we talk about the foundation chain, the slip stitch, single crochet, half double crochet, and double crochet. A chart will assign a specific shape to each of these. Before attempting a complex project via a chart, keep a small practice swatch handy. It is much easier to learn your “map” on a simple four-by-four square of stitches than on a large, complicated blanket or garment. Remember, crochet is not a race; it is a creative outlet. Take your time to orient your chart clearly so that your work matches the intended direction of the design.
Understanding Symbols and Stitches
Every crochet chart is accompanied by a “key” or “legend.” This is your dictionary. Always look for this first, as designers may sometimes use custom symbols for unique textured stitches. However, standard charts usually follow universal conventions that you will recognize quickly once you see them.
The most common symbol you will encounter is a small circle or an oval, which represents the chain stitch. A small cross or “x” almost always stands for a single crochet, while a vertical line with a diagonal slash crossing it represents a double crochet. A simple horizontal dash usually indicates a slip stitch. As you look at a chart, notice how these symbols are clustered. If the symbols are stacked vertically, you are likely looking at a project worked in rows, where you increase or decrease as you move upward. If the symbols radiated outward from a center point, you are working in rounds, typical for hats, doilies, or amigurumi.
How to Read a Crochet Chart Step-by-Step
Reading a chart is a process of learning to track your visual path. Here is how you can train your eyes to follow the roadmap.
Orienting Your Chart
Always start at the bottom right corner if you are working in rows. That is where your foundation chain begins. Most charts are designed to be read from the bottom to the top and from right to left as you work your first row. When you turn your work at the end of the first row, you then read the next row from left to right. It sounds slightly confusing at first, but it mirrors how you physically move your crochet hook back and forth.
Following Row by Row
When working flat, identify the number of the row, usually marked on the side of the chart. Follow the symbols along that horizontal line. If there is a “gap” where the chain stitch is, it signifies the turning chain. This is the crucial point where you gain height to reach the next row. Make sure your hook pulls through the stitch indicated directly above the one from the previous row.
Navigating Rounds
If the pattern is worked in rounds—such as a coaster or a hat—there will be a center point. You read these charts from the center outward. Often, the rounds are numbered, and you will see “sl st” (slip stitch) markers connecting one round to the next. This ensures your project “closes” correctly as you expand the circle.
Common Mistakes to Avoid
Even experienced crocheters can get tripped up by a chart if they aren’t careful. Here are a few things to watch out for.
- Ignoring the Turning Chain: Sometimes, the turning chains are included as part of the stitch count, and sometimes they act only to give you height. If your edges are curling or puckering, double-check if your chart treats the turning chain as a stitch.
- Assuming Orientation: Never assume the chart is meant to be read in one direction for every row. If you are working flat, remember that you are turning your work, which forces you to reverse your reading direction on alternating rows.
- Skipping the Legend: Never skip the legend. Even if you think you know what a symbol means, a designer might use a variation for a specific texture.
- Miscounting at Corners: In round projects, it is easy to miss an increase at a corner or a curve. If your piece starts to “bowl” when it should be flat, you have likely missed an increase stitch indicated in the chart.
Pro Tips for a Better Result
To make your progress as smooth as possible, keep these tips in your creative toolkit.
- Color-Code Your Progress: Use a highlighter or a piece of washi tape to mark off the row or round you are currently working on. It keeps your place and prevents the “where was I?” panic.
- Check Your Gauge Early: Even if you can read the chart perfectly, your tension will dictate the final size. Make a small test swatch to ensure your stitches are coming out in the correct proportions.
- Good Lighting Is Essential: When working from a chart, you are constantly looking back and forth from the paper or screen to your hands. Ensure your workspace is well-lit so you don’t strain your eyes or miss a symbol.
- Keep a Row Counter: If you are working on a large project, don’t rely on memory. Use a simple tally clicker or write your row numbers on a notepad next to the chart.
Variations and Personalization Ideas
Once you are comfortable reading a chart, you will find that you are no longer limited to just “following the rules.” You can start to customize patterns to fit your vision. If a chart calls for a single crochet border, consider swapping it for a picot stitch or a crab stitch for a more decorative, feminine edge.
You can also experiment with yarn weights. If a chart is designed for medium-weight yarn but you want a daintier look, try a lighter weight yarn with a smaller hook. By understanding the symbols, you can see how the stitches interact, giving you the confidence to subtract or add elements without breaking the structure of the design. This is where your crochet becomes truly “yours.”
Care and Maintaining Your Finished Projects
After all the hours of following your map, you want your hard work to last. Always check your yarn labels for care instructions, but as a general rule, hand-washing in cool water with a gentle wool wash is the safest way to care for handmade crochet.
When drying, lay your project flat on a clean towel and “block” it—gently shape it into the dimensions shown on your chart. This process of blocking sets the stitches and ensures your hard work looks professional and neat. If you are storing larger items like blankets or rugs, fold them loosely and store them in a cool, dry place away from direct sunlight to prevent fading.
FAQ
How do I know if I am holding my hook correctly?
There is no single “correct” way, but there are two main styles: the pencil hold and the knife hold. Experiment with both to see which feels most natural for your hands, but ensure you aren’t gripping the hook so tightly that your hand cramps.
Why does my project get smaller or larger at the edges?
This is a classic beginner issue usually caused by missing the first or last stitch of a row. When reading a chart, ensure you are placing a stitch into every single symbol indicated, including the very first and last ones of the row, even when they look hidden.
What does it mean when a chart has dark, bold lines?
Often, designers use bold lines to indicate a “repeat” section. This is a shorthand that tells you to perform a specific sequence of stitches a certain number of times before moving to the next part of the pattern.
Can I use the same hook size regardless of the project?
No, the hook size is vital. It is usually determined by the weight of the yarn and the tightness of the stitch you want to achieve. Even if the chart doesn’t specify a hook, look at the yarn label for a “recommended” hook size to get started.
How do I fix a mistake I made three rows ago?
If the mistake is glaring, the best way to fix it is to carefully pull out your work—a process called “frogging”—until you reach the point of the error. It is frustrating, but it is a normal part of the process, even for experts. Use it as an opportunity to fix your tension!
Conclusion
Reading a crochet chart is like learning to read a musical score; at first, it looks like a series of dots and lines, but soon, you hear the melody. We hope this guide has demystified the process for you. Remember that every master was once a beginner who simply didn’t quit. Don’t be afraid to make mistakes—they are simply stepping stones to better technique.
As you continue your crochet journey, keep your charts close, your yarn stash cozy, and your patience high. There is a whole world of patterns out there just waiting for you to bring them to life. Whether you are creating a heartfelt gift for a loved one, a piece of decor for your home, or a cozy accessory for yourself, know that each stitch you place is a testament to your creativity and skill. Happy hooking, and may your next project bring you nothing but joy.