
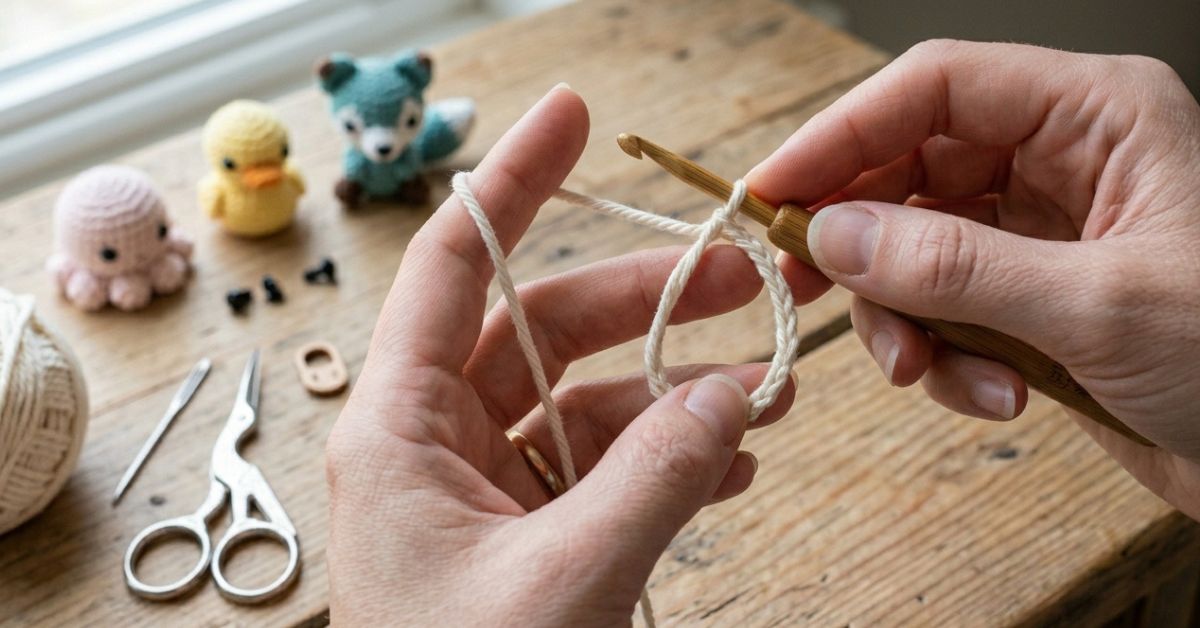
There is something truly magical about starting an amigurumi project. Whether you are crafting a tiny woodland creature for a nursery, a whimsical cactus for your windowsill, or a darling doll as a handmade gift, the journey always begins at the very same spot: the center. If you have ever felt frustrated by a gaping hole sitting right at the bottom of your work, or if the “chain two” method left you with a visible gap you couldn’t quite hide, you are in the perfect place.
The magic loop—often called the magic ring—is the secret weapon of every amigurumi artist. It allows you to cinch your starting stitches tightly, creating a seamless, professional finish that keeps your fiber-fill securely inside. While it can feel a bit like trying to juggle yarn at first, I promise that with a little patience and this foolproof guide, you will be mastering it in no time. We will walk through the technique, and then dive into a charming, beginner-friendly amigurumi mushroom pattern to put your new skill to the test. Let’s create something beautiful together.
Quick Project Overview
- Skill Level: Beginner-friendly.
- Estimated Time: 1 to 2 hours.
- Finished Size: Approximately 3 inches tall.
- Best Use: Perfect as a sweet keychain, a desk companion, or a tiny toy for little hands.
- Why You’ll Love It: It is a quick win! This pattern uses minimal yarn, making it a fantastic stash-buster, and it is the ideal way to practice the magic loop until it feels like second nature.
Materials Needed
- Yarn: Worsted weight (Size 4) cotton or acrylic yarn. Cotton is preferred for amigurumi because it has less stretch and holds its shape beautifully.
- Crochet Hook: Size E/4 (3.5 mm). Using a hook slightly smaller than the yarn label recommends helps keep your stitches tight so the stuffing doesn’t show through.
- Tools: A yarn needle for weaving in ends and sewing pieces together, a pair of scissors, and a small amount of polyester fiberfill for stuffing.
- Marker: A stitch marker is essential for keeping track of your rounds, as we will be working in continuous spirals.
Stitches and Abbreviations
- Magic Loop: The foundation technique for starting in the round.
- ch (chain): Yarn over, pull through loop on hook.
- sc (single crochet): Insert hook, yarn over, pull up a loop, yarn over, pull through both loops on hook.
- inc (increase): Two single crochet stitches into the same stitch.
- dec (decrease): A standard invisible decrease is best: Insert hook into front loops of the next two stitches, yarn over, pull through both front loops, yarn over, pull through remaining two loops.
- sl st (slip stitch): Insert hook, yarn over, pull through stitch and loop on hook.
- st(s) (stitch/stitches): The spaces into which you work your stitches.
Pattern Notes Before You Start
When working on amigurumi, tension is your best friend. Aim for a tight, consistent stitch. If you find your stitches are loose, try going down a hook size. We will be working in a continuous spiral, which means you won’t join rounds with a slip stitch unless specified. Always use your stitch marker to mark the first stitch of each round so you don’t lose your place.
Full Crochet Pattern: The Whimsical Mushroom
Part 1: The Mushroom Cap (Red Yarn)
Round 1: Start with a magic loop. Work 6 sc into the magic loop. Tighten the loop securely. (6 sts)
Round 2: Inc in each st around. (12 sts)
Round 3: Sc 1, inc repeat around. (18 sts)
Round 4: Sc 2, inc repeat around. (24 sts)
Round 5-7: Sc in each st around. (24 sts)
Round 8: Sc 2, dec repeat around. (18 sts)
Fasten off, leaving a long tail for sewing. Stuff the cap firmly.
Part 2: The Mushroom Stem (White Yarn)
Round 1: Start with a magic loop. Work 6 sc into the magic loop. (6 sts)
Round 2: Inc in each st around. (12 sts)
Round 3: Working in the back loops only, sc around. (12 sts)
Round 4-6: Sc in each st around. (12 sts)
Fasten off and leave a tail for sewing. Stuff the stem lightly.
Assembly
Place the stem centered against the bottom of the cap. Using your yarn needle and the long tail from the stem, whip stitch the two pieces together. Weave in all loose ends inside the body of the mushroom before closing your final stitches. Add a few small embroideries or beads if you wish to give your mushroom “spots.”
Step-by-Step Tutorial Explanation
The magic loop is easier than it looks. Hold the yarn tail in your palm and wrap the working yarn around your index and middle fingers to create an “X.” Insert your hook under the first strand and pull up the second, creating a loop on your hook. Chain one to secure it, then work your single crochet stitches right over that loop and the attached tail.
Once you have your stitches in, pull the tail until the center hole disappears completely. That is the magic! As you work your mushroom, imagine the structure being built from the inside out. When you reach the increases, you are expanding the circumference; when you reach the decreases, you are rounding off the shape.
Common Mistakes to Avoid
The most common mistake beginners make with the magic loop is not securing the tail tightly enough, which can cause the center to unravel over time. Always tie a small knot in the tail once you have finished the first round. Additionally, avoid “yarn chicken” by starting with a generous amount of yarn. If your edges look uneven, check your stitch counts at the end of every round—amigurumi is very math-heavy, and missing one stitch can warp the shape of your finished piece.
Pro Tips for a More Beautiful Result
For a polished look, focus on consistent tension throughout your project. If you feel your hand cramping, take a break; tight tension is good for amigurumi, but an unnatural grip will make your stitches stiff. When you weave in your ends, run the needle through several stitches in different directions to ensure they are secure and won’t pop out after the toy is washed. Finally, if you want your character to have personality, the placement of the eyes is everything—bringing them closer together creates a cute, youthful look, while spacing them further apart adds a sophisticated charm.
Variations and Personalization Ideas
The beauty of this mushroom pattern is its versatility. You can use different colors to create a “forest” of mushrooms—try using muted sage green, deep forest green, or even soft pastels for a spring-themed display. You can also sew on tiny buttons or use a tapestry needle to stitch little white polka dots onto the red cap. If you want to use this as a gift for a baby shower, skip the buttons and embroider the details with yarn so there are no small parts that could come loose.
Care Instructions
Since this project is made with cotton yarn, it is fairly durable. If your mushroom gets dusty or dirty, hand wash it in cool water with a gentle detergent. Do not wring or twist the piece, as this can distort the shape. Instead, gently press the water out using a clean towel and reshape it while it is still damp. Allow it to air dry on a flat surface away from direct sunlight to keep the colors vibrant.
FAQ
Is the magic loop really necessary for amigurumi?
While you can start with a chain-two method, it almost always leaves a small hole in the center. If you are stuffing your project, that hole will eventually stretch, allowing the fiberfill to poke through. The magic loop is the only way to get a perfectly closed, professional center.
I keep pulling the loop too tight and breaking the yarn. What should I do?
If your yarn is delicate, don’t pull too forcefully. Instead, tighten the loop gradually while holding the stitches in place with your thumb. If you are still struggling, use a slightly thicker yarn to practice the technique until your hands get used to the tension.
Can I use the magic loop for other crochet projects?
Absolutely! While it is a staple of amigurumi, it is also perfect for starting hats from the crown, mandalas, coasters, and even granny squares when you want a smooth, solid center.
Why do my rounds look like they have a “seam”?
When working in a continuous spiral, you will naturally have a small step between the first and last stitches of the round. This is normal. If you want a perfectly invisible transition, you can switch to joining your rounds with a slip stitch and chaining one at the start of every new round, though this will create a visible line.
My magic loop keeps coming undone. How do I lock it?
After you finish your first round and pull the loop tight, thread that tail onto your yarn needle and weave it around the base of the stitches on the inside of the work. Tying a small knot or weaving it back and forth through the back loops of the first round will lock it in place permanently.
Conclusion
Mastering the magic loop is a wonderful milestone in your crochet journey. It is one of those foundational skills that, once learned, opens up a world of possibilities for the toys, decor, and gifts you can create. Don’t be discouraged if your first attempt feels a bit clumsy—my first magic loop was messy, too! Every single stitch you work is a step toward becoming more confident and creative with your hook.
I hope you enjoyed learning how to start your amigurumi projects with a seamless, hole-free base. Whether you make a dozen mushrooms for a woodland display or just one for a friend, remember that the joy is in the making. If you found this tutorial helpful, feel free to bookmark it for your next project, or share it with a fellow crafter who might be struggling with their start. Happy crocheting, and may your yarn always be tangle-free!