
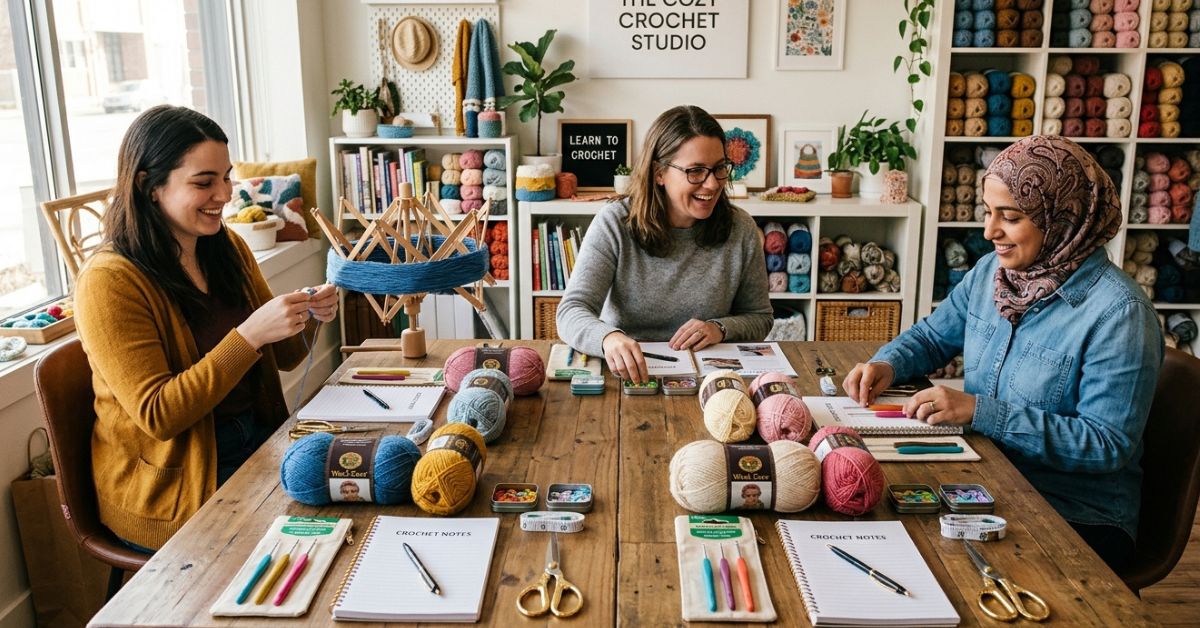
There is something truly magical about picking up a crochet hook for the first time. The rhythmic click of the hook, the soft texture of a new skein of yarn, and the realization that you are creating something beautiful from a simple piece of string—it is a hobby that offers both meditative peace and a sense of genuine accomplishment. If you have been looking at cozy blankets, adorable stuffed toys, or stylish handmade accessories and thinking, “I wish I could do that,” let me be the first to tell you: you absolutely can.
Taking your first crochet class is the perfect way to demystify the process. It is a space where mistakes are just learning opportunities and every knot is a step toward mastery. Whether you are signing up for a local workshop or joining an online community class, the nervousness you might feel is entirely normal. Everyone, even the most experienced designers, once sat exactly where you are, staring at their hands and wondering how to hold the yarn. This guide is designed to help you walk into your first lesson feeling prepared, confident, and excited. We will walk through the basics and even dive into a simple, beautiful starter project so you can get a feel for the rhythm of the craft right away.
Quick Project Overview
To help you get comfortable, we are going to learn by making an “Everyday Cotton Washcloth.” It is the perfect beginner project because it works up quickly, uses only basic stitches, and results in a highly practical item for your home.
- Skill Level: Absolute Beginner
- Estimated Time: 1 to 2 hours
- Finished Size: Approximately 8 x 8 inches
- Best Use: Use it as a gentle facial scrubby, a kitchen dishcloth, or a heartfelt handmade gift for a friend.
- Why You’ll Love It: This project teaches you the core pillars of crochet: maintaining consistent tension, counting stitches, and working in rows.
Materials Needed
For your first class, you want to set yourself up for success by choosing materials that are easy to work with.
- Yarn: One skein of medium (worsted) weight, 100% cotton yarn. Cotton is best for beginners because it doesn’t stretch as much as acrylic, making your stitches easier to see.
- Crochet Hook: A size H/8 (5.0 mm) hook. An ergonomic handle—one with a thicker, rubberized grip—can make a world of difference for your hands during long sessions.
- Tapestry Needle: A large-eye, dull-tipped needle used for weaving in your yarn ends when you finish.
- Scissors: Any pair from your kitchen drawer will do perfectly.
- Stitch Markers: These little plastic clips are a lifesaver for marking the first and last stitch of every row so you don’t accidentally lose or gain stitches.
Stitches and Abbreviations
In American crochet, we use specific abbreviations. Here are the ones you will see in this pattern:
- ch (chain): The starting point for most projects. It involves drawing the yarn through a loop on your hook.
- sc (single crochet): A basic, short stitch that creates a tight, durable fabric.
- sl st (slip stitch): Used to join yarn to a piece or move across a row without adding height.
- st(s) (stitch(es)): The individual points where you insert your hook.
Pattern Notes Before You Start
Crochet is all about “tension,” which is simply how tightly or loosely you hold your yarn. If you hold it too tight, your finished piece will be stiff as a board; if you hold it too loose, it will look like lace. Don’t worry about perfection; your tension will naturally stabilize the more you practice. Before you begin, find a comfortable seat with good lighting. If you feel your hands cramping, take a break—your muscles are learning a new movement, and it takes a little time to build that muscle memory.
Full Crochet Pattern
This pattern is worked in rows. You will start with a foundation chain and build your square from the bottom up.
Part 1: The Foundation
Start with a slip knot on your hook. Chain 30 stitches. Count them carefully to ensure you have exactly 30 chains.
Part 2: Building the Square
Row 1: Insert your hook into the second chain from the hook. Yarn over, pull up a loop, yarn over again, and pull through both loops on the hook (this is your first single crochet). Continue placing one single crochet in each chain across the row. You should have 29 stitches in total. Ch 1 and turn your work.
Row 2: Insert your hook into the very first stitch (under both loops of the “V” shape at the top). Single crochet in that stitch and in every stitch across the row. When you reach the end, ch 1 and turn.
Part 3: Maintaining the Square
Repeat Row 2 until the piece measures approximately 8 inches in length. Aim for a square shape.
Part 4: Finishing
Once you are happy with the size, cut your yarn, leaving a 6-inch tail. Pull the end of the yarn through the final loop on your hook and pull tight to knot it. Use your tapestry needle to weave the loose ends back and forth through the stitches at the edge of the cloth to secure them. Clip any excess yarn.
Step-by-Step Tutorial Explanation
Think of crochet as a dance between your two hands. Your left hand (if you are right-handed) is responsible for feeding the yarn and controlling the tension, while your right hand maneuvers the hook.
When you start that first row, notice how the “V” looks at the top of your stitches. Each “V” represents one stitch. When you insert your hook, you want to make sure you are going under both legs of that “V.” If you only go under one leg, your work will look thinner and might develop holes. As you progress through the rows, count your stitches at the end of each row. If you started with 29, you should end with 29. If you suddenly have 30 or 31, don’t be discouraged! It happens to everyone. Just gently pull your hook out, un-do the stitches back to where the error occurred, and try again.
Common Mistakes to Avoid
The most common hurdle in beginner classes is the “losing stitches” phenomenon. Beginners often miss the very last stitch in a row because it can look like it’s pulling away from the edge. This is why stitch markers are your best friends. By marking the first and last stitch of each row, you ensure that you don’t accidentally skip them, which would cause your rectangle to start looking like a triangle.
Another issue is the “death grip.” If you feel like your hook is getting stuck or you can’t push it through the loops, you are likely gripping your hook and yarn too tightly. Shake out your hands, take a deep breath, and try to relax your fingers. The yarn should slide through your fingers with ease.
Pro Tips for a More Beautiful Result
To take your projects from “handmade” to “professional looking,” the secret is in the finishing. Even for a simple washcloth, blocking makes a huge difference. Blocking is the act of gently dampening your finished item and pinning it into a perfect square shape on a clean towel until it dries. This evens out all your stitches and gives your project a polished, store-bought quality.
Also, when choosing your color palette, don’t be afraid to try multi-colored yarns! They add visual interest to simple stitch patterns without you needing to do any extra work. If you choose a solid color, consider adding a simple border of a contrasting color using the same single crochet stitch to frame your hard work.
Variations and Personalization Ideas
Once you have mastered the basic square, your options are endless. You can make a set of three washcloths in different shades of blue for a spa-themed gift for a friend. You could even use a thicker, plush velvet-style yarn to make a soft face-scrubbing pad for a birthday present.
For the intermediate step, try alternating rows—one row of single crochet and one row of double crochet. This “mixed stitch” technique creates a beautiful, textured fabric that is much more absorbent and visually interesting. Once you feel confident in your ability to keep a consistent stitch count, you will find you can branch out into larger projects like blankets or simple market bags very quickly.
Care Instructions
Since you used cotton yarn, your washcloths are incredibly easy to care for. You can toss them in the washing machine on a warm, gentle cycle. To keep them looking fresh, skip the fabric softener, as it can coat the fibers and make them less absorbent. Lay them flat to dry on a towel to ensure they keep their shape. If they start to look a little worn after many uses, a quick spin in a laundry bag will keep them from snagging on other items in your wash.
FAQ
How do I know if my tension is correct?
Your stitches should be even and firm enough that they hold their shape, but not so tight that they pull or distort the fabric. If you can easily insert your hook into your previous stitches without struggling, your tension is likely just right.
Why does my straight edge look wavy or slanted?
This usually happens because you are accidentally adding or skipping stitches at the end of every row. Remember to count your stitches every time you complete a row. Using a stitch marker in the first and last stitch is the best way to keep your edges straight.
Is it normal for my hands to hurt after a while?
Yes, it is common when you are just starting because you are using muscles in your hands that aren’t used to these repetitive motions. Take short, frequent breaks, stretch your fingers, and remember to relax your shoulders as you work.
Can I fix a mistake without starting over?
Absolutely! Simply remove your hook and gently pull on the working yarn to “frog” your work (crocheters call this “frogging” because you “rip it, rip it”). You can undo as many stitches as you need to reach the point where the mistake happened.
What should I look for in a good beginner yarn?
Look for a solid-colored, medium-weight cotton or smooth acrylic yarn. Avoid novelty yarns that are fuzzy, metallic, or incredibly thin, as these make it very difficult to see your stitches and learn proper technique.
Conclusion
Starting your crochet journey is an act of creativity and self-care. It is a slow, grounding practice that allows you to step away from the fast pace of modern life and produce something tactile and real. Do not hold yourself to the standard of perfection; hold yourself to the standard of progress. If your first washcloth has slightly crooked edges or a few uneven stitches, cherish them—they are the signature of your first step into a beautiful new world.
Save this guide as a reference, keep your tools in a dedicated bag, and don’t be afraid to experiment. Once you have the rhythm of the hook in your hands, you will find that a whole world of cozy handmade gifts, home decor, and fashion accessories has opened up to you. Happy crocheting!