
There is something profoundly soothing about the rhythm of a crochet hook dancing through yarn. Whether you are a brand-new enthusiast holding yarn for the first time or a seasoned maker looking to expand your creative repertoire, mastering a variety of stitch patterns is the key to unlocking endless possibilities. From the cozy, thick texture of a winter blanket to the delicate, airy flow of a summer shawl, your choice of stitch changes the entire character of your project.
This guide serves as your personal, comprehensive library of stitch patterns. We will explore how stitches are categorized, why specific textures behave the way they do, and how you can combine these techniques to achieve professional, polished results in your own handmade creations. By understanding the building blocks—the interplay between single, half double, and double crochet stitches—you will gain the confidence to move beyond simple patterns and start designing your own unique crochet items. Let’s embark on this journey of discovery together, turning simple loops of yarn into beautiful, textured fabric.
Understanding Crochet Stitch Categories
To build a mental library of stitches, it helps to categorize them by how they look and function. While the possibilities are infinite, most crochet patterns fall into two main families: textured stitches and openwork, or lace, stitches. Understanding these two categories will help you choose the right pattern for your next project, whether you are creating a squishy baby blanket or an elegant accessory.
The Beauty of Textured Stitches
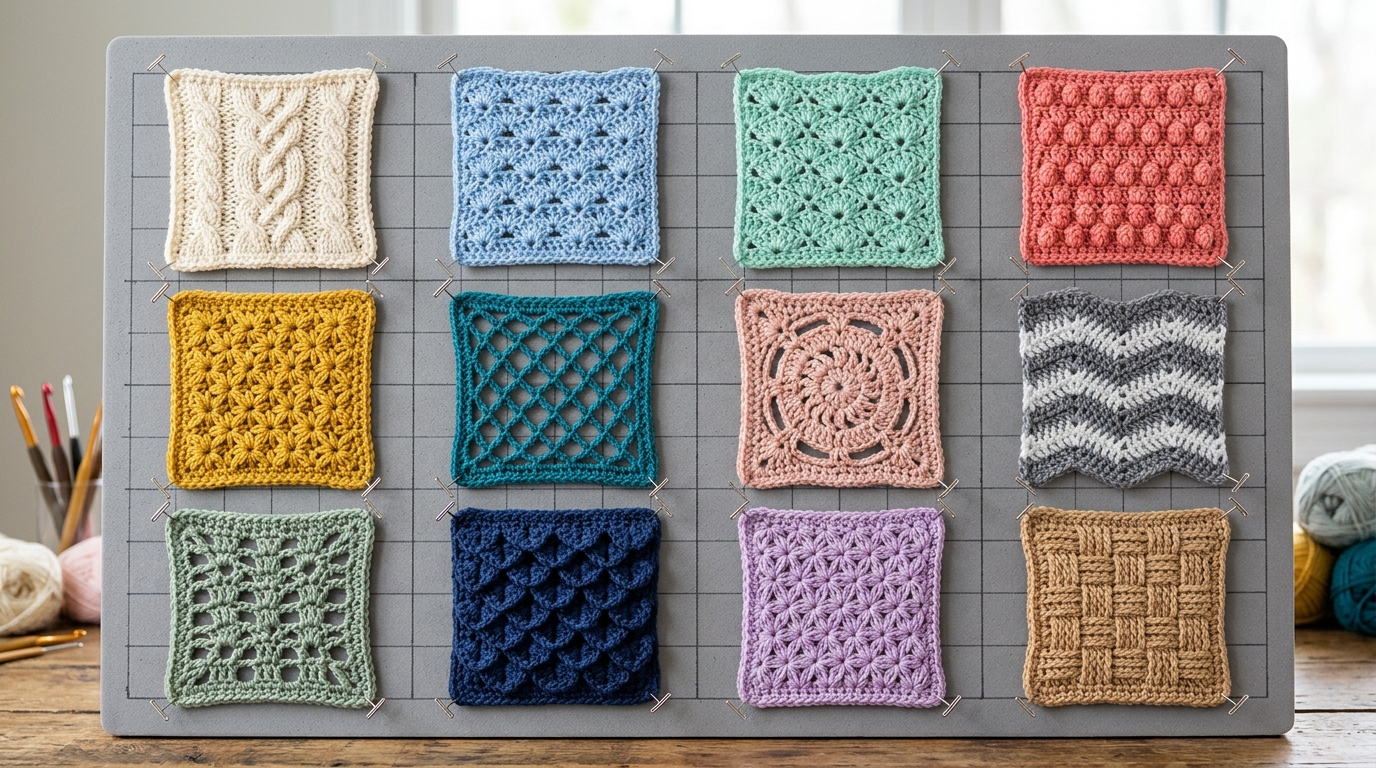
Textured stitches are the “cozy” side of crochet. They involve techniques that create raised details, such as post stitches, bobbles, or clusters. These stitches are perfect for projects where warmth and tactile interest are desired. When you use textured stitches, you aren’t just creating a flat surface; you are creating a landscape of depth that adds luxury and weight to your work. Examples include the waffle stitch, the moss stitch, or the charming popcorn stitch. These are excellent for home decor like pillow covers or heavy winter scarves, as they trap air and provide extra insulation.
The Elegance of Openwork Designs
Openwork, often referred to as lace, is the art of creating deliberate gaps or “lacy” patterns within your fabric. These designs rely on the strategic placement of chains and tall stitches, usually double or treble crochets, to create space. Unlike textured stitches, openwork is all about drape and breathability. These patterns look stunning in shawls, market bags, and lightweight summer garments. The open areas allow the fabric to move naturally with the body, making them a staple for warmer months or layered outfits.
Essential Concepts for Every Crocheter
Before diving into specific stitch combinations, there are a few foundational concepts that every crocheter—regardless of skill level—should keep in mind. These “hidden” rules of crochet will drastically improve the professionalism of your finished items.
The Importance of Turning Chains
The turning chain is the stack of chains you make at the beginning of a row to bring your hook up to the height of the next stitch. A common mistake for beginners is counting the turning chain as a stitch. Sometimes the pattern will tell you to do this; other times, it explicitly asks you to skip it. Always read your pattern notes carefully! If your edges look wavy or uneven, check how you are treating your turning chains, as this is the most frequent culprit for distorted side edges.
Understanding Tension and Gauge
Tension refers to how tightly or loosely you hold your yarn while working. If your tension is too tight, your stitches will be small and rigid; if it’s too loose, the fabric will look holey and limp. Gauge is the measurement of your stitches over a specific area (usually a 4-inch square). While many beginners want to skip the gauge swatch, it is your best friend when you want a project to fit correctly or to ensure you have enough yarn. Think of your gauge as your own crochet “fingerprint”—no two people work exactly alike!
How to Build Your Own Textured Patterns
Texture in crochet is essentially the manipulation of where you place your hook. Instead of working into the traditional “V” of the stitch (the top loops), you can work around the “post” of the stitch from the row below.
Front Post and Back Post Stitches
These are the secret weapons of textured crochet. By inserting your hook around the vertical bar of a stitch instead of into its top loops, you push the stitch forward (Front Post) or backward (Back Post). Alternating these creates the classic “ribbing” seen on the cuffs of sweaters and the brims of hats. For a beautiful, woven-look texture, try alternating two front post double crochets with two back post double crochets to create a cable-like effect.
The Cluster and Bobble Family
Clusters, popcorns, and bobbles are all variations of working multiple stitches into the same space and closing them together. They create “pop-out” features that have a three-dimensional quality. When working these, remember that the “wrong side” of your fabric is where the texture will be pushed out. If you are making a flat square, ensure you are working your texture on the side that you want to be the front. Pro tip: Always use a slightly larger hook than the yarn label recommends when working heavy bobble designs; this prevents the fabric from becoming too stiff and cardboard-like.
Mastering Openwork and Lacework
Openwork is a lesson in negative space. The goal is often to create a repeating motif that feels light and airy.
Working with Chains and Skips
The simplest form of openwork is the “mesh” pattern. This is created by working a chain space and skipping a stitch in the row below. By varying the number of chains (e.g., chain one, skip one versus chain three, skip three), you change the size of the window created in your fabric. This is the foundation of many beautiful vintage-style lace projects.
The Shell Stitch
The shell stitch is a timeless classic that bridges the gap between texture and openwork. By working multiple double crochet stitches into the same stitch, you create a fan shape. This creates a scalloped edge or a repeating wavy pattern that looks much more complicated than it actually is. It is the perfect beginner “next step” after mastering the basic stitches.
Step-by-Step Learning Strategy
If you feel overwhelmed by the variety of stitches, follow this logical progression to build your skills effectively:
- Perfect the Basics: Ensure your single, half double, and double crochet stitches are consistent in height and width. Practice making simple squares.
- Explore Edge Work: Learn to work in the back loop only (BLO) or front loop only (FLO). This simple change in technique creates a ridge that acts as a subtle texture.
- Introduction to Posts: Spend a few rows practicing Front Post Double Crochet. Use a light-colored yarn so you can see the stitch “post” clearly.
- Combine and Repeat: Find a simple stitch library book or online resource, pick one “texture” and one “openwork” stitch, and try to incorporate them into a sampler blanket. A sampler is one of the best ways to keep track of your progress as a learner.
Common Mistakes to Avoid
Even experienced crocheters fall into these traps. Being aware of them will save you hours of “frogging” (the term for ripping out your stitches).
- The Twisted Chain: When starting a large project in the round, it is incredibly easy for your foundation chain to twist. Lay your chain flat on a table before joining with a slip stitch to ensure it stays straight.
- Missing the Last Stitch: At the end of a row, the last stitch can often look like part of the turning chain. Look closely at your work; if your rows keep getting shorter, you are likely skipping that final stitch.
- Yarn Over Consistency: Always ensure your yarn over (the way you loop the yarn over the hook) is consistent. If you switch between “yarn over” and “yarn under” mid-project, it can change the orientation of your stitches and create a messy look.
- Forgetting to Count: When working in rows, it is vital to count your stitches at the end of every row for the first five rows. If the count is off, don’t keep going—fix it early!
Pro Tips for a Polished Result
Finishing is just as important as the crochet itself. To make your handmade items look like they came from a high-end boutique, follow these professional tips:
- Blocking is Non-Negotiable: Especially with openwork and lace, blocking is the “magic” step. Once your piece is finished, soak it in lukewarm water, gently squeeze out the moisture (do not wring), and pin it to a foam mat in the desired shape. Let it dry completely. This relaxes the yarn and opens up the stitch patterns, giving your project a professional, crisp finish.
- The Power of the Border: A simple project can look finished with a basic border. A round of simple single crochet stitches around a blanket or piece of clothing frames the work and covers up uneven edges.
- Weaving in Ends Properly: Don’t just cut your yarn and leave a knot! Use a tapestry needle to weave your tails back and forth through the stitches in multiple directions. This prevents the ends from popping out after the item is washed.
Personalization and Creative Ideas
The beauty of having a stitch library in your repertoire is that you can customize any project to your own style.
- Color Blocking: Take a simple pattern that uses only one stitch and alternate rows of different colors. The color change will highlight the texture you have chosen.
- Seasonal Swaps: Use a dense, textured stitch like the waffle stitch for a winter-specific item, but use the same pattern structure with a lighter, breathable stitch for a summery market bag.
- Gift-Giving: Texture makes for wonderful gifts. A washcloth or small coaster set using a variety of textured stitches is a great way to practice new techniques without committing to a massive project like a full-sized afghan.
FAQ
How do I know which hook size to use for a specific stitch?
Check the yarn label first; it will provide a “recommended” hook size. However, if you are working a very textured, holey pattern, you might want to go down a hook size to keep the fabric dense. If working a lace pattern, going up a hook size can make the drape even better.
Why does my crochet project keep curling at the edges?
Curling often happens due to tension that is too tight or because of the specific stitch pattern. A simple fix is to use a slightly larger hook, or if you are working in rows, try to ensure your turning chains aren’t being pulled too tightly. Blocking also helps significantly with edge control.
Is there a difference between U.S. and U.K. crochet terms?
Yes, and it is a major one! The names of the stitches are the same, but the definitions differ. For instance, a “single crochet” in the U.S. is called a “double crochet” in the U.K. Always check the pattern’s “terms index” at the beginning to see which country’s terminology is being used.
How can I make my stitches look more uniform?
Consistency is key. Try to keep your yarn tension steady by finding a comfortable way to hold the yarn through your fingers. Also, be mindful of the “loop” height—when you pull up a new loop on your hook, try to make each one the same height before finishing the stitch.
What is the best way to clean my finished crochet items?
Whenever possible, hand-wash your crochet items in cool water with a gentle wool wash. Lay them flat to dry on a towel. If you must machine wash, use a mesh laundry bag on the delicate cycle, but always air dry to prevent the yarn from shrinking or deforming.
Conclusion
Mastering crochet stitch patterns is a journey, not a destination. Each stitch you learn adds a new “word” to your creative vocabulary, allowing you to narrate your own designs. Whether you are falling in love with the rhythmic rows of a simple texture or the delicate complexity of openwork lace, remember that the time and love you put into every stitch is what makes the finished item truly special.
Don’t be afraid to experiment, make mistakes, and pull out your work to try again. Every “frog” is just another step toward becoming a more skilled and confident crafter. Keep your hook close by, stay inspired by the colors and textures that bring you joy, and most importantly, enjoy the process. Your next favorite project is just a few loops away. Happy crocheting!