
There is something truly magical about picking up a crochet hook for the first time. The rhythmic loop-and-pull motion is more than just a craft; it is a gateway to a world of creativity, relaxation, and the quiet satisfaction of making something beautiful with your own two hands. If you have ever felt intimidated by the sight of tangled yarn or complex stitch diagrams, please take a deep breath and know that you are exactly where you need to be. Every master crocheter once stared at a yarn ball feeling just as confused as you might feel today.
In this class, we are going to focus on the absolute foundation of everything we create: the chain stitch and the art of counting your work. When you master these two elements, you gain the confidence to pursue any pattern—be it a cozy blanket, a delicate lace shawl, or a charming amiguri friend. We will spend this afternoon demystifying the process, ensuring your edges are straight, your counts are perfect, and your stitches look professional. Grab a cup of tea, find a comfortable corner in your home, and let’s begin this rewarding journey into the wonderful world of crochet together.
Quick Project Overview
- Skill Level: Absolute Beginner
- Estimated Time: 1 to 2 hours
- Finished Size: A practice swatch measuring approximately 6 inches by 6 inches, perfect for a coaster or a dishcloth.
- Best Use: Skill building and confidence boosting.
- Why You’ll Love It: This project removes the pressure of “making something perfect” and replaces it with the joy of learning. By the time you finish this swatch, you will have the muscle memory and the counting techniques required for almost any entry-level project.
Materials Needed
To keep things stress-free, I always recommend starting with materials that are “kind” to beginners.
- Yarn: One skein of medium (worsted) weight cotton yarn. Cotton is firmer than acrylic, which makes it easier to see exactly where your stitches are going. Choose a light, solid color—creams, soft pinks, or light blues make it much easier to see your loops compared to black or navy yarn.
- Crochet Hook: A size H/8 (5.0 mm) crochet hook. This is the “Goldilocks” of hooks—not too big, not too small, and very comfortable for learning tension.
- Stitch Markers: These are optional but highly recommended. You can use specialized locking stitch markers or simple paper clips.
- Scissors: Any pair from your craft drawer.
- Yarn Needle: A large-eye blunt needle used for weaving in your ends.
Stitches and Abbreviations
- ch (chain): Yarn over, pull the yarn through the loop on your hook.
- sc (single crochet): Insert hook into the next stitch, yarn over, pull up a loop (two loops on hook), yarn over, and pull through both loops on the hook.
- st (stitch): The entire loop structure where you place your needle.
- turning chain: The extra chain worked at the end of a row to give your project height to start the next row.
Pattern Notes Before You Start
Crochet is all about “Tension.” Tension refers to how tightly or loosely you hold your yarn. As a beginner, your hands may feel a little clumsy, and your tension might vary—this is perfectly normal. If your stitches look very tight and “puckered,” try to relax your shoulders and hold the yarn more loosely. If they look wide and messy, you may need a firmer grip.
We will be practicing a flat, rectangular swatch. We will work in rows, which means we will crochet across, turn our work like a book, and return in the opposite direction.
Full Crochet Pattern
Part 1: The Foundation Chain
Start with a slipknot on your hook. To make a chain: Yarn over and pull the yarn through the loop currently on your hook. This is one chain. Repeat this until you have 20 chains. Do not pull these too tight, or you will find it difficult to insert your hook into them in the next step.
Part 2: The First Row
Insert your hook into the second chain from the hook. Yarn over, pull up a loop, yarn over, and pull through both loops. You have created one single crochet. Continue placing one single crochet in each chain across the row. You should end with 19 single crochet stitches.
Part 3: The Turning Process
At the end of your row, chain 1. This is your “turning chain.” Now, flip your entire piece of fabric over from right to left, just as if you were turning a page in a book. You are now ready to begin the next row.
Part 4: Rows 2 through 15
Insert your hook under both top loops of the first stitch. (Beginners often insert under only one loop, but working under both makes your edges much stronger and cleaner). Work one single crochet in each stitch across. At the end of the row, count your stitches. If you have 19, you are doing perfectly. If you have 18, you may have missed the last stitch. If you have 20, you may have accidentally added an extra stitch at the end. Turn and repeat until you have 15 rows.
Finishing
Once you reach the end of row 15, cut your yarn, leaving a 6-inch tail. Pull the yarn tail through the final loop on your hook and pull tight to knot it. Use your yarn needle to weave the loose ends back and forth through the stitches on the back side of the swatch, then trim the excess.
Step-by-Step Tutorial Explanation
When you sit down to start, don’t worry about the final product. Focus entirely on the “V” shapes. When you look at your finished row of single crochet, you will see a series of little “V”s looking up at you from the top of the work. Each “V” is one stitch. To stay consistent, always put your hook under both legs of that “V.”
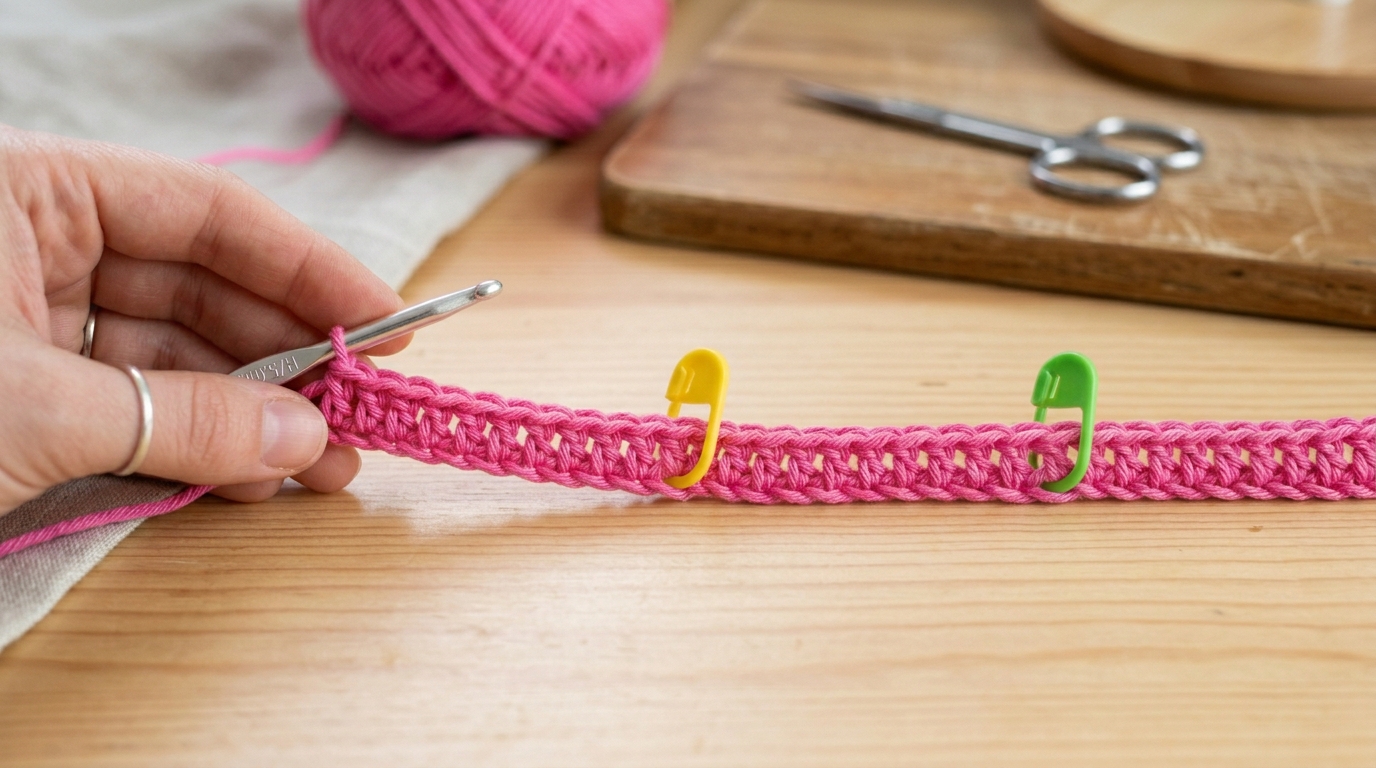
If you find yourself losing count, use your stitch markers. Place one at the first stitch of the row and one at the last stitch of the row. This acts as a visual guide so you know exactly where to start and where to finish, preventing those pesky accidental increases or decreases that cause “wavy” edges.
Common Mistakes to Avoid
The most common mistake is the “missing end stitch.” At the end of a row, the very last stitch can often look like it is leaning or pulling away, and beginners frequently skip it. This leads to a triangle-shaped piece of fabric rather than a rectangle. Always count your stitches at the end of every row.
Another pitfall is using an incorrect hook size for your yarn. If you use a hook that is too small for the yarn, your fabric will be stiff and hard to work into; if the hook is too big, your stitches will be loose and gap-filled. Stick to the recommendations on the yarn label or the project notes.
Pro Tips for a More Beautiful Result
The secret to professional-looking crochet is the “tension test.” If your swatch is curling at the edges, your tension might be inconsistent. Many crocheters find that after they finish a project, a technique called “blocking” solves this. To block your swatch, lay the finished piece on a damp towel, gently pin it into a crisp rectangle, and let it air dry completely. This relaxes the fibers and makes the stitches look uniform and elegant.
For weaving in your ends, try to go at least two inches in one direction, then change direction and go back again. This “locking” technique ensures that your ends will never unravel, even after years of washing and use.
Variations and Personalization Ideas
Once you have mastered this basic stitch, you can personalize your work endlessly. Swap your yarn for a variegated (multi-colored) yarn to create a playful striped effect without having to change balls of yarn. Or, try using a slightly thicker yarn with a larger hook to create a super-chunky textured coaster for your coffee table. You can also experiment with “working in the back loop only” on every other row to create a ribbed, sophisticated texture that looks much more advanced than it actually is.
Care Instructions
Since we used cotton yarn for this tutorial, your swatch is very durable! You can machine wash it in cool water on a gentle cycle. For the best longevity, I recommend laying the piece flat to dry. Avoid using fabric softeners, as they can coat the fibers and make the cotton less absorbent over time.
FAQ
Why does my crochet project look like a triangle?
This usually happens because you are missing the first or last stitch of each row. Make it a habit to count your stitches after every single row to ensure you have the same number you started with.
How do I know if my tension is too tight?
If your fingers hurt, you are likely gripping the hook too firmly or pulling your yarn too hard. Try to maintain a loose, relaxed grip. If you can barely push your hook through the stitch, your tension is too tight.
Do I have to weave in my ends?
Yes! It is the most important part of finishing your project. If you just trim the ends, your hard work will unravel. Weaving them in creates a secure anchor.
What is the purpose of the turning chain?
The turning chain serves as a “step up.” It gives your hook enough height to move from the end of one row to begin the next at the same level, preventing your work from bunching or pulling at the edges.
Can I crochet if I am left-handed?
Absolutely! The instructions are identical, just performed from the opposite side. You can even find mirror-image videos online if you find that following a “right-handed” tutor is confusing your brain.
Conclusion
Congratulations! You have just completed your first crochet class. Whether your swatch is perfectly square or a little wonky, you have successfully completed the fundamental steps of building, turning, counting, and finishing. Keep this swatch. It is not just a piece of yarn; it is a souvenir from the day you started a lifetime of creativity.
Crochet is a skill that grows with you. As you get more comfortable, you will find yourself noticing the structure of sweaters in stores or admiring the stitches on a baby blanket in a park. Don’t be afraid to experiment, make mistakes, and unravel your work to try again. That is exactly how the best designers learn. I encourage you to save this tutorial and return to it whenever you need a refresher. You are now officially a part of a beautiful community of crafters, and the possibilities for what you can create from here are truly endless. Happy hooking!