
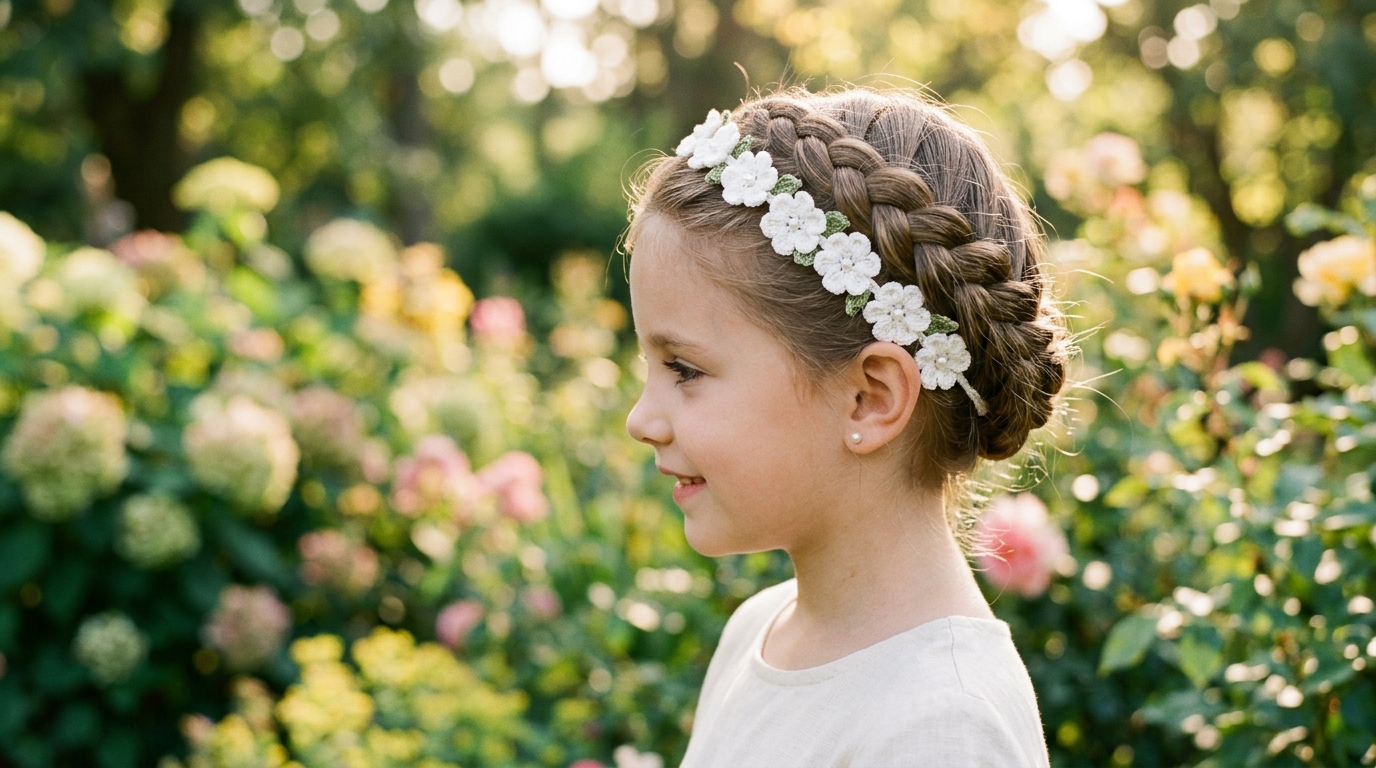
Introduction
There is something undeniably magical about wearing an accessory you have crafted with your own two hands. Whether you are looking to pull your hair back for a busy morning of errands, add a touch of whimsy to a favorite outfit, or create a thoughtful, handmade gift for a friend, crochet hair accessories are the perfect solution. They are small, portable, and incredibly rewarding to make. For the beginner, they offer a low-stakes way to practice new stitches and refine your tension. For the intermediate crocheter, they provide a canvas for experimentation with textures, beads, and delicate yarn weights.
Making your own headbands and clips allows you to move beyond the mass-produced options found in big-box stores. You choose the colors that make your heart sing and the fibers that feel softest against your skin. This guide is designed to walk you through the process of creating beautiful, functional hair accessories that won’t just sit in a drawer—they will become a staple of your wardrobe. We will cover everything from selecting the right materials to finishing techniques that ensure your creations are durable enough for daily wear. Grab your favorite hook, settle into a comfortable chair, and let’s explore the lovely world of handmade hair accessories together.
Quick Overview
This guide is designed for anyone with a basic knowledge of crochet who wants to expand their accessory repertoire. It includes a foundational pattern for a classic, beginner-friendly twisted headband, as well as instructions for creating versatile hair clips.
- Skill Level: Beginner-friendly.
- Estimated Time: 1 to 2 hours per project.
- Finished Size: Customizable for all head sizes and hair thicknesses.
- Best Use: Perfect for everyday wear, seasonal gifting, and using up those precious mini-skeins of yarn in your stash.
- Why You Will Love It: These projects are quick gratification, highly personal, and offer a wonderful opportunity to play with color combinations and yarn textures.
Materials and Tools Needed
To create professional-looking hair accessories, having the right tools on hand makes all the difference. While crochet is a simple craft, the details are in the preparation.
- Yarn: For headbands, a soft cotton or bamboo blend is ideal because it is breathable and gentle on the hair. For clips, you can use almost anything—sport weight or fingering weight yarn works beautifully to keep the clips lightweight.
- Crochet Hooks: A range of hook sizes is helpful. Typically, a size G/6 (4.0mm) or H/8 (5.0mm) works well for most medium-weight yarns.
- Hair Hardware: You will need metal hair clips (alligator clips or snap clips) and, optionally, a bit of felt or ribbon for backing.
- Essential Notions: A tapestry needle for weaving in ends, a pair of sharp embroidery scissors, and stitch markers to keep your work organized.
- Adhesive: A strong, clear-drying fabric glue (like E6000 or a high-quality hot glue gun) is essential for securing your crochet pieces to the clips.
Crochet Terms and Stitches
We will be using standard U.S. crochet terminology. Familiarizing yourself with these terms will make the process smooth and enjoyable.
- Chain (ch): The foundation for your work.
- Single Crochet (sc): A compact, sturdy stitch perfect for durability.
- Half Double Crochet (hdc): Offers a little more height and drape than a single crochet.
- Slip Stitch (sl st): Used for joining rounds or creating decorative edges.
- Fasten Off: The process of cutting your yarn and pulling the tail through the final loop to lock your work.
- Weave in Ends: Using a tapestry needle to hide your yarn tails back into the fabric, ensuring they stay secure and invisible.
Helpful Notes Before You Start
Crochet accessories should be comfortable. If a headband pulls too tightly, it causes headaches; if it is too loose, it slips off. Always measure your head—or the intended recipient’s head—before finishing your headband. If you are using wool, remember that it has natural “give,” whereas cotton is more structured and holds its shape better over time. When working on hair clips, keep your stitches tight. You want the crochet motifs to be dense so they hold their shape and don’t become floppy or distorted when glued to the metal base.
The Twisted Headband Pattern
This pattern is a fan favorite because of its elegant, sophisticated look, yet it is simple enough to execute while watching your favorite show.
- Finished Size: Adjustable; typically 20–22 inches.
- Yarn: Worsted weight (approx. 80–100 yards).
Part 1: The Foundation
Chain 12 (or any even number desired for width).
Row 1: Half double crochet in the third chain from the hook and in each chain across. Turn.
Row 2: Chain 2 (counts as first hdc here and throughout), hdc in each stitch across. Turn.
Part 2: The Body
Continue working in rows of hdc until the piece reaches roughly 18 inches, or 2 inches shorter than your desired total head circumference. Because we are making a twisted style, we will split the work.
Part 3: The Split
When you reach the desired length, split your stitch count in half. If you have 12 stitches, work your next row across only the first 6 stitches. Continue working in rows until this “leg” is 4 inches long. Fasten off. Repeat this for the second set of 6 stitches.
Part 4: The Twist and Join
Take your two long “legs” and twist them once or twice through each other to create the knot effect. Align the ends of the legs back with the start of your headband, fold the original starting edge up, and sew or slip stitch the ends together firmly.
Creating Decorative Hair Clips
Hair clips are the ultimate stash-buster. You can crochet mini-flowers, simple circles, or leaves to glue onto standard metal hair clips.
Flat Circular Motifs
Start with a magic ring or chain 4 and sl st to the first chain to form a loop.
Round 1: Work 10 single crochet into the ring. Join with a sl st to the first sc.
Round 2: Chain 1, work 2 sc into every stitch around. Join with a sl st. Fasten off, leaving a long tail for sewing or securing.
Finishing the Clips
Once you have your motif, apply a thin bead of fabric glue to the top of the metal hair clip. Carefully press your crochet motif onto the glue. For a professional finish, cut a small circle of felt the same size as your crochet piece and sandwich the metal clip between the felt and the crochet piece, gluing all parts together. This covers any sharp metal edges and protects the hair.
Step-by-Step Explanation
For the headband, the magic happens when you do the “split.” Don’t be intimidated! It is just like working a small, narrow rectangle and then repeating it. Once you fold those two legs, the twist forms naturally. If it looks a little messy during the assembly, don’t worry—a bit of steam blocking or adjusting the knot with your fingers will make it look polished.
For the clips, the goal is to create a flat, dense surface. If your circle is curling, increase your stitch count in the next round. If it is ruffling (like a potato chip), you have too many stitches; try skipping an increase in the next round. These are tiny projects, so you can easily pull them out and try again without losing much yarn.
Common Mistakes to Avoid
- Ignoring Tension: When making headbands, it is easy to crochet very tightly, resulting in a headband that is too small. Check your gauge by measuring your work against a headband you already own.
- Using Stretching Fibers: For hair accessories, avoid very stretchy acrylics, as they can “grow” and become loose after a few wears. Cotton and blends are superior for structural accessories.
- Forgetting to Secure Ends: Hair accessories are handled frequently. If you don’t weave in your ends securely, your hard work will unravel. Use a drop of fabric glue or fray-stop liquid on your final knot to be extra safe.
- Leaving Metal Exposed: Always use a felt backing on your clips. It prevents the metal from snagging or pulling on hair, which is a major comfort factor.
Pro Tips for a Better Result
- Blocking is Your Best Friend: Even small accessories benefit from blocking. Once finished, dampen your headband and pin it flat to the dimensions you need. This sets the stitches and ensures it looks professional.
- Customization: Add a button, a sew-on pearl, or a bow decoration to the center of your headbands to make them thematic.
- Color Theory: If you are a beginner, stick to monochromatic palettes or neutrals until you feel comfortable with the stitches. If you are intermediate, try mixing a variegated yarn with a solid to highlight the texture of your stitches.
- Tool maintenance: Keep your crochet hooks smooth. If you have an old metal hook that has a nick in it, it will snag the delicate yarn often used for hair accessories.
Variations and Personalization
Transform these basic patterns into seasonal treasures! Use sparkling metallic yarn for a holiday party, pastel cottons for a spring brunch, or deep, rich wools for a cozy winter aesthetic. For baby shower gifts, consider making mini-headbands. Just reduce the starting chain length to accommodate a smaller head circumference and use a super-soft, baby-safe yarn like bamboo or organic cotton. The sky is the limit, and using these patterns as a base allows you to experiment endlessly.
Care, Storage, and Next Steps
To keep your handmade hair accessories looking fresh, hand wash them in cool water with a gentle detergent. Do not wring them out; instead, lay them flat on a towel and roll the towel up to absorb excess moisture before laying the items flat to dry. Store your clips in a small tin or a jewelry box to keep them from getting crushed, and hang your headbands on a hook or keep them in a drawer where they won’t get tangled with other jewelry.
Your next step? Once you have mastered these, try experimenting with different stitch patterns for the headbands, such as the moss stitch or the shell stitch, to create a more textured, sophisticated look.
FAQ
How do I know if my headband will fit comfortably?
Measure your head circumference where you plan to wear the headband. Subtract 1 to 2 inches from that number to account for the natural stretch of the yarn.
What is the best yarn weight for hair clips?
Fingering weight (sock yarn) or sport weight is typically best because it creates small, lightweight motifs that won’t weigh down the clip or your hair.
How do I keep my hair clips from sliding out of my hair?
Using a bit of felt on the underside of your crochet motif provides friction, which helps the clip “grip” the hair better than plain metal would.
Can I machine wash my crochet headbands?
It is not recommended, as the agitation can distort the stitch definition. Hand washing is the safest way to maintain the shape and quality of your handmade accessories.
Why does my crochet circle look like a ruffle?
This happens when there are too many stitches in a round. You have created a slight “wave.” Try removing a few increases in the outer rounds to flatten the piece out.
Conclusion
Creating your own hair accessories is a delightful way to add a bit of handmade charm to your daily life. Whether you’ve just picked up a crochet hook for the first time or you’ve been stitching for years, I hope this guide has inspired you to create something beautiful for your hair. These projects are more than just items to be worn; they are expressions of your creativity and a testament to the time you’ve invested in your craft. Remember, every stitch you make is part of the learning process, and there is no such thing as a “perfect” project—only a piece that reflects your unique touch and style. Enjoy the process, wear your creations with pride, and keep on stitching!