
Introduction
There is something deeply satisfying about carrying a handbag you’ve crafted with your own two hands. Crochet bags are a beautiful blend of artistry and utility, allowing us to express our personal style through texture, color, and stitch patterns. However, many crocheters find that the most challenging part of the process isn’t the stitches themselves—it’s the finishing touches. Have you ever spent hours on a stunning market bag only to realize the handles felt flimsy or stretched out after just one trip to the grocery store?
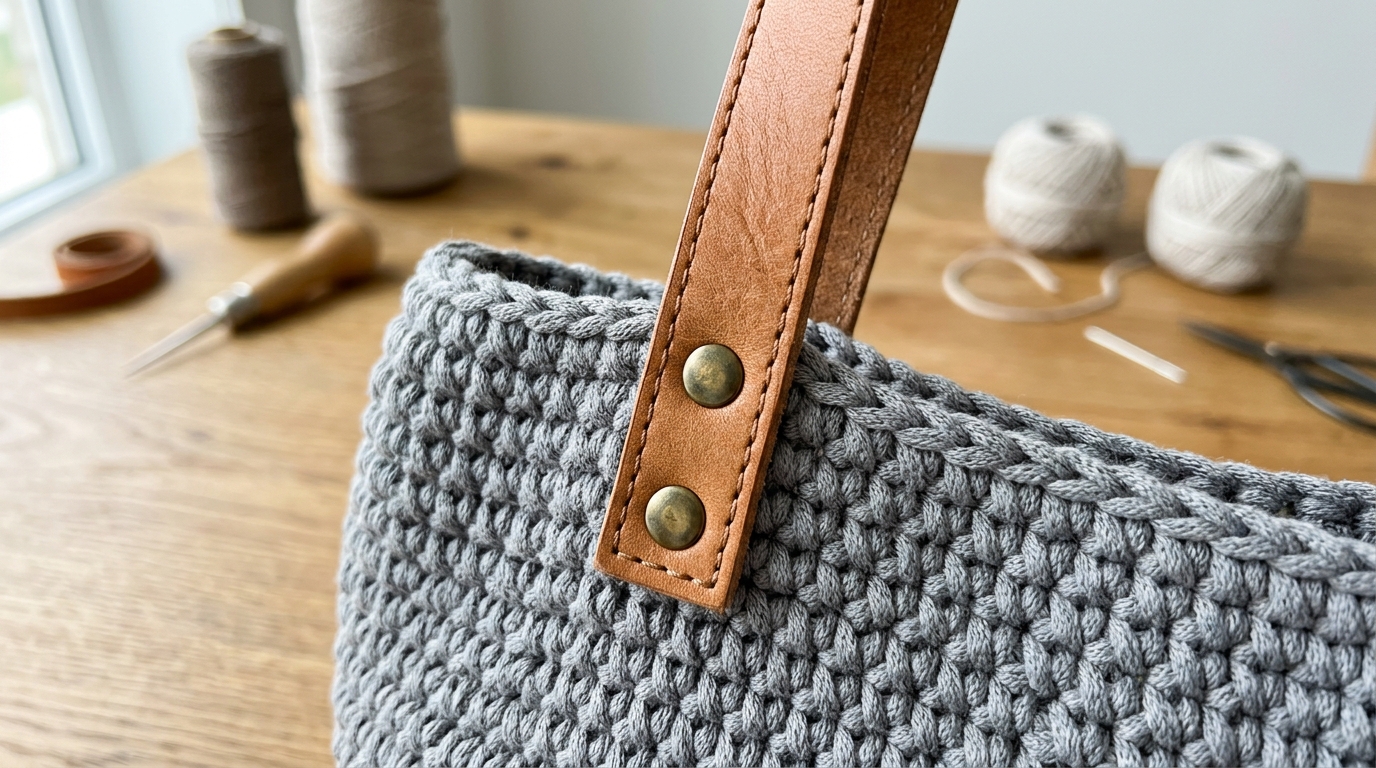
The secret to a professional-looking, durable crochet bag lies in how you attach your handles. Specifically, using high-quality leather handles can instantly transform your project from a “homemade” craft into a boutique-quality accessory. Leather provides the necessary strength to prevent sagging and adds a sophisticated, feminine touch that elevates the entire aesthetic. Whether you are a beginner looking to assemble your very first tote or an intermediate pro refining your finishing techniques, this guide will walk you through the process of choosing, preparing, and securely attaching leather handles to your crochet creations. We will focus on methods that ensure longevity, protecting your hard work so you can reach for your favorite handmade bag for years to come.
Quick Overview
This guide is designed for any crocheter who wants to take their accessories to the next level. We will be focusing on the structural integrity of bag making, specifically how to bridge the gap between textile materials and leather hardware.
- Who this is for: Both beginners wanting to avoid common pitfalls and intermediate crafters looking for professional finishing techniques.
- What you will learn: Selecting the right hardware, preparing your crochet work for hardware, and the most reliable hand-sewing techniques for securing leather to yarn.
- Why it matters: Proper attachment prevents the yarn from tearing under weight and ensures the handle stays centered and aligned, giving your handbag a polished, expensive look.
Tools and Materials Needed
To attach leather handles successfully, you need the right tools to navigate the different textures of leather and fiber.
- Leather Handles: Look for “sew-on” handles. These often come with pre-punched holes, which are a lifesaver for sewers and crocheters alike.
- Heavy-Duty Polyester Thread or Waxed Cord: Do not use standard cotton sewing thread, as it can snap under tension. Polyester or nylon threads are much stronger.
- Leather Needle or Heavy-Duty Tapestry Needle: If your leather handles have large, pre-punched holes, a dull tapestry needle may work. If the holes are very small, you will need a needle sharp enough to pierce through without struggle.
- Stitch Markers: Essential for holding the handles in place while you align them.
- Optional – Leather Punch: If your handles are not pre-punched, you will need a rotary leather punch tool to create clean holes.
- Optional – Fabric Glue or Clear Craft Cement: A tiny dab can help keep the handle from shifting while you sew.
Understanding Structural Integrity
Before you attach anything, it is vital to understand the “load-bearing” nature of your bag. Crochet, by its very nature, loves to stretch. When you fill a bag with items, the fabric hanging from the handles will inevitably elongate.
When attaching hardware, don’t rely on the yarn alone to hold the weight. You want to anchor the handles to a reinforced section of your bag. If your bag is worked in single crochet, you are in luck—this is the densest, most stable stitch. If your bag uses lacy or open-work stitches, you must add an internal lining or a reinforced “bridge” of tighter stitches where the handles will be attached.
Helpful Notes Before You Start
Always test-run your assembly on a scrap swatch. If this is your first time sewing through leather, do not start on your finished bag! Crochet a small rectangle using the same yarn and stitch pattern as your bag, and practice passing your needle through the leather holes and the stitches.
Ensure your yarn ends are thoroughly woven in and trimmed before you start the attachment process. You don’t want to accidentally catch a loose end in your sewing thread, which could pull on your stitches later. Finally, always attach your handles while the bag is empty and lying on a flat surface to ensure the alignment is perfectly centered.
Step-by-Step Guide to Attaching Handles
Preparing the Placement
Lay your finished bag perfectly flat. Use stitch markers to identify the exact center point on both the front and back of the bag. Measure from your side seams inward to ensure the handles are spaced evenly. It is helpful to mark the position of the leather holes with pencil marks or removable tailor’s chalk on your crochet fabric so you don’t lose your spot while handling the bag.
Sealing the Connection
If you are worried about the handle shifting, place a tiny, pin-head-sized dot of clear fabric glue on the back of the leather tab. Press it firmly against the crochet fabric. Give it a few minutes to set before you begin the actual sewing. This allows you to focus on your stitch tension without worrying about the handle moving an inch to the left or right.
The Sewing Technique: The Saddler’s Stitch
Thread your needle with a generous length of strong polyester thread. Secure your knot on the inside of the bag; you don’t want your knot visible from the outside.
Come up from the inside of the bag through your first pre-punched hole. Pass the needle through the crochet fabric, then back down through the same hole or into the next one. Use a “whip stitch” or a “backstitch” motion. Because you are sewing through crochet, you want to aim for the “legs” of the stitches rather than just the gaps. Going through the physical yarn fibers of your crochet work provides much more structural support than simply looping through the spaces between stitches.
Reinforcing the Stress Points
Each handle has at least two or four holes. Make sure you pass through each hole at least two or three times. After the final pass, bring your needle back through to the inside of the bag. Tie off with a sturdy double knot that sits flush against the fabric, then weave the remaining ends back through the inner layers of the crochet for a clean finish.
Common Mistakes to Avoid
Even experienced crocheters can run into trouble when combining materials.
- Wrong Hook Size initially: If your bag fabric is too loose or stretchy, no amount of careful sewing will stop the handle from pulling the stitches apart. When making a bag, always go down one or two hook sizes smaller than your yarn recommendation suggests to create a dense, firm fabric.
- Stretching the Handle: Resist the urge to pull the leather handles tight while pinning. If you stretch the leather while attaching it, the bag will look puckered once it rests. Let it lay naturally.
- Using too much glue: A little goes a long way. Too much glue can seep through the crochet stitches, leaving a shiny or sticky residue on the front of your beautiful work.
- Ignoring Thread Weight: Standard sewing thread is meant for light fabrics. Using it for a leather handle attachment on a heavy bag will lead to broken threads and a snapped handle. Always opt for heavy-duty upholstery thread.
Pro Tips for a Better Result
The biggest pro tip for a flawless finish is adding a lining. A simple cotton lining can take the weight of your items off the crochet stitches entirely. If you have the lining sewn in before you attach the leather handles, you can sew through the crochet and the lining simultaneously. This sandwiches the yarn between the leather and the fabric liner, creating an incredibly strong, professional anchor point that will not sag under pressure.
Additionally, always match the color of your sewing thread to the leather, not the yarn. If your leather handles have dark brown tabs, use dark brown thread. This creates a seamless look where the sewing becomes part of the leather’s design rather than a distracting contrast.
Personalization Ideas
Leather handles come in a staggering array of styles. For a bohemian, summer-ready bag, look for tan or cognac-colored leather. For a sleek, professional aesthetic, black leather handles on a charcoal or navy blue crochet bag look sophisticated and timeless.
If you want to get creative, consider “wrapped” handles. You can take matching yarn and whip-stitch it around the leather handle itself, or add a small leather tassel to one of the rings that attaches the handle, giving the bag a touch of movement. You can also mix metals—if your leather handles have gold hardware, consider adding gold-tone stitch markers or a metal label tag to the front of your bag to tie the look together.
Care and Storage
Leather is a natural material, which means it requires different care than your yarn. If you get your bag wet, ensure you dry the leather thoroughly but away from direct heat sources like radiators, which can make the leather brittle. If you need to wash your crochet bag, it is best to use removable handles if possible. If they are permanently attached, spot clean the yarn with a damp cloth and mild soap, being very careful to wipe the leather dry immediately. For long-term storage, stuff your bag with tissue paper to help it keep its shape and store it upright in a dust bag to keep the leather soft and dust-free.
FAQ
Can I attach leather handles to a bag that is already finished?
Yes, absolutely! As long as the fabric at the top of your bag is dense enough to hold the weight, you can sew on handles at any point. If the top edge feels too loose, you might want to add a row of single crochet or a slip-stitch surface crochet edge around the rim first to firm it up.
Do I need a special machine to sew leather?
For the purpose of attaching pre-punched handles, you generally do not need a machine at all. In fact, hand-sewing is often superior because you have more control over the tension and can ensure the needle passes through the exact center of your crochet stitches.
What if my handles don’t have holes?
If you have handles without pre-punched holes, you can use a leather punch tool to create them. Alternatively, if the leather is very thin, a sharp needle may be able to penetrate it, but a punch is always safer to prevent the leather from tearing.
How do I know if my bag is strong enough for leather handles?
If you can pull on the top edge of your bag and it stretches significantly, it’s not strong enough to support a heavy handle on its own. You should either reinforce the edge with a non-stretch fabric ribbon hidden on the inside or add a full fabric lining.
Is there a specific type of yarn that works best for bags?
Medium-weight cotton yarns (worsted weight) are the gold standard for bags because they have very little stretch. Acrylic yarns look beautiful, but they tend to “grow” when heavy items are placed inside, so keep that in mind if you choose to use them!
Conclusion
The transition from a simple crochet project to a professional handmade accessory is all in the details. By taking the time to carefully secure your leather handles, you aren’t just finishing a project—you are investing in the longevity and functionality of your work. Don’t be intimidated by the idea of sewing through leather; with the right needle, strong thread, and a little patience, you will find that the process becomes one of the most rewarding parts of the craft.
As you move forward with your next handbag, remember that every stitch matters, but the way you finish your piece tells the world exactly how much love—and skill—you put into it. Keep practicing, try different handle styles, and don’t be afraid to add those personal touches that make your bag entirely your own. Your beautiful, handmade, and perfectly finished bag is ready to be shared with the world. Happy crocheting!