
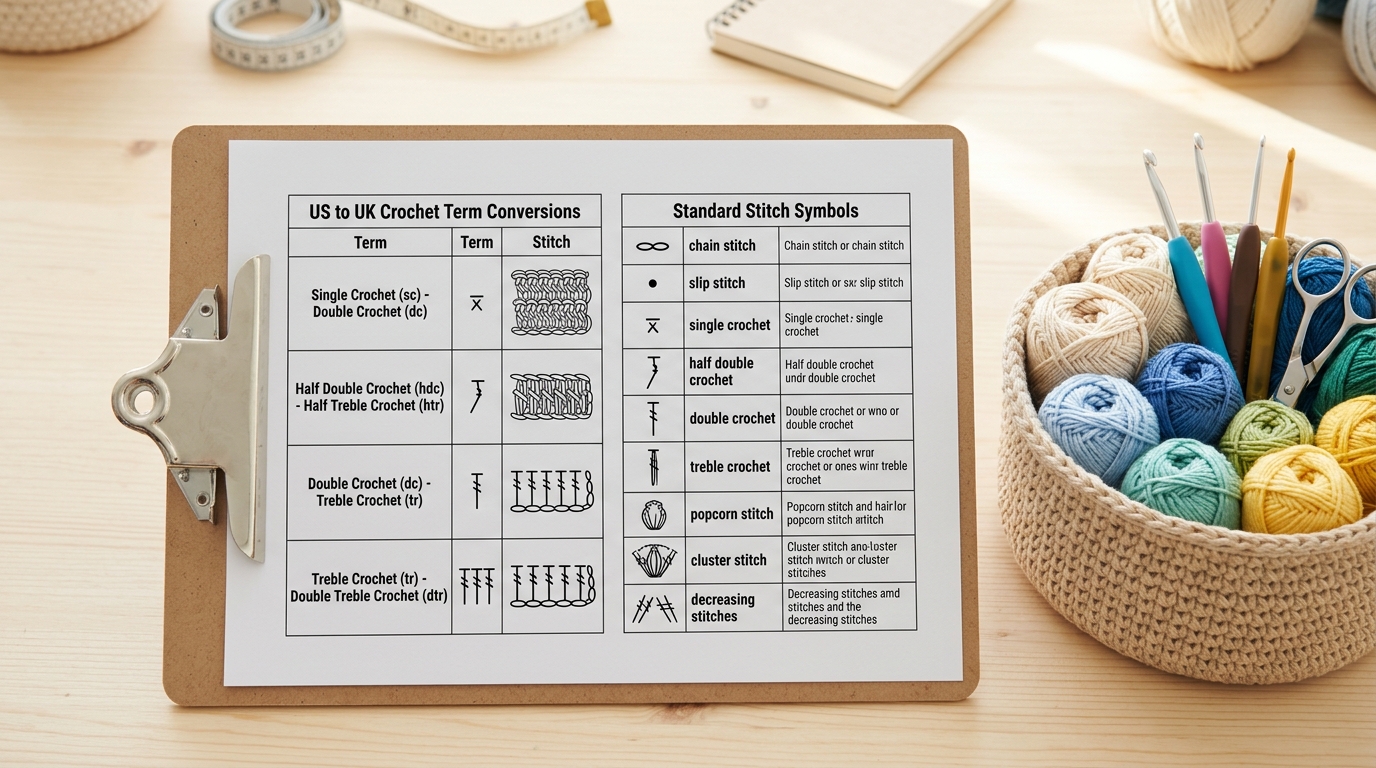
There is something truly magical about sitting down with a soft skein of yarn and a crochet hook, ready to transform a simple thread into something beautiful. Whether you are a curious beginner picking up a hook for the first time or a seasoned maker looking to refine your craft, there is a universal language we all speak: the language of stitches. Many crocheters find themselves overwhelmed when switching between patterns from different designers, especially when faced with conflicting abbreviations or the dreaded alphabet soup of design terminology. That is exactly why I wanted to put together this comprehensive guide—a digital “cheat sheet” designed to bring clarity, confidence, and a touch of joy to your crochet practice.
Having a reference guide at your fingertips is like having a helpful friend sitting beside you on the couch, ready to assist whenever you get stuck on a tricky row or wonder if your stitch count is correct. Not only will we walk through a lovely, foundational project today, but we will also demystify the symbols and conversions that often trip up even the most talented crafters. You deserve a seamless experience, and this guide is created to ensure your time spent hooking is as relaxing and rewarding as possible. Let’s dive into a project that serves as the perfect canvas for practicing your technique: The “Cozy Hearth” Textured Mug Rug.
Quick Project Overview
This project is designed for everyone—from the student who just mastered the chain stitch to the pro looking for a meditative 30-minute make.
- Skill Level: Beginner-Friendly
- Estimated Time: 30–45 minutes
- Finished Size: Approximately 5” x 5”
- Best Use: Use this as a coaster for your daily coffee, a thoughtful handmade housewarming gift, or even a swatch to test your tension.
- Why You’ll Love It: It uses basic stitches combined in a way that creates a beautiful, dense texture that is both professional in appearance and incredibly sturdy.
Materials Needed
To create this mug rug, you will need a few simple supplies that you likely already have in your stash:
- Yarn: Approximately 30 yards of Worsted Weight (Category 4) cotton yarn. Cotton is preferred for coasters because it is absorbent and holds its shape well.
- Crochet Hook: Size H/8 (5.0mm) for a nice, tight tension.
- Tapestry Needle: For weaving in ends securely.
- Scissors: Any sharp pair will do.
- Optional: A small wooden tag or a bit of leather ribbon to finish it off for gift-giving.
Stitches and Abbreviations
Before we start, let’s get comfortable with the abbreviations you will see throughout our pattern. We use standard U.S. terminology:
- ch (chain): Bring the yarn over the hook and pull through the loop.
- sc (single crochet): Insert hook into the next stitch, yarn over, pull up a loop, yarn over, and pull through both loops on the hook.
- hdc (half double crochet): Yarn over, insert hook into the stitch, yarn over, pull up a loop, yarn over, and pull through all three loops on the hook.
- sl st (slip stitch): Insert hook into the stitch, yarn over, pull up a loop, and pull that loop directly through the existing loop on your hook.
- st(s) (stitch/stitches): The collective term for where you place your work.
Pattern Notes Before You Start
Crochet is a craft of rhythm. Before you begin, spend a moment focusing on your tension. If you hold the yarn too tightly, your stitches will be difficult to work into on the next row; if you hold it too loosely, your “fabric” will look saggy. Aim for a tension that allows your hook to pass through smoothly without tugging or fighting against the chain.
For beginners, I recommend using a light-colored yarn for your first attempt. It makes it much easier to see where your hook should go and helps you identify your stitch count at the end of each row.
Full Crochet Pattern
This pattern is worked in rows, starting with a foundation chain. We will be alternating stitches to create a “moss stitch” variant that offers a beautiful, squishy texture.
Part 1: The Foundation
Start by leaving a 4-inch tail to weave in later. Make a slip knot and place it on your hook. Chain 18. This will give you a square base.
Part 2: Working the Rows
Row 1: Skip 2 chains. Place one hdc into the 3rd chain from your hook. Continue placing 1 hdc in every chain across until the end. You should have 16 hdc stitches. Chain 1 and turn.
Row 2: Insert your hook into the first stitch. Work a single crochet (sc) into the same space. In the next stitch, work a half double crochet (hdc). Repeat this [sc, hdc] sequence all the way across the row. The row will end with an hdc. Chain 1 and turn.
Rows 3 through 12: Repeat Row 2. Because you are alternating the height of your stitches within the row and from row-to-row, the fabric will gain a gorgeous, nubby texture that feels lovely under a mug of tea.
Part 3: Finishing
Once you have reached your desired size (square it up by holding it periodically to check the dimensions), fasten off your yarn. Leave a tail at least 6 inches long so you can secure it properly. Use your tapestry needle to weave the tail through the back of the stitches, traveling in opposite directions to ensure it doesn’t unravel with use.
Step-by-Step Tutorial Explanation
When you look at your finished piece, notice how the stitches stack. The hdc adds height and bulk, while the sc pulls the fabric back down, creating a ripple of texture. If you were getting confused during the process, it is usually because of the “turning chain.” Remember: in this pattern, our chain-1 at the end of the row is simply to give us height to reach the next row; it does not count as a stitch. You should always be working back into the very first stitch of the previous row. If your edges start to look staggered, you might be accidentally adding or skipping a stitch at the end of your rows!
Common Mistakes to Avoid
Even those of us who have been crocheting for decades have “oops” moments. Let’s talk about how to prevent them:
- The Twisted Chain: When you make your starting chain, ensure it isn’t twisted like a curly fry before you start your first row. This is a common issue that causes the foundation to curl permanently.
- Miscounting Stitches: Beginners often struggle to see the “last” stitch in a row, which is often hiding slightly under the turning chain. If you find your piece getting narrower, you are likely skipping the last stitch. Use a stitch marker on the first and last stitch of every row to keep your edges perfectly straight.
- The “Death Grip”: If your fingers hurt, you are holding the hook too tightly. Relax your shoulders. Crochet should be a form of stress relief, not a workout for your knuckles.
Pro Tips for a More Beautiful Result
A professional finish is all about the little details. First, always block your work. Even a simple mug rug benefits from a light steam or a gentle soak in water and a bit of wool wash, pinned flat to a towel until dry. This relaxes the fibers and makes the stitches look uniform and intentional.
When it comes to weaving in your ends, avoid cutting the yarn right at the base of the final knot. Weave it back and forth through at least three columns of stitches. This prevents the ends from popping out after you’ve washed the item a few times. Finally, if you want your color changes to look seamless, always change to your new yarn color during the final pull-through of the very last stitch of the previous row.
Variations and Personalization Ideas
The beauty of the “Cozy Hearth” pattern is its versatility. Want it to be a bit more feminine? Work the final row or round in a contrasting color and add a dainty shell stitch border (3 dc in one stitch, skip one, sl st in the next). Want a seasonal look? Use forest greens and deep reds for a Christmas theme, or soft pastels for a spring-inspired baby gift. You can even join several of these together after making a batch to create a larger table runner or a unique, textured pillow cover.
Care Instructions
Since this project is ideally made with cotton, it is quite durable. To keep it looking fresh, I recommend hand washing it in cool water with a gentle detergent. Do not wring it out; instead, lay it flat on a dry towel, roll the towel up to squeeze out the excess moisture, and then reshape the square. Lay it flat to dry completely. Avoid using bleach, which can compromise the fibers and fade your beautiful color choices.
FAQ
How do I know if my tension is correct?
Check to see if your stitches look like the photos in the pattern. If you see large, gaping holes between stitches, your tension is likely too loose. If the fabric is stiff and curls up like a potato chip, your tension is too tight.
What is the most important conversion to know for U.S. versus UK patterns?
The most vital difference is the terminology. A UK double crochet is actually a U.S. single crochet. Always check the terminology key at the beginning of any pattern before diving in!
How do I fix a mistake I made three rows ago?
The best way is to “frog” your work (rip it out). Unpick your stitches until you reach the mistake, place your hook back into the active loop, and continue from there. It feels frustrating, but it is much better than finishing an item you aren’t proud of.
Is it necessary to use a stitch marker?
While not strictly required, stitch markers are a lifesaver. They help you keep track of where a row begins and ends, which is essential for maintaining a clean, straight edge on your projects.
Can I change the hook size to make the coaster larger?
Absolutely! If you go up a hook size, you will get a airier, larger fabric. If you go down a hook size, your fabric will be denser and smaller. It is the easiest way to customize a project without changing the actual pattern instructions.
Conclusion
I hope this guide has given you the confidence to pick up your hook and jump into your next project with a smile. Whether you successfully complete this mug rug or simply feel more empowered to read your patterns, remember that every stitch is a step forward in your journey as a crafter. Crochet is more than just making finished objects; it is about the quiet, meditative time you carve out for yourself in a busy world. I would love to hear how your mug rug turns out—keep those hooks moving and your needles busy, and don’t forget to save this guide for the next time you need a quick refresher. Happy hooking!