If you’re struggling with loose or messy crochet circles, the magic ring crochet tutorial is exactly what you need right now. This simple technique is the foundation for clean, tight, professional-looking circular crochet projects.
In just a few steps, you can completely transform how your crochet pieces begin—and achieve perfect results from the very first stitch.
What Is the Magic Ring in Crochet (And Why It Matters Immediately)
The magic ring (also called magic circle or adjustable ring) is a beginner-friendly technique used to start crocheting in the round. Instead of leaving a visible hole at the center of your work, it allows you to tighten the starting loop completely.
This is especially important for:
- Amigurumi (crochet toys)
- Hats and beanies
- Coasters and placemats
- Granny squares started in the round
- Any circular crochet pattern
Without the magic ring, your project often starts with a gap in the middle. With it, you get a tight, professional finish instantly.
Why This Technique Is Going Viral Now
The reason the magic ring crochet tutorial is trending is simple: more beginners are entering crochet through short-form videos and YouTube tutorials. They quickly realize that starting correctly is the difference between frustration and beautiful results.
This technique has become essential because:
- Crochet content is booming on social platforms
- Beginners want fast visual wins
- Amigurumi toys are highly popular
- People prefer clean, aesthetic handmade results
Materials You Need
One of the best parts of this technique is that it requires almost nothing.
Materials:
- Yarn (medium weight recommended for beginners)
- Crochet hook (matched to yarn size)
- Scissors
- Optional: stitch marker
No special tools, no expensive equipment—just basic crochet supplies.
Step-by-Step Magic Ring Crochet Tutorial
The magic ring crochet technique may look tricky at first, but once you understand the movement, it becomes automatic.
Step 1: Create a loop with your yarn
Wrap the yarn around your fingers to form a loose circle. The working yarn should be on top, and the tail end should hang freely.
This loop is the foundation of your magic ring.
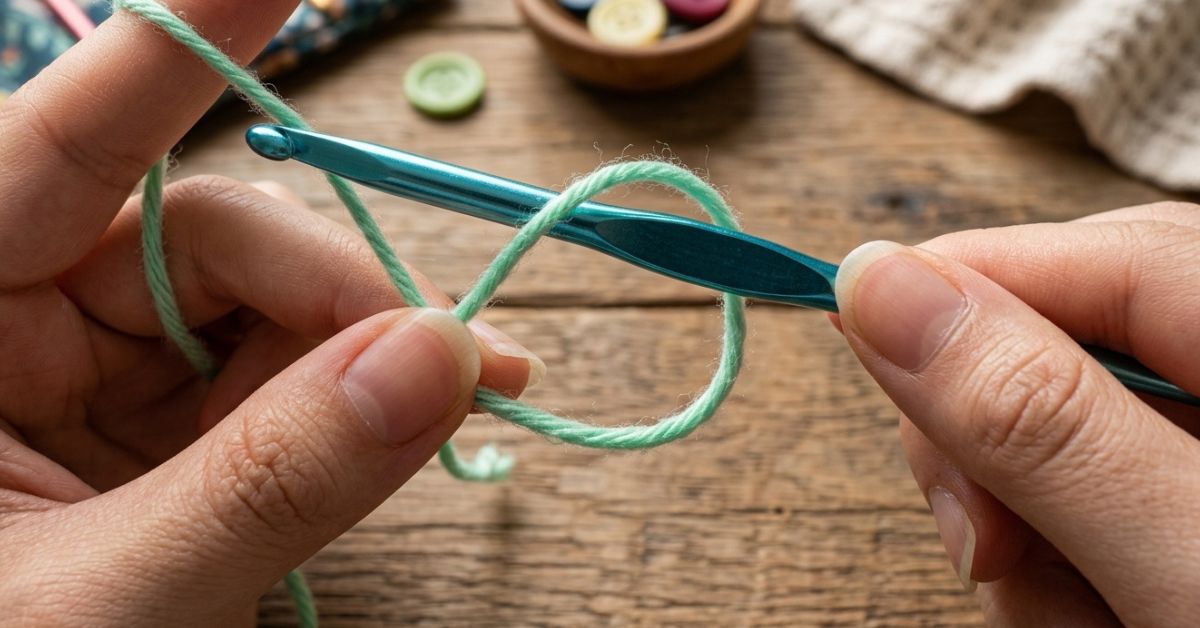
Step 2: Insert your hook into the loop
Slide your crochet hook under both strands of the loop. This is where your first stitch will begin.
Step 3: Yarn over and pull through
Grab the working yarn with your hook and pull it through the loop. You now have a base loop on your hook.
Step 4: Chain stitch to secure
Make one chain stitch to lock the loop in place. This stabilizes your starting point.
Step 5: Work your first stitches into the ring
Now crochet the required number of stitches (often 6 single crochet stitches in amigurumi patterns) directly into the loop.
This is where the magic happens—the structure begins forming tightly in the center.
Step 6: Pull the tail to close the ring
Gently pull the loose yarn tail. The loop will close completely, forming a tight center with no gap.
Common Mistakes Beginners Make
Even though the magic ring crochet tutorial is simple, beginners often face small issues that affect the final result.
1. Pulling the ring too early
If you tighten the loop before finishing stitches, your work may become uneven.
2. Not securing the first chain properly
This can cause the ring to loosen later.
3. Using slippery yarn
Some yarn types make it harder to maintain tension at the beginning.
4. Missing stitches inside the ring
Make sure all stitches are worked into the loop, not outside it.
Why the Magic Ring Gives Better Results
Compared to the traditional chain method, the magic ring offers a major upgrade in quality.
Here’s why experienced crocheters prefer it:
- No visible hole in the center
- Adjustable tension
- Cleaner stitch alignment
- Professional finish for handmade items
Once you master it, you’ll rarely go back to older starting methods.
Best Projects to Practice the Magic Ring
If you want to reinforce your learning, start with small projects.
Beginner-friendly ideas:
- Crochet coasters
- Small amigurumi balls
- Mini flowers
- Simple keychains
- Basic granny squares
These projects help you repeat the technique until it becomes natural.
Tips to Master the Technique Faster
To get comfortable with the magic ring crochet tutorial, consistency matters more than speed.
- Practice slowly at first
- Watch your tension carefully
- Repeat the steps at least 5–10 times
- Use thicker yarn for visibility
- Don’t rush the closing step
With repetition, your hands will learn the motion naturally.
Why Beginners Love This Method
The magic ring is often the “aha moment” in crochet learning. It transforms frustration into confidence because it immediately improves results.
Beginners love it because:
- It feels like unlocking a secret technique
- Results look instantly more professional
- It improves all circular projects
- It builds confidence quickly
Semantic Entities (Google Knowledge Graph Targets)
To strengthen topical relevance, include these related concepts:
- Crochet
- Amigurumi
- Yarn
- Single crochet stitch
- Circular knitting techniques
Final Thoughts
The magic ring crochet tutorial is one of the most important foundational skills in crochet. Once mastered, it opens the door to cleaner, more professional-looking projects and makes advanced patterns much easier to follow.
It may feel awkward at first, but with a few repetitions, it becomes second nature—and completely changes the quality of your work.
If you’re just starting your crochet journey, mastering this technique is one of the fastest ways to level up your skills instantly.