
There is a special kind of comfort found in the rhythmic movement of a crochet hook sliding through yarn. Whether you are curling up on the sofa on a rainy Sunday, waiting for an appointment, or enjoying a quiet moment while the kids are at school, having a project in your hands is like a warm hug for your creativity. But, as many of us know, memory can be a fickle thing. How many times have you stared at a pattern, blinked, and realized you’ve momentarily forgotten the difference between a half double crochet and a double crochet? We have all been there, and there is absolutely no shame in needing a quick reminder.
Keeping a set of reliable, printable basic crochet stitch references tucked inside your project bag is one of the best ways to nurture your confidence. It transforms a moment of frustration into an opportunity for growth, allowing you to focus on the joy of making rather than the anxiety of getting it “wrong.” This guide is designed to be your go-to companion, helping you master the foundational language of crochet so that you can tackle almost any pattern with a sense of ease and grace.
Quick Overview: Mastering the Basics
This guide is intended for both the absolute beginner who is just learning how to hold their hook and the seasoned intermediate crafter who wants to keep a handy reference for precision and polish. You will learn the essential U.S. crochet terms, how to execute the fundamental stitches, and why having a printed “cheat sheet” is a secret weapon for every fiber enthusiast. This information matters because the foundation of every intricate blanket, cozy sweater, or adorable amigurumi lies in the mastery of these simple, versatile stitches. By understanding these basics, you gain the freedom to experiment and customize your handmade projects.
What You Need to Know Before Starting
Before you begin printing out your own reference sheets or gathering your yarn, you should understand that crochet is a skill built entirely on repetition and muscle memory. You do not need expensive tools to start. A simple medium-weight (worsted/aran) yarn in a light, solid color is best for learning because it allows you to clearly see the “V” shapes of your stitches.
Have a set of crochet hooks in various sizes ready, and perhaps a small notebook or a few printed index cards where you can jot down your own notes. The most successful crocheters are those who treat their stitch guide not as a textbook, but as a living document. Feel free to add your own shorthand, reminder sketches, or tips that help your specific way of learning.
Essential Crochet Terms and Concepts
In the United States, we use a specific set of terminology. It is vital to learn these abbreviations, as they appear in virtually every pattern you will ever encounter.
The Foundation Chain (ch)
The foundation chain is the starting point for most flat projects. It creates the base row. Keep your tension relaxed here; if you chain too tightly, your foundation row will be smaller than the rest of your project, creating a “pull” at the bottom.
Slip Stitch (sl st)
This is the shortest stitch and is typically used for joining rounds, moving across a row without adding height, or creating decorative seams. It is essentially pulling the yarn through a loop without completing a full stitch.
Single Crochet (sc)
The workhorse of the crochet world. It is short, dense, and perfect for fabric that shouldn’t have too many gaps, such as amigurumi or sturdy home decor.
Half Double Crochet (hdc)
This stitch sits perfectly between the single and double crochet in terms of height. It is incredibly versatile and creates a slightly softer, more draped fabric.
Double Crochet (dc)
The most common stitch for blankets and clothing. It works up quickly and creates a beautiful, airy texture that is very forgiving for beginners.
Helpful Notes on Tension and Gauge
Tension, or how tightly or loosely you hold your yarn, determines the size and feel of your finished project. It is perfectly natural for a beginner’s tension to fluctuate. Do not worry if your first few rows look a bit uneven; that is just part of the learning journey. A pro tip is to use a slightly larger hook than the yarn label suggests if you tend to crochet tightly, or a smaller hook if your stitches feel loose and gappy. Always remember to check your gauge—that small 4×4 inch square—if you are making a garment, as it ensures your hard work results in a piece that actually fits.
Building Your Personal Stitch Library
To create your own printable cheat sheet, categorize your stitches by height and complexity. Your sheet should include clear, step-by-step instructions for each of the stitches mentioned above.
Structuring Your Printed Guide
- The Basics: List the abbreviations (ch, sl st, sc, hdc, dc).
- Turning Chains: Include a small note on how many chains you need to skip (e.g., “ch 1 for sc, ch 2 for hdc, ch 3 for dc”).
- The Anatomy of a Stitch: Briefly explain where to insert the hook: under both loops, through the front loop only, or through the back loop only. This is how you add texture to your work.
- Fastening Off: Include the steps to secure your last stitch so it doesn’t unravel when you cut the yarn.
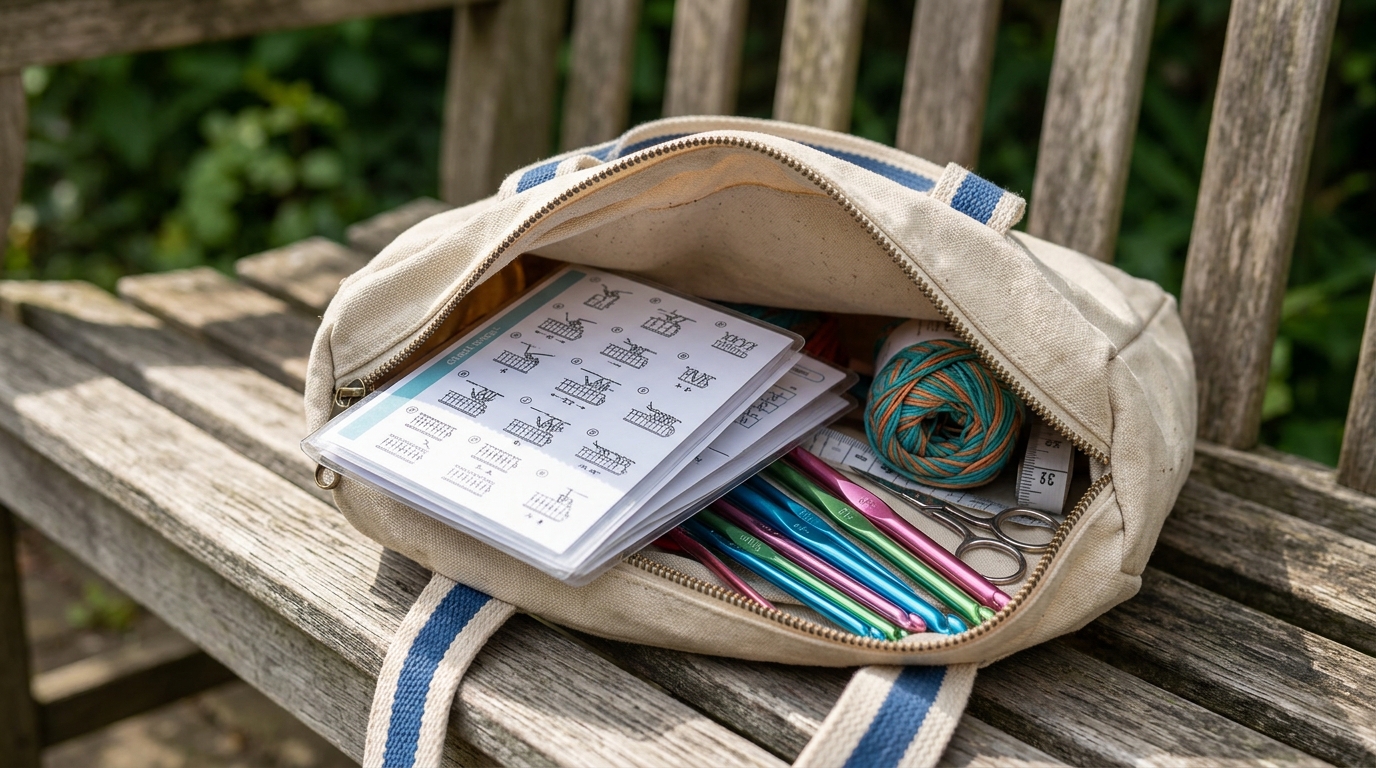
Having this information printed and laminated—or simply kept in a plastic sheet protector inside your bag—means you are never stuck in the middle of a project, wondering what comes next.
Step-by-Step Learning Stages
Learning to crochet is a marathon, not a sprint. Follow these stages to ensure you are building a strong foundation:
- The Chain Stage: Spend time just making long chains. Focus on consistency. If one loop is tiny and the next is gigantic, your finished edge will look messy.
- The Swatch Stage: Practice the single crochet. Work a row, turn, and work another row. This teaches you how to keep your edges straight.
- The Height Stage: Incorporate the half double and double crochet. You will notice that as the stitch gets taller, your hands need to adjust to maintain the yarn tension.
- The Completion Stage: Learn how to “weave in ends.” A project isn’t truly finished until those pesky tails are hidden securely within the stitches using a yarn needle.
Common Mistakes to Avoid
Even experienced crocheters make mistakes. Identifying them early saves hours of “frogging” (that’s when you pull out your stitches!).
- The “Twisted Chain” Trap: When working in cycles or joining a long chain for a hat, ensure your chain isn’t twisted before you join it. Lay it flat on a table to confirm the alignment.
- Miscounting Stitches: This is the most common error. Count your stitches at the end of every row. If you started with 20, you should end with 20.
- Confusing U.S. and U.K. Terms: This is vital. A U.K. double crochet is a U.S. single crochet. Always verify the origin of your pattern.
- The “Tight Foundation” Syndrome: As mentioned, avoid the urge to pull your starting chain tight. You can even use a hook one size larger just for the foundation chain to give it extra room.
Pro Tips for Polished Results
To elevate your crochet from “homemade” to “handmade with love,” focus on these finishing touches:
- Blocking: This is the most underrated step. Wet blocking—gently soaking your finished piece and pinning it into shape while it dries—completely transforms the look of the stitches. It makes lace look delicate and squares look crisp.
- Weaving in ends: Don’t just cut the yarn tail short. Weave it in several directions—up, down, and across—to ensure it stays hidden after the piece is washed.
- Mindful Color Choices: If you are a beginner, stick to lighter, solid colors until you feel confident reading your stitches. Dark navy or black yarn makes it nearly impossible to see where the hook is meant to go.
Variations and Personalization Ideas
Once you have your cheat sheet, you can start modifying your projects.
- Texture Additions: Instead of working through both loops, try working through the “Back Loop Only” (BLO). This creates a ribbed effect that is perfect for hat brims or sweater cuffs.
- Mixed Stitches: Combine a row of single crochet with a row of double crochet. This mixed-stitch technique creates a lovely, unique texture that looks like you’ve been crocheting for years.
- Seasonal Swapping: Change your color palette based on the time of year. Soft pastels for spring projects, deep, earthy tones for fall blankets, or vibrant reds and greens for holiday gift-giving.
Care and Storage for Your Handiwork
Your crochet items deserve to last. Most acrylic yarns are machine washable, but always check the care label on your yarn skein. For wool or cotton, hand washing in cool water with a gentle detergent is the gold standard. After washing, lay your item flat on a towel to dry; never hang wet crochet, as the weight of the water will stretch the yarn and distort your beautiful stitch work.
Store your printed cheat sheets in a dedicated project bag. Treat this bag like a treasure chest—keep your favorite hook, a pair of embroidery scissors, a few stitch markers, and your printed guides inside. When you feel the urge to create, everything will be ready at your fingertips.
FAQ
How do I know if I am holding the hook correctly?
There is no single “right” way, despite what you may have heard. Some people hold the hook like a pencil (knife grip), and others hold it like a spoon (pencil grip). The only correct way is the one that feels comfortable and doesn’t cause your hand or wrist to cramp.
Why is my crochet fabric curling?
Curling often happens because of tension issues—usually, your stitches are too tight in the foundation chain or the row ends. Try using a larger hook and consciously try to keep your hands relaxed rather than tense.
What is a stitch marker and do I really need one?
A stitch marker is a small clip that marks a specific point in your work. They are essential for beginners to mark the first and last stitch of a row, which helps prevent accidental increases or decreases. You will wonder how you ever managed without them!
How do I fix a mistake without undoing the whole project?
If you catch the mistake within a few stitches, you can “un-crochet” by pulling on the working yarn to remove the stitches one by one. If you notice a mistake several rows back, you will have to “frog” it. It can be heartbreaking, but it is part of the process. Think of it as refining your craft.
Can I really learn from a printed guide?
Absolutely. Pairing a printed reference of stitches with a simple video tutorial allows you to visualize the movement while having the technical information right by your side. It is the best way for kinesthetic and visual learners to find success.
Conclusion
Embarking on your crochet journey is an act of self-care. It centers the mind, provides a sense of accomplishment, and leaves you with something beautiful and tangible at the end of the day. Keep your printed stitch references handy in your project bag; consider them your personal anchors in the sea of creativity.
You don’t need to be perfect to be a great crocheter. You only need to be curious, patient, and willing to pick up the hook again. As your skills grow, those basic stitches will become second nature, and you will find yourself effortlessly weaving them into intricate patterns, heartfelt gifts, and cozy home comforts. Happy crocheting—may your tension be even and your stitches be joyful.