
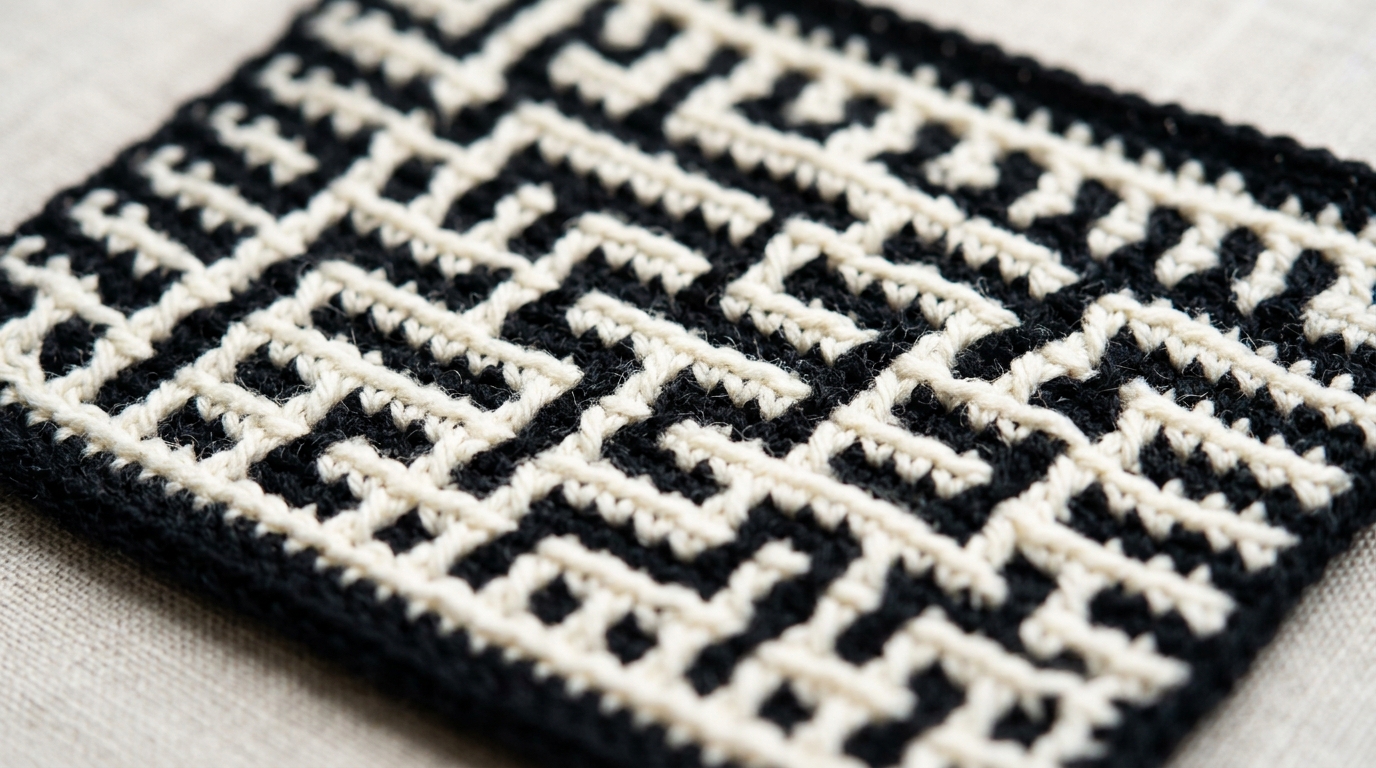
Mosaic crochet often carries a reputation for being an intimidating technique, reserved only for those who have been crocheting for years. You might have seen those gorgeous, geometric blankets on social media, featuring intricate patterns that look like they were woven on a loom or painstakingly crafted with multiple yarn carry-overs. It is easy to look at those beautiful designs and decide that mosaic colorwork is simply “too hard” or requires too many complex tools. I am here to share a secret with you: mosaic crochet is actually one of the most rewarding and straightforward ways to introduce vibrant patterns into your work without the headache of managing multiple balls of yarn at once.
If you have mastered the basic foundation of single crochet and double crochet, you have everything you need to begin. This technique relies on a clever, rhythmic placement of stitches that creates stunning visual interest using only one color per row. We are going to strip away the myths surrounding this style and focus on the clean, interlocking logic that makes it such a favorite among modern makers. Whether you are looking to spruce up your living room with a textured throw or simply want to add a sophisticated, handmade touch to your winter wardrobe, this guide will provide the foundation to help you feel confident and inspired. Let’s sit back, grab our favorite hook, and demystify this beautiful craft together.
Quick Overview
This guide is designed for intermediate crocheters or confident beginners who have moved past the basics and are looking to add colorwork to their skill set. You will learn the “inlay” philosophy of mosaic crochet, which involves working with one color at a time to create complex patterns. We will focus on the fundamental “drop-down” double crochet stitch, which is the heart of every mosaic design. By the end of this article, you will understand how to read a mosaic graph, how to manage your yarn tails, and how to maintain consistent tension to ensure your finished projects lie flat and look professional. This is an educational deep dive, so no full project pattern is required; instead, we are building a library of techniques you can apply to any mosaic chart you find in the future.
What You Should Know Before Starting
The beauty of mosaic crochet lies in its simplicity. Unlike tapestry crochet, where you carry multiple colors behind your work, mosaic crochet uses a method of highlighting stitches by working them into the row two levels below. Before you dive into your first real project, be sure you are comfortable with these core concepts. You will be alternating colors every two rows. This means you do not need to stress about carrying yarn; you simply fasten off at the end of each row. For those who dislike weaving in ends, this might sound daunting, but many crocheters use an “envelope border” or simply incorporate their tails into the border of the finished piece to keep things tidy.
Key Concepts and Stitches
In mosaic crochet, you are primarily working with standard U.S. terminology, but with a specific application.
The Foundation Stitch (Single Crochet)
Most mosaic designs start with a single crochet in the back loop only (BLO). This is essential because it leaves the front loop free. That free front loop will later act as the anchor point for your drop-down stitches.
The Anchor Stitch (Double Crochet)
This is the “magic” stitch. When a pattern calls for a specific color to show through, you will work a double crochet into the free front loop of a stitch two rows below. This stitch “covers” the color of the current row, creating the design.
Maintaining the Row
When you are moving across a row, you are essentially “skipping” stitches in the current row to make room for the double crochet stitches anchored below. If you have a cluster of three squares in a, say, white color on a black background, you will work your white double crochets into those specific spots, skipping over the black stitches that would have been there. It creates a smooth, clean color transition that is almost impossible to replicate with standard color-changing techniques.
Why This Technique Is So Effective
Mosaic crochet is highly practical for the home crafter. Because you are only using one strand of yarn at any given time, you do not have to deal with the bulk of extra yarn carried behind your project. This makes the finished fabric feel lighter and more flexible—perfect for blankets, scarves, or even decorative pillows. Furthermore, it is incredibly forgiving. If you make a mistake, it is easy to spot immediately because the geometric pattern won’t align. The binary nature of the stitches (either you work a single crochet or a double crochet) makes it very easy to keep your place.
Step-by-Step Learning Approach
To truly master this, I recommend starting with a simple swatch. Don’t jump straight into a large blanket. Creating a small 6-inch square will teach you more about the mechanics than any full-scale project ever could.
Preparing Your Chart
Mosaic patterns are traditionally read from right to left, bottom to top. Each square on the grid represents a stitch. When you see a symbol or a filled-in box, that is a cue to work a double crochet into the row below. If the box is empty, it is a cue for a simple single crochet.
The Two-Row Sequence
You will work two rows of the same color before switching. This is standard for most mosaic patterns. Row 1 sets the foundation, and Row 2 executes the design. By repeating this two-row cycle, you build up the pattern naturally.
Managing Your Yarn
Since you are fastening off every two rows, you will have plenty of yarn tails. Do not see these as a burden! I suggest leaving them about 6 inches long and working them into the border of your project later. This saves you from having to weave in ends for every single pair of rows, which is a major time-saver.
Common Mistakes to Avoid
Even the most seasoned crocheters encounter snags when learning mosaic colorwork. The most common mistake involves tension. Because you are working double crochet stitches into a row below, you have a tendency to pull them too tightly, which can cause your fabric to “bunch up.” Always ensure your double crochet is nice and loose so it doesn’t distort the row you are currently working on.
Another frequent pitfall is skipping the wrong number of stitches. In mosaic, if the chart says to work two double crochets, you must skip exactly two single crochet stitches in your current row. If you skip one or three, the entire pattern for that row—and the ones following it—will be misaligned. Always take a moment to count your stitches before you reach the end of the row.
Finally, do not get discouraged by the “messy” back of the project. Mosaic crochet is technically a “right side” only craft. The back of the work will look somewhat like a jumble of yarn and stitches—this is perfectly normal and expected. As long as the right side looks sharp and consistent, you are doing it perfectly.
Pro Tips for Polished Results
To take your projects from “handmade” to “professional-looking,” keep these tips in mind. First, blocking is non-negotiable with mosaic crochet. Because of the way the double crochet stitches pull on the fabric, your project might naturally want to roll at the edges or look slightly uneven. A gentle steam block or a wet block (if your yarn allows) will set the stitches perfectly and reveal the crisp geometric patterns you have worked so hard to create.
Second, consider your fiber choice. A smooth, medium-weight acrylic or a wool blend is ideal for beginners. Avoid yarns that are overly fuzzy or dark in color, as they make it difficult to see the stitches from the row below. A high-contrast color palette, like cream and navy or light gray and black, will give you the most satisfying visual results and make it much simpler to spot errors while you are still learning the rhythm of the drops.
Personalization and Creative Ideas
Once you have the basics down, the world of mosaic crochet opens up immensely. You can use this technique to turn basic items into heirlooms. Imagine making a simple baby blanket, but incorporating a delicate repeating star pattern or a classic Greek key motif along the borders. Because you are only dealing with one color at a time, you can easily swap out colors for different seasons—perhaps deep greens and reds for a Christmas throw, or soft pastels and creams for a springtime nursery project.
Intermediate makers can start exploring “in-the-round” mosaic crochet, which is a slightly different technique that allows you to create patterns without ever having to turn your work or fasten off. It is a fantastic evolution that keeps the same visual logic but speeds up the process significantly.
Next Steps for Your Journey
Now that you have the conceptual framework, the best thing to do is practice. Find a small, free mosaic chart online—perhaps a simple geometric chevron—and commit to making a small coaster or a decorative wall hanging. Treat these early pieces as swatches. Don’t worry about perfection; focus on the feel of the hook and the rhythm of the stitches. Once that becomes natural, you will find you can work through a complex graph while listening to your favorite podcast without even needing to look down at your work constantly. You are building a wonderful, lifelong skill, so take your time and enjoy the creative process of watching a beautiful image emerge from nothing more than yarn and a simple hook.
FAQ
Is mosaic crochet harder than standard crochet?
It is not necessarily harder; it is just different. It uses the exact same stitches you already know (single and double crochet). The only “new” thing is the way you use those stitches to create a pattern by working into lower rows. Once you understand the rhythm, most people find it easier than standard colorwork.
Do I need to buy special yarn for mosaic projects?
Absolutely not. You can use any yarn in your stash. However, for your first few projects, I highly recommend using a smooth, solid-colored yarn in a light-to-medium weight. This will make it much easier to see your stitch placement and ensures your geometric patterns really “pop.”
Why does the back of my mosaic crochet look so messy?
Don’t worry—that is completely normal! Mosaic crochet is designed to be a one-sided technique. The back will show the alternating colors in a way that doesn’t look like the main design. As long as your front side is neat and uniform, you are doing it exactly right.
Can I do mosaic crochet if I am a beginner?
If you are comfortable with basic single crochet and double crochet stitches, you are ready. My best advice for beginners is to start with a very small chart (perhaps 20-30 stitches wide) just to get the hang of how the stitches anchor into the row below.
How do I handle all the yarn ends left by changing colors?
Because you fasten off your yarn every two rows, you will have tails. You can either weave them in as you go (some makers find this meditative) or, my personal favorite, work an “envelope border” (a plain border of single crochet all around the blanket) to securely trap all those ends inside, keeping the edge finished and clean.
Conclusion
Mosaic crochet is a beautiful, rhythmic, and incredibly rewarding technique that allows you to expand your creative horizons without the strain of complex color-carrying methods. By mastering these simple, interlocking stitches, you are opening the door to a world of stunning, professional-looking designs that you can incorporate into everything you make, from blankets to home accessories. Remember to be patient with yourself, keep your tension comfortable, and embrace the process of learning. Every stitch you make is a step toward becoming a more confident and skilled maker. I am so excited for you to begin your mosaic journey—before you know it, you will be creating intricate, eye-catching pieces that you will be proud to display in your home or share as gifts for years to come. Happy hooking!