
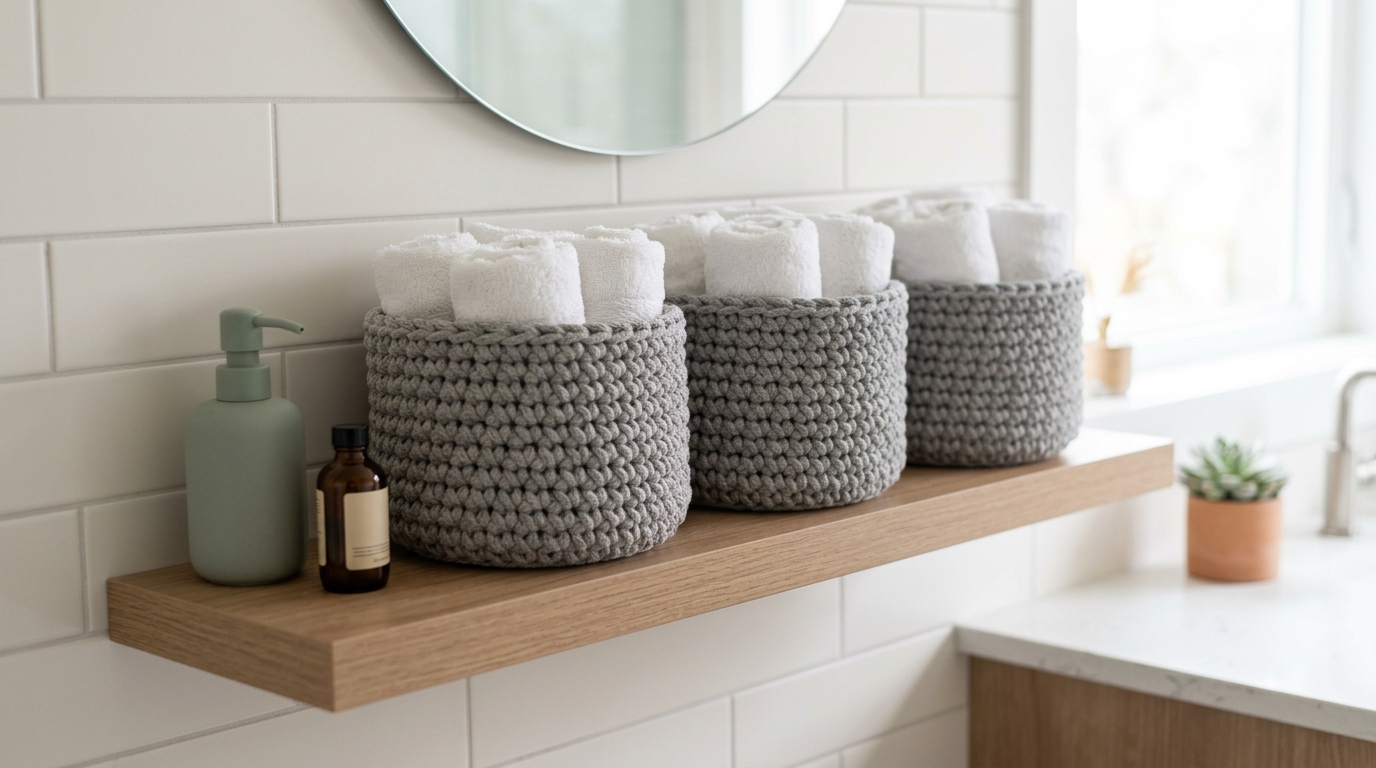
There is something inherently soul-soothing about a tidy home, but finding pretty, functional storage that doesn’t break the bank can feel like an endless search. We often look at those beautiful, store-bought fabric or plastic bins and think, “I could make something better, warmer, and more personal.” This is exactly where the beauty of crochet meets home organization. By working with sturdy materials like cotton cord or specialized crafting rope, you can create custom baskets that are not only durable enough to hold your essentials but provide that cozy, handmade texture every home crafter dreams of.
Whether you are looking to declutter your yarn stash, organize your bathroom vanity, or simply add a touch of handcrafted charm to your bookshelf, crocheting with cord is a wonderful skill to develop. It is a fantastic project for beginners because you get to see results quickly, and it is a delightful playground for intermediate makers who want to experiment with structure and tension. Let’s walk through the joy of creating your own braided-look baskets, turning simple supplies into beautiful, lasting home decor.
Quick Overview
- Skill Level: Beginner-Friendly Intermediate
- Estimated Time: 2–4 hours per basket, depending on size
- Finished Size: Customizable; pattern provided for a medium-sized shelf basket (approx. 8 inches in diameter)
- Best Use: Organizing shelves, holding craft supplies, or as a thoughtful housewarming gift
- Why You Will Love It: It uses quick-working, thick materials, resulting in a project that is sturdy, satisfying to hold, and incredibly practical for everyday life.
Materials and Tools Needed
To create a sturdy basket that stands upright, your choice of material is everything.
- Cord or Rope: Look for 3mm or 5mm cotton macramé cord or a tubular “t-shirt” yarn. Cotton cord provides that beautiful, crisp stitch definition, while t-shirt yarn offers a softer, more pliable feel.
- Crochet Hook: A large crochet hook is essential. Depending on the thickness of your cord, an 8mm (L) to 10mm (N/P) hook usually works best. If your stitches are too tight, sizing up your hook will help you maintain your comfort.
- Stitch Markers: These are vital when working in a continuous round, as they help you keep track of your first stitch so you don’t lose your place.
- Large Eye Tapestry Needle: You will need this for weaving in your ends. Because the cord is thick, ensure your needle has a wide eye.
- General Household Items: A pair of sharp scissors and a measuring tape.
Crochet Terms and Stitches Used
We will focus on basic stitches to keep the structure simple and strong.
- Chain (ch): The foundation of most crochet projects.
- Single Crochet (sc): The workhorse stitch. It creates a tight, dense fabric, which is perfect for baskets that need to hold their shape.
- Slip Stitch (sl st): Used to join rounds or create a clean finish.
- Increase (inc): Working two single crochet stitches into the same stitch to grow your circle.
- Back Loops Only (BLO): This technique creates a beautiful ridge where the base meets the side of the basket, allowing it to turn upward cleanly.
Helpful Notes Before You Start
Working with cord requires a different mindset than working with soft acrylic or wool yarn. It can be quite taxing on your hands, so please take breaks often. If you find your hands are cramping, gently stretch your fingers and shake out your wrists.
When working on the base of your basket, keep your tension consistent. If your circle begins to ruffle, you are increasing too often; if it begins to curl into a bowl shape too early, you aren’t increasing enough. The base should lie perfectly flat on your table. Lastly, always work over your starting tail for a few inches to secure it—this saves time on weaving in ends later!
The Sturdy Shelf Basket Pattern
This pattern is worked in a continuous spiral for the base and then transitions into a wall.
The Base
Round 1: Create a magic ring. Chain 1, and work 8 sc into the ring. Tighten the ring securely. (8 sts)
Round 2: Work 2 sc in each stitch around. Place a stitch marker in the first stitch of each round to keep track. (16 sts)
Round 3: 1 sc in the next st, 2 sc in the next st. Repeat from to around. (24 sts)
Round 4: 1 sc in the next 2 sts, 2 sc in the next st. Repeat from to around. (32 sts)
Round 5: 1 sc in the next 3 sts, 2 sc in the next st. Repeat from to around. (40 sts)
Round 6: 1 sc in the next 4 sts, 2 sc in the next st. Repeat from to around. (48 sts)
Note: For a larger basket, continue increasing until the base reaches your desired diameter.
The Walls
Round 7: Work 1 sc in each stitch around, but work in the Back Loops Only (BLO). This creates a “hinge” that allows the walls to stand up straight.
Round 8–18: Work 1 sc in both loops of every stitch around. Continue until the basket reaches your preferred height.
Finishing and Handles
To make optional handles, on your final row, chain 6 and skip 6 stitches midway along two sides of the basket. In the next round, work 6 single crochet stitches into the chain space to create a sturdy, bridged handle. Finish off with a slip stitch, cut your cord, and weave the end deeply into the base of the basket using your tapestry needle.
Step-by-Step Explanation for Success
When you are starting your magic ring, don’t feel discouraged if it feels stubborn. Cord is stiff! Hold your tail end firmly as you complete that first round. As you transition to the walls in Round 7, you will notice a distinct, horizontal line forming—that is your indicator that you are doing it correctly. It creates a crisp corner that professional-looking baskets are known for. When moving into the walls, don’t worry about stitch markers as much; you can easily count your rounds by spotting the “spiral” ladder of your stitches.
Common Mistakes to Avoid
The most common issue is “cupping,” where the base won’t sit flat. If your base looks like a bowl when it should be a pancake, increase more frequently in the next round. Conversely, if it looks like wavy lace, you are increasing too much; frog (unravel) back and work a round with fewer increases. Another mistake is poor tension. If the gaps between your stitches are too large, you will have a “holey” basket. Use a smaller hook size to combat this!
Pro Tips for a Better Result
- The Steam Trick: Once your basket is finished, it might look a little lumpy. A light steaming with your iron (holding it a few inches away—do not let the iron touch the cord!) can help soften the fibers just enough to shape the basket into a perfect cylinder.
- Hidden Strength: If you want an extra-stiff basket, you can double-strand your cord with a thinner piece of nylon or clear fishing line to give it structural integrity without changing the look.
- Color Blocking: Use two different colors of cord—one for the base and one for the walls—for a modern, decorative look that complements your home decor.
Variations and Personalization
Baskets aren’t just for uniform storage. You can add leather labels, sew on wooden beads, or even attach a pom-pom trim to the rim for a boho-chic vibe. If you are making these for a baby nursery, consider using softer, organic cotton rope in pastel shades. For a more sophisticated look, use neutral tones like oatmeal, grey, or black. You can also vary the height of the baskets to create a nesting set, which looks stunning on an open shelving unit.
Care and Storage Tips
Since these are made of cotton, they are generally easy to maintain. If your basket collects dust, a quick vacuum with a soft brush attachment is usually all it needs. For deeper stains, spot treat the area with a damp cloth and mild soap. Avoid putting these in the washing machine, as the weight of the water-logged cord can cause the structural shape to distort. If they ever lose their shape, a light starch spray and re-shaping by hand will bring them right back to life.
FAQ
How do I know if my cord is the right thickness for my hook?
As a general rule, your hook should be slightly larger than the cord itself. Aim for a hook that allows you to pull the cord through the loop without extreme resistance, but still keeps the stitches snug.
Why does my basket lean to one side?
Leaning usually happens because of uneven tension while working in a spiral. Try to maintain the exact same tension throughout the entire circumference of every round. Using a stitch marker at the start of every round helps keep you organized.
Can I make these baskets using regular yarn?
You absolutely can, but your basket will be much softer and prone to collapsing. If you must use regular yarn, try holding three or four strands together at once, or use a very small hook to create an ultra-tight, stiff fabric.
How do I join a new ball of cord invisibly?
Avoid knots! Instead, overlap your old cord and your new cord for about two inches, and work over both strands until the old one fades out. This hides the transition seamlessly within your stitches.
Are these baskets heavy?
Because they are made with dense cord, they have a wonderful weight to them. This is a positive trait, as it helps the basket stay anchored on your shelf when you pull items in and out of it!
Conclusion
There is a unique sense of accomplishment that comes from creating something with your own two hands that solves a problem in your home. These crochet baskets teach us that even something as simple as a single crochet stitch, when paired with the right material, can become a tool for beauty and organization. Whether you are a beginner picking up a hook for the first time or an intermediate maker looking for a quick and satisfying weekend project, I hope this guide gives you the confidence to start your own set. Take your time, enjoy the rhythm of the stitches, and don’t forget to take a step back and admire your handiwork once you’re done. Happy crocheting!