
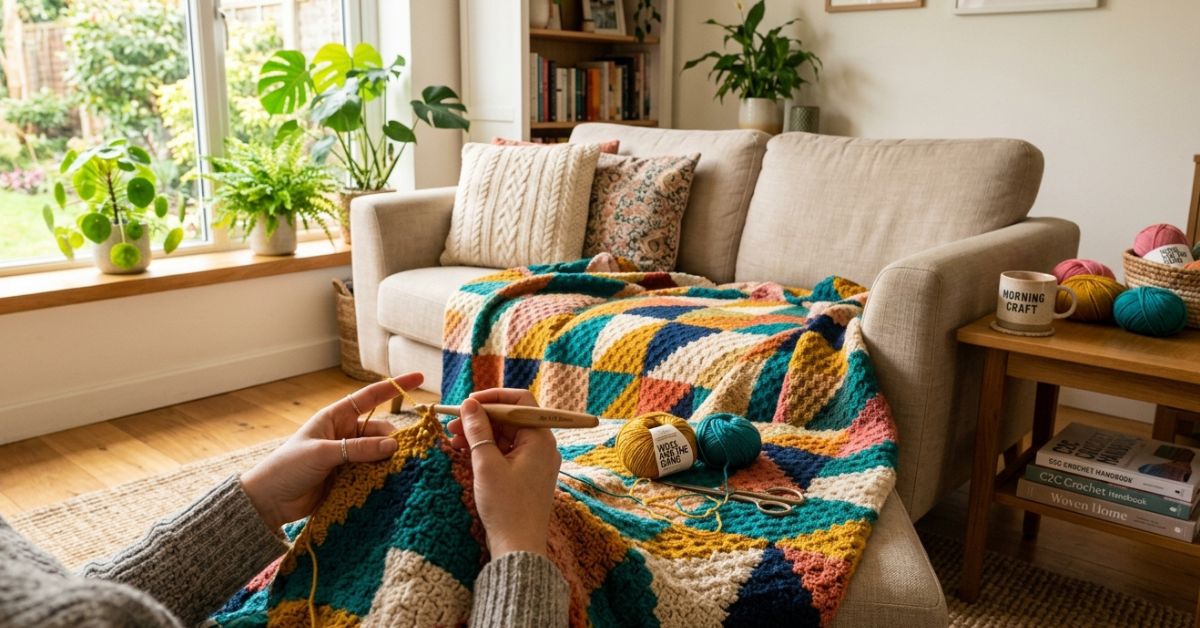
There is something truly magical about the way a simple stitch can transform a humble ball of yarn into a stunning, heirloom-quality masterpiece. If you have ever scrolled through social media or browsed home decor magazines and marveled at those pixel-perfect, graphic blankets with crisp, diagonal lines, you are likely looking at the wonder of Corner to Corner crochet, commonly known as C2C.
This technique is a favorite among makers for good reason: it is incredibly rhythmic, easy to memorize once you get the hang of it, and creates a dense, squishy fabric that is perfect for cozying up on the sofa. Whether you are aiming to make a modern geometric baby blanket, a festive holiday throw, or a bold minimalist piece for your living room, C2C is your best friend. In this guide, I will walk you through the anatomy of the C2C stitch, helping you move from those first tentative chains to a finished piece you’ll be proud to display. We will break down exactly how the increases and decreases work, ensuring that your edges stay straight and your tension stays consistent. It is a relaxing, meditative journey, and I am so delighted to share it with you.
Quick Project Overview
- Skill Level: Beginner-Friendly Intermediate. While the stitch is simple, it requires a basic understanding of chaining and double crochet.
- Estimated Time: 15–30 hours for a full-sized throw, depending on your speed and yarn choice.
- Finished Size: Customizable; this pattern creates a square, but you can stretch it into a rectangle.
- Best Use: Perfect for handmade gifts, housewarming presents, or a seasonal refresh for your own home.
- Why You’ll Love It: It is essentially “crocheting by pixels.” Once you master the foundation block, you can create anything from simple stripes to elaborate graphs.
Materials Needed
- Yarn: A worsted weight (4) yarn is recommended for beginners. Cotton or acrylic blends are wonderful for their durability. You will need approximately 1,500–2,000 yards for a medium throw.
- Crochet Hook: A size H/8 (5.0 mm) hook is standard for worsted weight yarn. If your stitches feel a bit loose or gappy, try going down a half-size.
- Tapestry Needle: For weaving in your ends.
- Scissors: A sharp pair for clean snips.
- Stitch Markers: Useful for keeping track of your beginning corners, especially when you start your decrease rows.
Stitches and Abbreviations
- Ch (Chain): Yarn over and pull through the loop on your hook.
- Dc (Double Crochet): Yarn over, insert hook into stitch, yarn over and pull up a loop, yarn over and pull through two loops, yarn over and pull through remaining two loops.
- Sl St (Slip Stitch): Insert hook into stitch, yarn over and pull through the stitch and the loop on your hook.
- C2C Block: The basic unit of this stitch, consisting of 3 dc stitches and a ch-3 space.
Pattern Notes Before You Start
The beauty of the C2C stitch lies in the “pixel” structure. You are creating small squares of three double crochets, built diagonally from one corner to the opposite corner. The most important thing to monitor is your tension. If you crochet loosely, the “holes” in your work will be quite large. If you feel like your blanket is becoming too airy, don’t be afraid to switch to a tighter hook size.
When working back and forth, ensure you are consistently chaining 6 at the start of an increase row and chaining 3 to “climb” up the sides of your blocks. This creates the uniform, textured look that makes C2C so recognizable.
Full Crochet Pattern
Part 1: The Increase Rows
You are building your project from one bottom corner. Each row increases by one block until your blanket reaches the desired width.
- Row 1: Ch 6. Dc in 4th ch from hook and next 2 ch. (1 block made).
- Row 2: Ch 6. Dc in 4th ch from hook and next 2 ch. Sl st into the top of the ch-3 of the previous row’s block. Ch 3, 3 dc in the same ch-3 space. (2 blocks made).
- Row 3: Ch 6. Dc in 4th ch from hook and next 2 ch. Sl st into top of next block. [Ch 3, 3 dc in next ch-3 sp, sl st in next block] repeat across. Finish the row with a ch 3 and 3 dc in the final space of the previous row.
- Repeat: Continue increasing in this manner for every row until the side of your triangle measures the width you want your blanket to be.
Part 2: The Square or Rectangle
If you want a square, stop increasing and start decreasing on both sides. If you want a rectangle, you will increase on one side and decrease on the other until it reaches the desired length.
Part 3: The Decrease Rows
- Row (Decrease): Instead of chaining 6 at the beginning of the row, turn your work, sl st across the 3 dc stitches of the last block you made. Sl st into the ch-3 space. Ch 3, 3 dc in that same space. Continue the pattern of [sl st into next block, ch 3, 3 dc in next ch-3 space] until you reach the last block. Sl st into the final block. Turn.
Assembly and Border
Because C2C produces a clean, jagged edge, many people choose to leave it as-is for a modern look. However, if you prefer a finished, smooth edge, add a simple border.
- Border: Join your yarn at any corner. Work 1 sc in each st around, placing 3 sc in every corner of the blanket so it doesn’t pull. You can do one round or three rounds for a wider border. Fasten off and weave in all ends securely.
Step-by-Step Tutorial Explanation
When you sit down to start, your first “block” might look a little strange—it’s just a tiny square sitting in space. Don’t worry! As you begin Row 2, the pattern will start to make sense. You are essentially building a lattice. By chaining 6, you are creating the “base” for the next block to be built onto. The slip stitch is the “glue” that attaches your new block to the one you finished on the previous row.
Always check your progress at the end of each row. You should have exactly the number of blocks as the row number (e.g., Row 5 should have 5 blocks). If you have one too many or one too few, carefully count your slip stitches. It is very common to accidentally work into the wrong space during a late-night crochet session, so keep a stitch counter handy if you’re working on a large project!
Common Mistakes to Avoid
- The Twisted Chain: When you begin, make sure your starting chain is flat. If it twists, your entire foundation will be off-kilter.
- Miscounting the Increases: It only takes one missing block to throw off the diagonal symmetry. Count your blocks every few rows.
- Tight Tension: If you crochet tightly, your blanket will have less drape and may feel stiff. Try to keep your stitches relaxed.
- The “Hole” Issue: If your ch-3 spaces are creating giant holes, try working your double crochets slightly tighter or ensure you are working your slip stitches firmly into the ch-3 space of the previous row to “close” the gap.
Pro Tips for a More Beautiful Result
- Color Changes: If you plan on doing a graphic pattern or color-blocked sections, do not carry your yarn across the back. It will show through the stitches. Instead, use a new bobbin of yarn for each color section and drop the color until you need it again on the next row.
- Blocking: C2C blankets can sometimes look slightly uneven while on the hook. Once you finish, steam block your piece (if using acrylic) or wet block (if using cotton/wool) to square off the edges and relax the fibers.
- Consistent Yarn: Even within the same “weight,” different brands have different thicknesses. For your first C2C, stick to one brand and one dye lot if possible to ensure the blocks look identical.
Variations and Personalization Ideas
- Stripes: Use a self-striping yarn to create a beautiful, effortless gradient as you grow your blanket from the center out.
- The Mini-C2C: Instead of 3 dc, use 2 dc for smaller, “tighter” pixels. This makes a great washcloth or dense baby lovey.
- Seasonal Colors: Use deep forest greens and burgundy for a winter blanket, or soft pastels for a spring baby shower gift.
- Mixing Textures: Try using a velvet yarn for one section and a classic acrylic for another to create a sensory, high-end look.
Care Instructions
For an heirloom piece, gentle care is key. Most acrylic yarns can be machine-washed on a gentle cycle in a mesh laundry bag and tumbled dry on low. Cotton blankets should be laid flat to dry to prevent stretching. Always check the label on your yarn ball for specific washing instructions. If you have created a gift, tuck a small, handwritten note inside the wrapping with these care instructions so your loved one knows exactly how to keep it cozy for years to come.
FAQ
How do I stop my C2C blanket from looking like a trapezoid?
This is almost always a tension issue. If your piece is widening, your tension is likely getting looser as you go. Make sure to check your stitch gauge periodically. If the edges are wavy, ensure your turn-chains are consistent.
Can I make a rectangular blanket using C2C?
Yes! Simply increase on both sides until the shorter side matches your desired width. Then, continue to increase on one side while decreasing on the other side. Once your blanket reaches your desired length, begin decreasing on both sides to finish the final corner.
Do I have to use double crochet stitches?
The traditional C2C stitch uses double crochet, but you can also use half double crochet for a smaller, tighter, and slightly thicker fabric. You would adjust your starting chains accordingly (e.g., ch 5 instead of ch 6).
How do I join a new color without big knots?
The cleanest way is to finish the last dc of your old color until you have two loops left on your hook. Instead of pulling through with the old color, yarn over with the new color and pull through. You can tie the ends together later or weave them in as you work.
Why are my corners curling?
This is normal! C2C is quite dense and has a lot of texture. Often, a gentle steam block after finishing is all it takes to make the blanket lay perfectly flat.
Conclusion
Mastering the C2C stitch opens up a whole world of possibilities in your fiber arts journey. There is a simple, profound joy in watching a triangle of yarn grow row by row, turning into a piece of functional art that will bring warmth to a family home. Remember, your first attempt doesn’t have to be perfect; the “mistakes” are just proof that your hands made this with love. Take your time, enjoy the rhythm of the stitches, and don’t be afraid to experiment with bold colors or intricate designs. When you finish your first blanket, you’ll have more than just a cozy item—you’ll have a new skill that you can return to again and again. Happy hooking, and may your stitches always be even and your yarn always feel soft!