
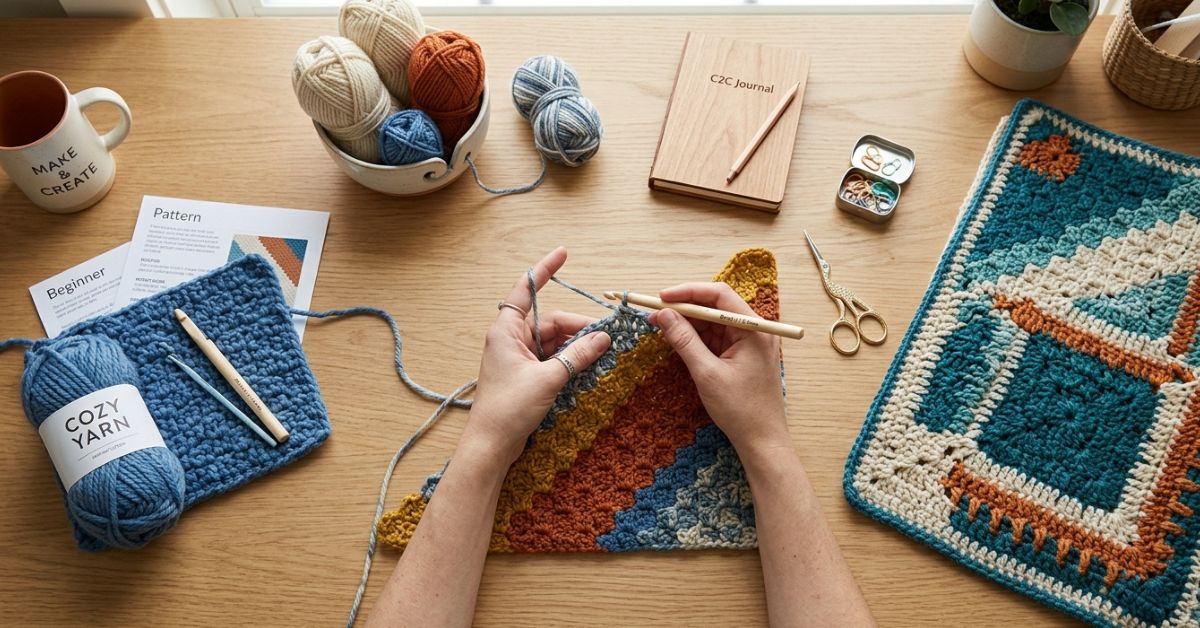
There is something deeply meditative about the rhythmic “click” of a crochet hook and the soft weight of yarn growing into a beautiful fabric. If you have spent any time browsing for crochet inspiration, you have likely come across the C2C, or Corner-to-Corner, technique. It is one of those timeless methods that feels like magic the first time you work it. Instead of working in straight rows from side to side, you build your project diagonally, starting from one corner and expanding outward like a growing triangle until you reach your desired dimensions.
C2C is a favorite among crocheters because it is incredibly versatile. It works perfectly for everything from cozy baby blankets and decorative throw pillows to modern wall hangings and scarves. Because you start small and increase every row, you can easily stop whenever your project reaches the size you want, making it a dream for makers who prefer not to be tied down to a rigid stitch count. If you have ever felt intimidated by large patterns or complex charts, I want to reassure you: the C2C stitch is essentially a collection of simple little blocks, all repeating in a way that is incredibly satisfying to master. Let’s grab our hooks and settle into a cozy spot to learn how to create these lovely diagonal blocks together.
Quick Project Overview
- Skill Level: Beginner-Friendly Intermediate
- Estimated Time: Projects vary, but a small washcloth takes about 1–2 hours, while a baby blanket may take 15–20 hours.
- Finished Size: Customizable; you can work until your project is exactly as big or small as you need.
- Best Use: Perfect for stash-busting, scrap projects, cozy home decor, or handmade gifts that look far more impressive than they are difficult to make.
- Why You Will Love It: It is mindless, relaxing, and creates a beautiful textured fabric with a wonderful drape. Plus, it is one of the easiest ways to transition into color-changing patterns or pixel art designs!
Materials Needed
To practice the C2C method, you will need a few simple supplies.
- Yarn: Medium-weight (Category 4) yarn is best for learning. Cotton yarns are wonderful for washcloths and dishcloths, while soft acrylic or wool blends are ideal for blankets and accessories.
- Crochet Hook: Choose a hook recommended on your yarn label. For a medium-weight yarn, an H/8 (5.0 mm) hook is typically a perfect starting point.
- Yarn Needle: Essential for weaving in those ends neatly.
- Scissors: Any sharp pair will do.
- Stitch Markers: These are optional but helpful if you tend to lose track of where your rows begin or end.
Stitches and Abbreviations
Using standard U.S. crochet terms, you will need to know these three fundamental techniques:
- Ch (Chain): Yarn over and pull through the loop on your hook.
- Dc (Double Crochet): Yarn over, insert your hook, yarn over and pull up a loop, yarn over and pull through two loops, yarn over and pull through remaining two loops.
- Sl St (Slip Stitch): Insert your hook into the stitch, yarn over, pull through both the stitch and the loop on your hook.
Pattern Notes Before You Start
The most important thing to remember with C2C is that each “block” consists of a chain-3 (turning chain) and 3 double crochet stitches. Your tension should remain relatively consistent; if you find your blocks are looking a bit too holey, try dropping down by half a hook size. If the fabric feels stiff or board-like, you may need to loosen your tension or size up your hook. Unlike traditional row-by-row crochet, you are increasing until you reach the desired height of your project, and then you begin decreasing.
Full Crochet Pattern
Part 1: The Increasing Phase
This is the process of building the width and height of your project.
Row 1: Ch 6. Dc in the 4th ch from hook, and in the next 2 chs. (This forms your first block). Turn.
Row 2: Ch 6. Dc in the 4th ch from hook, and in the next 2 chs. Sl st into the ch-3 space of the previous row’s block. Ch 3, work 3 dc into that same ch-3 space. Turn.
Row 3: Ch 6. Dc in the 4th ch from hook, and in the next 2 chs. Sl st into the ch-3 space of the next block. (Ch 3, 3 dc into the space) for each of the next two blocks. Turn.
Continue in this pattern: For every row, increase by starting with a chain of 6, then work your blocks across, slip stitching into the space of the block below. Keep repeating this, adding one more block per row, until your triangle reaches the desired width.
Part 2: The Decreasing Phase
Once your square or rectangle reaches the size you want, you stop increasing. Instead of chaining 6 at the start of the row, you will now slip stitch across the top of the last block to “step down” the edge.
Decreasing Row: Sl st into the next 3 stitches (the 3 dc from the previous block). Sl st into the ch-3 space. Ch 3 and work 3 dc into that space. Continue working your blocks normally across the row until you reach the final block. Sl st into the final block. Do not work a block on top of that last block. Turn and repeat this decrease until only one block remains at the peak.
Part 3: Finishing
Once you have only one block left, fasten off your yarn, leaving a 6-inch tail for weaving in. Use your yarn needle to tuck the tail securely into the back of the work. If you are making a larger project, you can add a simple border of single crochets around the entire perimeter to give it a polished, professional edge.
Step-by-Step Tutorial Explanation
When you look at your work, you want to see a diagonal “checkerboard” of squares. Each square is tilted on its side, which is why it is called corner-to-corner. At the beginning of the project, it will look like a small triangle. If you are making a square piece, you will notice that the sides become very uniform. If you want a rectangular piece, you will increase on one side only for a few rows, which makes the piece grow in length without adding width. This is the beauty of the system—you can really control the shape as you go!
Common Mistakes to Avoid
Even experienced crocheters can run into trouble with tension. One of the most common issues is the “twisting” of the foundation stitches. Take your time with those first few chain stitches. Another pitfall is forgetting to slip stitch into the gap. If you miss that slip stitch, your blocks will not align, and you will end up with a very strange, wavy edge. If you find your work curling, your tension might be too tight. Experiment with a slightly larger hook; often, a quarter-size or half-size increase can make all the difference in the final look and feel of your handmade piece.
Pro Tips for a More Beautiful Result
For a professional finish, always block your project. Wet blocking involves soaking your finished item in cool water, gently pressing out the excess, and pinning it to a clean towel in the exact shape you want it to dry. This relaxes the stitches and makes the diagonal pattern stand out beautifully. When it comes to color, C2C is famous for “pixel graphs.” If you have a favorite picture or a simple design, you can translate it into a graph where each square is one block of color. Just carry your yarn loosely or work with bobbins so you do not have long strings running across the back of your project.
Variations and Personalization Ideas
The C2C method is essentially a blank canvas. For a baby blanket, try using a soft variegated yarn that does the color shifting for you. For a more sophisticated home decor look, try a monochromatic palette with a subtle, chunky wool yarn. You can even experiment with different stitches within the blocks; some makers prefer a “mini-C2C,” which uses half-double crochets instead of double crochets. This creates a smaller, denser block that is perfect for hats or more intricate designs where you want less space between the stitches.
Care Instructions
To ensure your handmade project lasts for years, always check the care instructions on the band of your yarn. Generally, if you used acrylic, it can be machine washed on a gentle cycle, but I always recommend a laundry mesh bag to prevent snags. Cotton projects should be washed in cool water and laid flat to dry to avoid shrinking. Wool items should almost always be hand-washed with a gentle wool wash and laid perfectly flat to dry so they do not lose their shape.
FAQ
How do I know when it is time to start decreasing in C2C?
If you are making a square, start your decreases once the side of your triangle equals the desired width of your finished piece. If you want a rectangle, you will increase on one side and “straighten” on the other until it is long enough, then start decreasing on both sides.
Can I use multiple colors in the same row?
Yes! Simply drop the color you are using and pick up the new color during the final pull-through of the last double crochet in your current block. This creates a clean transition.
Why is my C2C project curling?
Curling is almost always a sign of tension issues. It usually means your stitches are worked too tightly. Try going up a hook size or focusing on pulling up your loop slightly more before completing each double crochet.
Is C2C suitable for beginners?
Absolutely! If you know how to chain and double crochet, you have all the skills needed. It is one of the most rewarding patterns for those looking to build confidence because pieces grow quite quickly.
How do I join a new ball of yarn mid-row?
The best way is to join at the start of a new block. When you finish your last double crochet of a block, join the new yarn by pulling it through the final loops on your hook. Weave in the ends as you go to save yourself the frustration at the end of the project!
Conclusion
Mastering the C2C technique opens up a world of possibilities for your crochet journey. Whether you are creating a simple dishcloth to practice or embarking on the journey of a large-scale pixel art afghan, the process of building your work corner-to-corner is deeply rewarding. Remember to be patient with yourself during those first few rows—every great project starts with a single, imperfect stitch. Feel free to save this guide, print it out, and keep it with your favorite crochet supplies as you experiment with different colors and textures. I cannot wait to see what you create with this versatile, cozy, and truly addictive technique. Happy crocheting!