
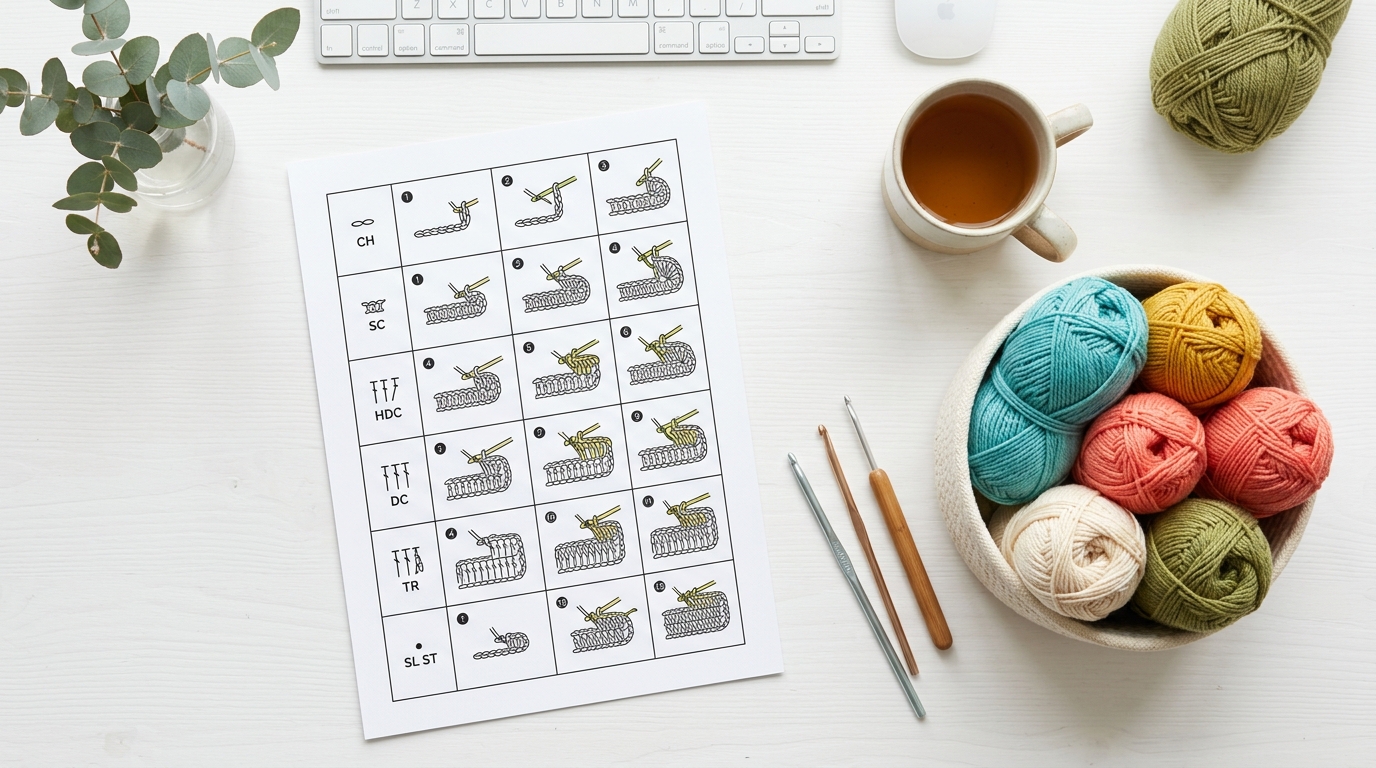
Every crocheter remembers the moment they first opened a printed pattern, only to be struck by a wave of confusion. Those lines of cryptic letters—sc, dc, ch, yo—might have felt like a secret code, but they are actually the gateway to endless creative possibilities. Whether you are picking up your first crochet hook to make a cozy baby blanket or you are a seasoned maker diving into a complex lacy shawl, understanding the language of crochet is the most important skill you can possess.
You aren’t just reading letters on a page; you are learning to translate a written design into a tangible, beautiful piece of art. This guide is designed to be your best friend. Whenever you find yourself wondering what a certain abbreviation means or how a specific stitch is worked, you can return here to find clarity. We are stripping away the intimidation factor and replacing it with the confidence you need to tackle any pattern you encounter with joy and ease.
Understanding the Basics of Crochet Notation
In the United States, we use a standardized set of abbreviations to keep patterns concise. Without these shortcuts, a simple beanie pattern would span a dozen pages! Once you learn the rhythm of these abbreviations, you will find that you can pick up almost any American pattern and start crafting immediately. These abbreviations function like a shorthand, telling you exactly what stitch to perform and where to place it.
Your Essential Stitch Abbreviations
When you look at a pattern, you will often find a section labeled “Abbreviations” or “Key.” Here are the most common terms you will see in your projects:
- ch (chain): The foundation of almost every project. The loop created by yarn over and pulling through.
- sl st (slip stitch): Used to join rounds or move across a row without adding height to the fabric.
- sc (single crochet): A short, sturdy stitch perfect for amigurumi and tight-fabric garments.
- hdc (half double crochet): The middle ground between a single and a double crochet; it provides a lovely, flexible texture.
- dc (double crochet): One of the most popular stitches; it works up quickly and creates a soft, drapey fabric.
- tr (treble crochet): A tall, airy stitch that adds elegance to designs.
- st(s) (stitch/stitches): Refers to the total count of stitches in a row or round.
- yo (yarn over): Bringing the yarn over your hook from back to front, a fundamental move for almost all stitches.
- inc (increase): Working two or more stitches into the same space to make your project wider or larger.
- dec (decrease): Combining two or more stitches into one to narrow the fabric.
How Abbreviations Appear in Patterns
Recognizing the abbreviation is only half the battle; the other half is understanding the syntax. Most American patterns follow a predictable flow. When you see a set of instructions like “2 sc in the next stitch,” it is telling you to perform two single crochet stitches into the very next available loop. If you see parentheses, such as (sc, ch 1, sc) in the next corner, it means you should perform that specific sequence of stitches all within the same designated spot.
Learning to read patterns is a journey. In the beginning, you might need to keep a printed copy of this cheat sheet nearby, but before long, you will memorize these signals. Don’t feel pressured to learn them all at once. Even the most advanced crocheters sometimes consult their references when trying a new or unusual stitch.
Practical Concepts for Every Crocheter
Beyond the abbreviations, there are foundational concepts that apply to almost every piece you will ever make. Understanding these will help you troubleshoot your work and achieve that “professional” look that every crafter loves to see in the mirror.
The Role of Turning Chains
You will frequently see instructions like “ch 2, turn.” This chain acts as a buffer to help you reach the appropriate height for the next row of stitches. A single crochet usually requires a chain-1, while a double crochet typically uses a chain-3. Always pay attention to whether the pattern designer counts the turning chain as a stitch; this is a common point of confusion that can change the entire shape of your project!
Working in Rounds vs. Rows
Most flat projects, like scarves or washcloths, are worked in rows. You finish a line, turn your work, and crochet back the other way. Projects like beanies, amigurumi, or mandalas are worked in rounds. These are often worked in a continuous spiral or joined at the end of each round with a slip stitch. Knowing which method your project uses will save you from accidental increases or decreases.
Gauge: Why it Matters
Gauge is the number of stitches and rows per inch. While it might sound like extra homework, checking your gauge is essential for garments. If your stitches are tighter than the pattern creator’s, your finished sweater might end up too small for you to wear. If they are looser, you might run out of yarn. Always make a small swatch before starting a big project if the fit is crucial!
Troubleshooting Common Beginner Pitfalls
Even with the best instructions, errors happen. It is part of the growth process. If you find your work looking a little bit “off,” don’t be discouraged. Here is how to handle the most frequent hiccups.
The Mystery of the Missing (or Added) Stitch
If your row or round ends with a different number of stitches than you started with, take a deep breath. This is the most common “mistake” in the craft. It usually happens in two ways: either you are skipping the first stitch of a row (which feels hidden), or you are accidentally adding extra stitches into your turning chain space. Take time to count your stitches every few rows until you build the muscle memory to spot the gaps naturally.
Dealing with Twisted Foundations
When working in the round, the initial chain can easily twist. Before you join your first round, lay your chain flat on a table to ensure it forms a perfect circle with no “kinks.” It’s much easier to fix this at the start than to realize it halfway through your first round!
The Importance of Turning Your Work
When working in flat rows, always remember to turn your work consistently. If you sometimes turn clockwise and sometimes counter-clockwise, the edges of your fabric may become wavy or uneven. Pick a direction and stick with it throughout the entire project for the most polished, professional-looking edges.
Pro Tips for Polished Results
To elevate your crochet from “homemade” to “handmade with love,” pay close attention to your finishing. These subtle touches make a massive difference in how your project feels and holds up over time.
Weaving in Ends with Care
Weaving in your ends is just as important as the stitches themselves. Instead of just snipping the yarn close to the knot, weave your tail back and forth through at least three inches of finished stitches in different directions. This creates enough friction to ensure your project doesn’t unravel in the wash.
Blocking Your Projects
If you finish a project and it seems a bit curled, don’t worry! Blocking is a magical process. By gently pinning your damp piece into the desired shape and letting it dry, you can set the stitches and make your fabric look crisp and even. It is the secret ingredient for professional-looking lace and structured home decor.
Choosing the Right Hook Material
Did you know that the feel of your hook changes your tension? Aluminum hooks are smooth and allow the yarn to glide, while bamboo or wooden hooks offer a bit more “grip.” If you find your hands getting tired or your stitches coming out too tight, try switching to a different hook material. It can completely change your crochet experience.
Frequently Asked Questions
What should I do if a pattern uses abbreviations I don’t recognize?
Don’t panic! Most well-written patterns include a “special stitches” section where the designer defines any unusual abbreviations. If it is still unclear, a quick search for the abbreviation + “crochet” will almost always lead you to a helpful photo tutorial or video.
How do I stop my edges from looking uneven?
Uneven edges are almost always caused by missing the first or last stitch of a row. Try using a stitch marker in your first and last stitch of every row. This helps you identify exactly where to place your hook, keeping your edges perfectly straight.
Is there a difference between U.S. and U.K. terms?
Yes, and it is a major one! U.K. terminology uses different names for the same stitches. For example, a U.S. single crochet is called a “double crochet” in U.K. terms. Always check the beginning of the pattern to see which system the designer used. If the pattern calls for a “treble crochet” but it looks shorter than expected, it might be written in U.K. terms.
How do I know if I am crocheting too tightly?
If you struggle to insert your hook into the stitches of the previous row, your tension is likely too tight. Try relaxing your shoulders and holding your yarn with a looser grip. You might also want to experiment with going up a hook size to see if it makes your work easier to manage.
Can I change colors mid-row?
Absolutely! To change colors, work your final stitch of the old color until two loops remain on the hook. YO with the new color and pull through both loops. This creates a clean transition. Be sure to carry your yarn or weave in your tails carefully for a neat finish.
Moving Forward with Your Craft
Crochet is a hobby that gives back as much as you put into it. By understanding the language of stitches, you have unlocked the ability to create anything from simple, cozy scarves to intricate heirloom blankets. Remember that every master was once a beginner who refused to quit.
Keep this reference guide handy, practice your tension, and most importantly, enjoy the process. There is something profoundly peaceful about the repetitive loop-and-pull motion of crochet. Whether you are crafting for your own home or making a heartfelt gift for a loved one, your stitches carry your personal touch. Happy stitching, and may your yarn always be tangle-free and your hooks ever-gliding!