
Introduction
There is something truly magical about taking a single strand of yarn and, with nothing more than a simple hook and your own two hands, transforming it into a piece of fabric that tells a story. Whether you have been dreaming of crafting a cozy heirloom blanket, a fashionable accessory, or perhaps your very first amigurumi character, every beautiful project begins in the exact same place: with a simple loop.
If you have felt intimidated by those intricate-looking crochet patterns you see online or in magazines, please take a deep breath and know that you are exactly where you need to be. Crochet is not a race, and it is certainly not a test of perfection. It is a hobby rooted in patience, creativity, and the quiet joy of making things. By learning how to hold your tools comfortably and form your first loop, you are laying the foundation for a lifetime of creative expression. This guide is designed to be your gentle companion, stripping away the complexity and focusing on the tactile, rhythmic basics that will turn you from a curious observer into a confident maker. Let’s sit down, get comfortable, and start our creative journey together.
Quick Overview
This guide is intended for absolute beginners who have never picked up a crochet hook, as well as those who might have tinkered with the craft in the past but want to refine their form. You will learn the mechanics of how to hold your hook and your yarn, the anatomy of a starting loop, and why these elements are the most important building blocks of your crochet practice. Understanding these fundamentals is not just about technique; it is about finding a physical rhythm that prevents hand fatigue and ensures your stitches look even and beautiful. By the end of this guide, you will be prepared to begin your first chain and start your very first project with confidence.
Tools You Need to Begin
One of the wonderful things about crochet is that it requires very little clutter. To get started, you will need just a few simple items that are easy to find at any local craft store.
- A Crochet Hook: For beginners, an aluminum or ergonomic hook in size H/8 (5.0 mm) is a perfect “Goldilocks” size. It is large enough to see your stitches clearly but small enough to handle comfortably.
- Worsted Weight Yarn: Look for a smooth, light-colored yarn (a soft gray, cream, or pastel works beautifully). Avoid fluffy, dark, or textured yarns at first, as they make it difficult to see where your hook should enter the stitch.
- A Pair of Scissors: Any household pair will do.
- A Comfortable Chair and Good Lighting: Never underestimate the importance of a well-lit space. Being able to see your yarn clearly is half the battle.
Crochet Concepts and Hook Logic
Before we dive into the physical movements, there are a few concepts to keep in mind. In the United States, we use specific terminology that you will see in every pattern. You don’t need to memorize them all today, but keep in mind that “tension” is the most important concept for a beginner.
Tension refers to how tightly or loosely you hold the yarn as you work. If you hold it too tightly, your stitches will be small, stiff, and difficult to insert your hook into. If you hold it too loosely, your work may look holey or uneven. The goal is a consistent, gentle hold. Furthermore, crochet is almost always worked from right to left if you are right-handed, or left to right if you are left-handed, building rows on top of each other. The “slip knot” is the very first thing that secures your yarn to the hook, and it is the starting point for almost everything you will create.
Helpful Notes Before You Start
Be kind to yourself. When you start, your hands may feel a little clumsy, and that is completely normal. Think of it like learning to play an instrument or learning a form of handwriting; your muscles have to develop “memory.” If you feel yourself gripping the hook until your knuckles turn white, stop, put the project down, and stretch your fingers.
The way you hold your hook is entirely a matter of preference. There are two main styles: the “pencil hold,” where you hold the hook like a writing utensil, and the “knife hold,” where you grip the hook like a dinner knife from above. Neither is “better” than the other. Try both for a few minutes and choose the one that feels most natural to your own hands.
How to Hold the Hook and Yarn
The most common mistake beginners make is focusing entirely on the hook and forgetting the yarn. In crochet, your hook does the work, but your non-dominant hand is actually the “steering wheel” for the yarn.
The Hook Hand
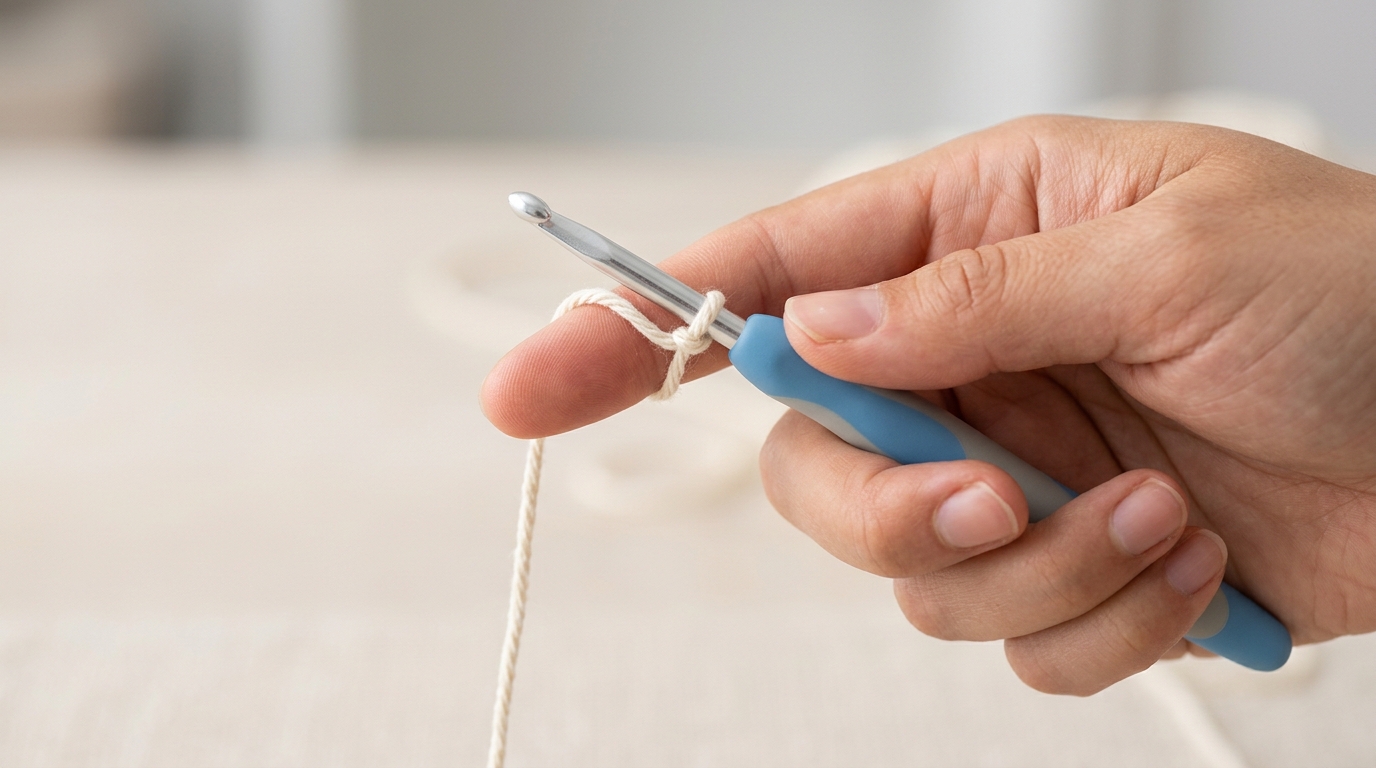
Whether you choose the pencil or knife grip, your dominant hand should be relaxed. Your thumb and index finger are your primary controls, while your other fingers rest gently against the handle. You should not be strangling the hook; keep it flexible.
The Yarn Hand
This is often where beginners struggle the most. You want to weave the yarn through your non-dominant fingers to create a bit of resistance. Try this: drape the yarn over your index finger, under your middle finger, and hold the tail end with your ring finger and thumb. This “tensioning” creates a little highway for the yarn to travel through, allowing you to control the flow so your stitches are consistent.
Making Your First Loop
The “slip knot” is the anchor of your project. It is easy to make and even easier to adjust.
- Step 1: Form a loop with your yarn, making sure the end attached to the yarn ball (the “working yarn”) is on top of the tail end.
- Step 2: Reach through the loop with your fingers and grab the working yarn, pulling it up through the loop. This creates a secondary loop.
- Step 3: Place your crochet hook into that new loop and pull both ends of the yarn to tighten it gently around the hook.
- Step 4: You should be able to slide the loop back and forth on the hook. If it is too tight to move, it is too tight to crochet. Loosen it just enough so it glides smoothly.
This is your first loop. It is the beginning of everything. Don’t worry if it takes a few tries to get it to sit just right; even experienced crocheters occasionally have to retie their slip knot to get the size perfect.
Common Mistakes to Avoid
- Choking the Hook: Like we mentioned, if you squeeze your hook too hard, your wrists will ache within twenty minutes. Relax your grip.
- Skipping the Tension Practice: If your first chain looks uneven (some loops huge, some tight), pull it out and try again. Practice is the only way to find your natural, consistent tension.
- Using Dark or Fuzzy Yarn: We cannot emphasize this enough—beginner yarn should be smooth and light-colored. Save the beautiful black mohair for when you are a confident intermediate crocheter!
- Counting Incorrectly: Beginners often forget that the loop currently on the hook is not a stitch. It’s just the “working” loop.
- Looking Down Too Much: Once you get the hang of the movement, try to look at the rhythm of the yarn rather than staring at the hook tip.
Pro Tips for Better Results
Once you get comfortable with that first loop, your next step will be creating a chain. Remember that your chain stitches serve as the foundation for your first row. A pro tip for beautiful edges: make your foundation chain just a little bit looser than you think you need to. It is much easier to work your stitches into a slightly loose chain than it is to wrestle your hook into a tight, twisted one.
Also, establish a habit of “blocking” early. Blocking is just the process of gently shaping your finished work. While a simple chain doesn’t need to be blocked, getting into the habit of neatly organizing your yarn and checking your work as you go will save you hours of frustration later on.
What to Practice Next
Once you have mastered the slip knot and become comfortable holding your hook and yarn, your next step is a simple foundation chain. From there, you can move into the single crochet stitch, which is the workhorse of the crochet world. Don’t feel pressured to start a sweater or a complicated amigurumi straight away. Spend a few days just making long, simple chains and practicing basic rows of single crochet. Building a solid foundation of stitches that look the same size is the secret to a professional-looking finish. When you feel ready, search for “single crochet tutorials” to take that next big step.
FAQ
How do I know if my tension is correct?
Your tension is correct if your stitches are uniform in size and you can easily insert your hook into them without forcing it. If the fabric feels stiff like cardboard, loosen your grip; if it feels loose and saggy, tighten your yarn hold.
Is crochet harder than knitting?
Most people find crochet easier at first because you only have to manage one active loop rather than a dozen on a needle. If you drop a stitch in crochet, it is much easier to retrieve than in knitting.
Why does my yarn keep getting tangled?
As a beginner, keep your yarn ball inside a bowl or a dedicated “yarn bowl.” This prevents it from rolling across the floor and collecting dust or getting knotted.
Does it matter which way I wrap the yarn?
While there are different “styles” (like English throw vs. Continental), the most important thing is consistency. As long as you are moving the yarn in the same direction for every stitch, your fabric will look uniform.
How often should I practice?
Ten to fifteen minutes a day is much better than a three-hour marathon once a week. Your brain and hands need those short, frequent sessions to really lock in the muscle memory.
Conclusion
You have just taken the first step on a journey that will yield countless hours of peace, productivity, and beautiful, handmade creations. Crochet is a skill that evolves with you. As you gain confidence, you will find that those once-baffling instructions start to become second nature, and soon, you will be reading patterns with the ease of someone reading a favorite book.
Remember that every single expert crocheter you admire started with that exact same small, slightly wobbly slip knot. Keep your hands relaxed, keep your yarn choice simple, and most importantly, remember to enjoy the process. There is no right or wrong way to enjoy your hobby, provided you are finding the rhythm that brings you joy. Be patient with yourself as you navigate these first stitches, and keep experimenting. Your next project, whether it is a simple scarf or a cozy set of dishcloths, is waiting for you to create it. Happy crocheting!