
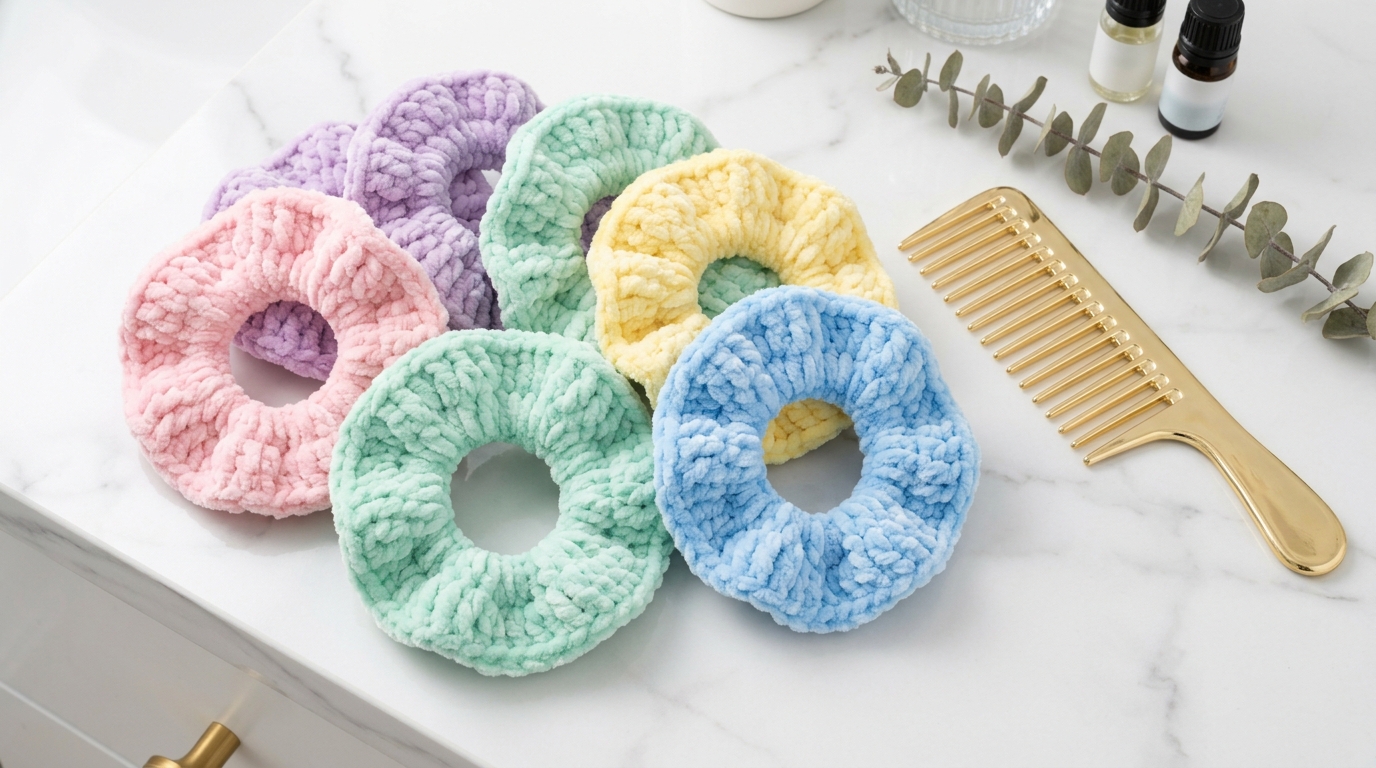
Introduction
There is something truly magical about taking a small, lonely ball of leftover yarn and transforming it into something both beautiful and functional in just an hour or two. If you have been looking for the perfect entry point into the world of crochet—or if you are a seasoned crafter with a stash overflowing with gorgeous partial skeins—you have come to the right place. Crochet scrunchies are the quintessential “quick win” project. They are charming, incredibly practical for holding your hair back, and offer a wonderful way to experiment with color, texture, and different fiber types without the commitment of a large blanket or a complex garment.
Working on a scrunchie is like a gentle hug for your creative spirit. Because the project is small, you can finish it in a single sitting while watching your favorite show, listening to a podcast, or simply enjoying a quiet moment with a cup of tea. It is a project that yields immediate gratification, making it an ideal confidence builder for those just learning to hold their hook. For more experienced crocheters, scrunchies provide a delightful canvas for trying out decorative stitches or using up those special, precious remnants of hand-dyed wool or sparkly yarn. Let’s gather our materials and turn those scraps into a collection of hair accessories that you will reach for every single day.
Quick Overview
This guide is designed to get you stitching right away. Here is a snapshot of what you can expect from this project:
- Skill Level: Perfect for absolute beginners.
- Estimated Time: 30 to 60 minutes per scrunchie.
- Finished Size: Customizable, but generally fits around a standard elastic hair tie.
- Best Use: Use these as handmade gifts, stash-busters, or everyday hair accessories that won’t tug or damage your hair.
- Why You Will Love It: It requires very little yarn, uses basic stitches, and allows for endless creativity in color combinations.
Materials or Tools Needed
Part of the joy of this project is its accessibility. You likely have most, if not all, of these items tucked away in your craft corner:
- Elastic Hair Tie: Any standard, smooth elastic band will work. Look for seamless ties for the best results.
- Yarn: Almost any weight works! Worsted weight (Size 4) is excellent for beginners, but DK (Size 3) or even a fingering weight (Size 1) can create a delicate, dainty result. Cotton yarn is great for summertime, while soft acrylic or wool blends feel cozy in cooler months.
- Crochet Hook: Choose a hook that corresponds to your yarn weight—typically a size G/6 (4.0mm) or H/8 (5.0mm) for worsted weight yarn. If you want the scrunchie to be extra “ruffled,” you might consider using a hook one size larger than what is recommended on your yarn label.
- Yarn Needle: Essential for weaving in your ends securely.
- Scissors: Any sharp pair will do.
- Optional: A stitch marker if you find it helpful to keep track of your starting point, though it is usually not strictly necessary for this pattern.
Crochet Terms, Stitches, or Key Concepts
Before we dive into the pattern, let’s review the basic stitches we will be using. All of these are foundational terms in American crochet:
- Chain (ch): The foundation of most crochet projects. You create this by wrapping yarn over your hook and pulling it through the loop currently on your hook.
- Slip Stitch (sl st): A versatile stitch used for joining or moving across the work without adding height. You insert your hook into the stitch, yarn over, and pull it through both the stitch and the loop on your hook.
- Single Crochet (sc): A short, sturdy stitch. You insert your hook into the fabric, yarn over, and pull up a loop (you now have two loops on your hook), then yarn over and pull through both loops.
- Double Crochet (dc): A taller stitch that creates a bit more “drape” and ruffles. You yarn over before inserting your hook, pull up a loop (you have three loops on your hook), yarn over and pull through two loops, then yarn over and pull through the final two.
Helpful Notes Before You Start
Crocheting around an object—in this case, an elastic hair tie—requires a slightly different touch than working on a flat piece of fabric. Here are some tips to keep in mind:
- Tension Matters: Since you are working around an elastic, be mindful not to pull your stitches so tight that the elastic loses its stretch. Your stitches should feel relaxed and comfortable.
- Coverage: Your goal is to cover the elastic completely. If you can still see the band peaking through, don’t worry—most people do more stitches to make it extra full. The more stitches you fit around the band, the “frillier” and more voluminous your scrunchie will be.
- The “Scrap” Concept: Because this is a scrap yarn project, don’t feel pressured to match colors. You can make a striped scrunchie, a solid one, or even a multicolored one by changing yarns midway—just be sure to weave in those extra ends as you go!
Main Tutorial
This project is divided into two simple phases: anchoring your yarn to the elastic and building the “scrunchie” volume.
Part 1: Anchoring the Yarn
We start by covering the elastic base. Take your chosen yarn and make a slip knot. Insert your hook into the center of the elastic, yarn over, and draw up a loop. Ch 1 to secure it to the band. Now, work single crochets around the entire elastic. You are essentially “hugging” the elastic with your yarn. Keep working these single crochets until the hair tie is fully covered. Depending on the thickness of your yarn and the size of your hair tie, you will likely need to make 40 to 60 stitches. When you reach the end, join with a slip stitch to your first sc to form a circle.
Part 2: Working the Ruffled Rounds
Now that the foundation is set, it is time to add the “scrunch factor.” This is where the magic happens.
Round 1: Chain 2 (this counts as your first double crochet). In every stitch around the circle, work 2 double crochets. If you want an even bigger, more dramatic ruffle, you can work 3 double crochets into every stitch. As you work, you will notice the fabric naturally starting to ruffle and bunch up around the elastic—that is exactly what you want!
Round 2: (Optional) If you want your scrunchie to be even larger or if you are using a finer yarn, you can do another round. Simply join with a slip stitch to the top of your starting ch-2, ch 2, and work one double crochet into every stitch around.
Finishing Your Scrunchie
Once you are happy with the size and the ruffle intensity, it is time to finish up. Cut your yarn, leaving a tail of about 5–6 inches. Pull the tail through the final loop on your hook to fasten it off. Using your yarn needle, weave that tail securely into the back of your stitching so that it is completely hidden. If you had any yarn changes during the process, be sure to weave those in as well. Give it a gentle stretch to make sure the stitches are distributed evenly around the fabric, and you are finished!
Step-by-Step Explanation
For those who thrive on visual cues, here is what your work should look like at each stage. Initially, after the first round of single crochets, your piece should look like a simple, yarn-covered ring. It might look a bit plain, but that is the perfect base. Once you move into the second round where you are placing multiple double crochets into each single crochet, the “scrunchie” shape will suddenly appear. You will see the yarn starting to collapse onto itself in a lovely, ruffled wave. If at any point the ruffles look too sparse, just remember that you can always go back and add more stitches. The more stitches you pack into that circle, the more luxurious and thick the final product will feel.
Common Mistakes to Avoid
Even in such a simple project, there are a few common pitfalls that beginners often encounter:
- Losing the stretch: This is the most common issue. If you work your stitches too tightly, the finished scrunchie won’t stretch enough to fit comfortably over a ponytail. When in doubt, loosen your grip!
- The “Peek-a-boo” Elastic: If you see the elastic color beneath your stitches, it means you haven’t filled the space well enough. Simply slide your stitches closer together to cover the band, or add a few more if necessary.
- Mixing fiber types: If you are using multiple types of yarn for a colorful effect, try to ensure they have a similar weight. Mixing a very thick chunky yarn with a very thin thread can make the scrunchie feel unbalanced.
- Skipping the weaving: Because scrunchies get stretched during use, it is tempting to just snip your ends short. Don’t! Make sure to weave your ends back and forth in different directions so they don’t pop out after a few uses.
Pro Tips for a Better Result
To elevate your scrunchie from “handmade” to “professional-looking,” try these techniques:
- Use a larger hook for the base: Using a slightly larger hook for the initial round of single crochet helps keep the tension loose, ensuring the scrunchie stays stretchy.
- Experiment with textures: Try using a velvet yarn for a super trendy, soft, and plush finish. It looks luxurious and feels incredibly gentle on the hair.
- Blocking for perfection: If your scrunchie looks a little messy after you finish, give it a very light steam with an iron (if your yarn is heat-safe) or dampen it lightly and let it dry flat. It helps the stitches settle into place.
- The “Secret” Ribbon Tip: If you want a more decorative look, you can crochet a small bow using a contrasting color and tie it onto your finished scrunchie for a cute, boutique aesthetic.
Variations, Examples, or Personalization Ideas
The beauty of this project lies in its versatility. Once you have mastered the basic pattern, consider these fun variations:
- The “Party” Version: Use metallic or sparkly yarn to create a festive accessory for holidays or formal events.
- The “Seasonal” Set: Think soft pastels for spring, vibrant cottons for summer, warm mustards and browns for autumn, and deep velvety reds for winter.
- The “Giftable” Trio: Make three small ones in coordinating colors and tie them together with a piece of ribbon. They make beautiful stocking stuffers or “just because” gifts for friends.
- Dainty vs. Dramatic: Try using a finer crochet thread with an H hook for a light, ethereal look, or use a bulky yarn for a large, statement-making accessory that looks great around a messy bun.
Care, Storage, or Next Steps
Since these scrunchies are often made from yarn, they handle best with a little bit of care. If they get a bit dusty or need freshening, hand wash them in cool water with a gentle wool soap. Squeeze—do not wring—the excess water out, and lay them flat on a towel to dry completely. Avoid putting them in the dryer, as the heat can melt or damage the elastic inside.
Once you have mastered the scrap yarn scrunchie, you are ready for your next project! Now that you are comfortable working in rounds and playing with stitch density, you could look into wider headbands or perhaps a matching small wrist pouch. The skills you practiced here—tension control, working in the round, and finishing items—are the exact same skills you need to tackle hats, bags, and cowls.
FAQ
How do I stop the scrunchie from losing its stretch?
The secret is to not pull the yarn too tightly while working around the elastic. Ensure your hook moves easily through the loops, and aim for a “looser” tension than you might use for something like a structured bag.
Can I use any kind of yarn?
Absolutely! While worsted weight is the easiest to learn with, you can use cotton, wool, acrylic, or blends. Just keep in mind that thinner yarns require more stitches to look “full” and ruffled.
My scrunchie isn’t ruffled enough; what did I do wrong?
It is not an error—it’s just a style choice! If you want more ruffles, simply increase the number of stitches you are working into each loop. Instead of 2 double crochets per stitch, try 3 or 4.
Is it hard to wash a crochet hair tie?
Not at all. Hand washing is best to preserve the elasticity of the hair tie. Just gently soak it in cool, soapy water, rinse it, and let it air dry.
Can I use a larger elastic hair tie for a bigger scrunchie?
Yes! A larger hair tie will act as a base for a larger, more dramatic scrunchie. The pattern remains exactly the same—you just keep working your starting circle of single crochets until you have completely covered the surface of the elastic.
Conclusion
Creating your own crochet accessories is such a fulfilling way to spend your time. What started as a simple pile of yarn scraps has now become a collection of beautiful, handmade treasures that you can wear, share, or gift to those you love. Remember, every time you pick up your hook, you are practicing a craft that has been cherished for generations. Don’t be afraid to experiment with different colors, textures, and styles. Whether this was your very first project or one of many, I hope this guide helps you feel more confident and creative in your crochet journey. Keep your hooks busy, your yarn stash curated, and most importantly, enjoy every single stitch!