
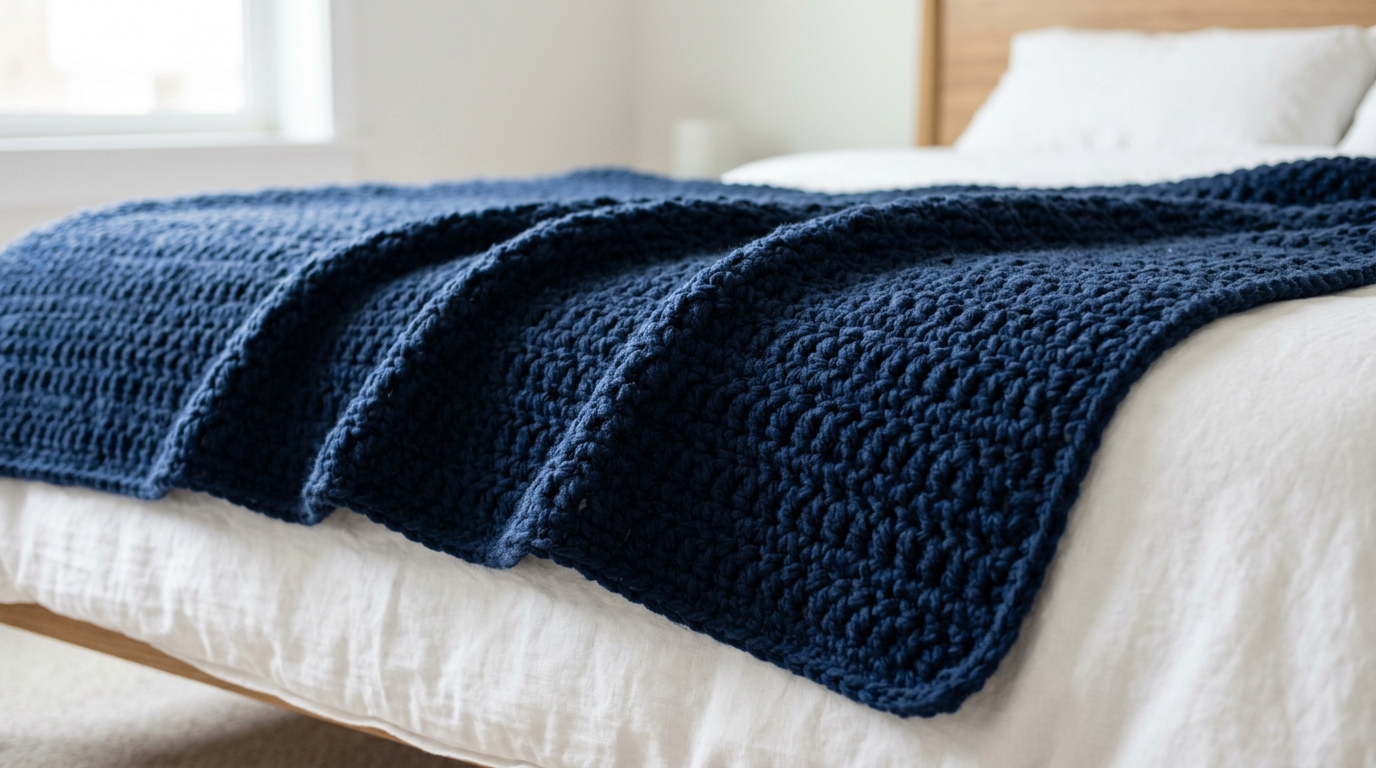
There is nothing quite like the feeling of curling up under a handmade blanket when the temperatures begin to drop and the first frost hits the windows. As the days shorten and the evenings grow longer, our homes become our sanctuary, and there is no better way to add a layer of warmth and love than with a thick, textured crochet throw. If you have been searching for the perfect stitch to keep your toes toasty during those chilly winter months, the blanket stitch is about to become your new favorite.
The blanket stitch is a gorgeous, timeless classic. It creates a dense, squishy fabric that feels substantial without being overly stiff. Unlike thinner lacy stitches, this one packs in the texture, making it an excellent choice for winter bedspreads, couch throws, and oversized blankets that you intend to use for years to come. Whether you are a beginner looking for their very first big project or an intermediate crocheter seeking a rhythmic, meditative stitch pattern, this tutorial will guide you through mastering this essential technique with confidence and ease.
Quick Overview
This guide is designed to help you create a cozy, professional-looking blanket using the classic stitch pattern.
- Skill Level: Beginner-friendly.
- Estimated Time: Depends on desired size; a throw takes approximately 25 to 40 hours.
- Finished Size: Customizable; we will provide instructions to adjust the size for anything from a lap robe to a full-sized bedspread.
- Best Use: Winter home decor, gifts for loved ones, or a personal comfort project.
- Why You Will Love It: It is incredibly forgiving, works up quickly, and creates a beautifully thick texture that traps body heat perfectly.
Materials Needed
To achieve that signature thick, winter-ready look, your choice of materials is the most important first step.
- Yarn: For a heavy winter blanket, opt for a Medium (4) weight acrylic blend or a bulky (5) weight wool-acrylic mix. You will need approximately 2,000 to 3,500 yards depending on your desired dimensions.
- Crochet Hook: Check your yarn label for the recommended size, but generally, a size I/9 (5.5mm) or J/10 (6.0mm) hook works perfectly for this stitch to keep the fabric soft rather than rigid.
- Tools: A pair of sharp scissors, a large-eye tapestry needle for weaving in ends, and a few stitch markers to keep your row counts accurate.
- Measuring Tape: Essential for ensuring your blanket reaches your desired length.
Understanding the Blanket Stitch
The blanket stitch is deceptively simple. It is a combination of single crochet and double crochet stitches worked into the same space, typically separated by a skipped stitch. This “cluster” approach is what creates the physical bulk necessary for warmth.
- Single Crochet (sc): The foundation of the stitch, providing security and structure.
- Double Crochet (dc): Adds the height and the “puff” that gives the blanket its cozy density.
- Chain (ch): Used for turning and to provide the space for the next row of stitches to settle into.
Helpful Notes Before You Start
Before you cast on your starting chain, keep these tips in mind to ensure your project stays consistent.
- Tension is Key: Because this blanket will likely be large, your tension might fluctuate as you get tired. Try to crochet in short, relaxed sessions. If you find your work pulling in at the edges, you may want to go up a half-size in hook dimensions.
- The Starting Chain: Make sure your chain is a multiple of 3. This is the secret to a perfectly straight edge every time.
- Gauge: For a blanket, exact gauge is usually not critical, but you should aim for a fabric that isn’t so loose that your fingers poke through the holes, nor so tight that it feels like cardboard.
The Blanket Stitch Tutorial
We will be working in flat rows back and forth. You will see that the pattern repeats in a way that is easy to memorize after just a few inches.
Setup and Foundation Row
Start by making a foundation chain that is a multiple of 3. For a standard throw, a chain of 150 is a great place to start.
Row 1: Skip the first two chains. In the third chain from the hook, work 2 double crochet (dc) and 1 single crochet (sc). Skip the next two chains, and in the following chain, work 2 dc and 1 sc. Repeat from the to across the row until you have 3 chains remaining. Skip the last two chains, and place 1 sc in the very last chain. Turn your work.
Working the Main Pattern
Now that your foundation is laid, you will see exactly where your hooks go in subsequent rows.
Row 2: Chain 2 (this counts as your first stitch space). In the first sc space (the space between your dc and sc cluster from the previous row), work 2 dc and 1 sc. Skip the next 3 stitches (the 2 dc and 1 sc cluster), and in the next space between clusters, work 2 dc and 1 sc. Repeat until you reach the end. Work 1 sc in the top of the turning chain from the previous row. Turn your work.
Repeat Row 2 until your blanket reaches your desired length. It’s that simple! By always placing your cluster into the previous row’s cluster space, you build that beautiful, stacked texture.
Border and Finishing
While the blanket stitch creates a lovely, straight edge on its own, adding a simple border gives it a polished look.
Work 2 or 3 rounds of single crochet around the entire perimeter of your blanket. In the corners, place 3 single crochet stitches into the same corner chain space to ensure the edges lie flat and do not curl. Once you are satisfied with the border, fasten off your yarn and use your tapestry needle to weave in all loose ends securely.
Step-by-Step Explanation
If the technical pattern feels daunting, think of it this way: you are creating little “nests” of stitches. Each row is just a repetition of putting a small cluster of stitches right into the “valleys” created by the row below.
- The “Valley”: Look for the gap created by the sc in the row below. That gap is your target.
- The “Cluster”: Work your 2 dc and 1 sc into that specific gap.
- The Repeat: Simply skip over the “mountain” of stitches and dive into the next “valley.” After a few rows, you won’t even need to look; your fingers will find those target spots automatically.
Common Mistakes to Avoid
Even experienced crocheters run into trouble occasionally. Here is how to keep your blanket project stress-free:
- The Tight-Edge Trap: It is very common for the edges of a blanket to pull inward. This usually happens because the turning chain is pulled too tightly. When you chain at the start of a row, try to keep that tension loose.
- Miscounting Stitches: Since this pattern is based on a repeat of 3, if you lose a stitch at the end of the row, the whole pattern will shift. If you find your count is off, don’t keep going! Use your stitch markers at the end of every 5 rows to ensure you haven’t dropped or added a stitch.
- Mixing Up Terms: Ensure you are using U.S. terminology. If you accidentally use a U.K. “treble crochet” instead of a U.S. “double crochet,” your stitches will be much taller and lankier, ruining the density of the blanket.
Pro Tips for a Better Result
- The “Color Change” Trick: If you want a fun, modern look, change your yarn color every 10 rows. This creates a bold, block-striped effect that looks intentional and stylish.
- Blocking: Even if it’s a blanket, don’t underestimate the power of blocking. Once finished, mist the blanket with water and lay it flat to dry. This relaxes the fibers and ensures those clusters sit uniformly across the surface.
- Weaving Ends: Because this is a weighted item, use the “needle join” method rather than simple knots. Knots can work themselves loose over time with heavy use, whereas weaving ends back and forth multiple times ensures they stay hidden for years.
Variations and Personalization Ideas
- For the Nursery: Use a soft, cotton-acrylic blend in pastel shades to make a dense baby blanket that will keep a little one warm in a car seat or stroller.
- For the “Luxe” Bedroom: Use a velvet-feel yarn (often labeled as chenille or blanket yarn). Because this stitch is so stable, it works beautifully with those slippery, plush yarns that can sometimes be difficult to work with in lacy patterns.
- The Scrappy Blanket: This is the perfect project to use up leftover bits of yarn. Coordinate your scraps by color family to create a “scrappy chic” masterpiece that tells a story of your past projects.
Care and Storage
A handmade blanket is an heirloom. To keep it supple and soft, always check your yarn label for care instructions. Generally, machine wash on a delicate, cool cycle and tumble dry on the lowest heat setting—or even better, lay it flat to air dry. When storing for the summer, place it in a breathable cotton bag rather than plastic to prevent trapped moisture or funky odors.
FAQ
How do I know if I have the right hook size?
Your yarn label usually suggests a range. For this stitch, try the smaller hook in the range. If the fabric feels too stiff to drape comfortably, move up to the larger hook size.
Why is my blanket getting wider as I go?
You are likely accidentally adding stitches at the ends of your rows. Always count your clusters at the end of each row to ensure you have the exact same number of clusters as you started with.
Can I use this for a cardigan?
Yes! The blanket stitch creates a wonderful, sturdy fabric for garments. However, be aware that it creates a very heavy, thick layer, so it is best suited for winter coats or heavy-duty cardigans.
How do I join a new skein of yarn?
The most secure way is to unravel a few inches from both the old and new strands, overlap them, and work your stitches through the double-thickness of the yarn. This avoids having a knot in your work.
Is the blanket stitch reversible?
Yes! One of the reasons it is so popular for blankets is that it looks identical on the front and the back, making it perfect for items where both sides will be visible.
Conclusion
There is a profound sense of accomplishment that comes with finishing a large-scale project like a blanket. You have invested hours of your time, choosing colors, working the rhythm of the hook, and creating something that provides genuine, physical warmth. The blanket stitch is one of the most reliable and comforting patterns in the crochet world, and mastering it opens up so many possibilities for your home decor.
Remember, the goal is not perfection—it is the process of creating something with your own two hands. If you make a mistake, simply pull it back and try again; each stitch is a lesson in patience and growth. We hope you enjoy the quiet, rhythmic joy of creating your own winter masterpiece. Keep your hook handy, your yarn cozy, and keep on stitching!