
Introduction
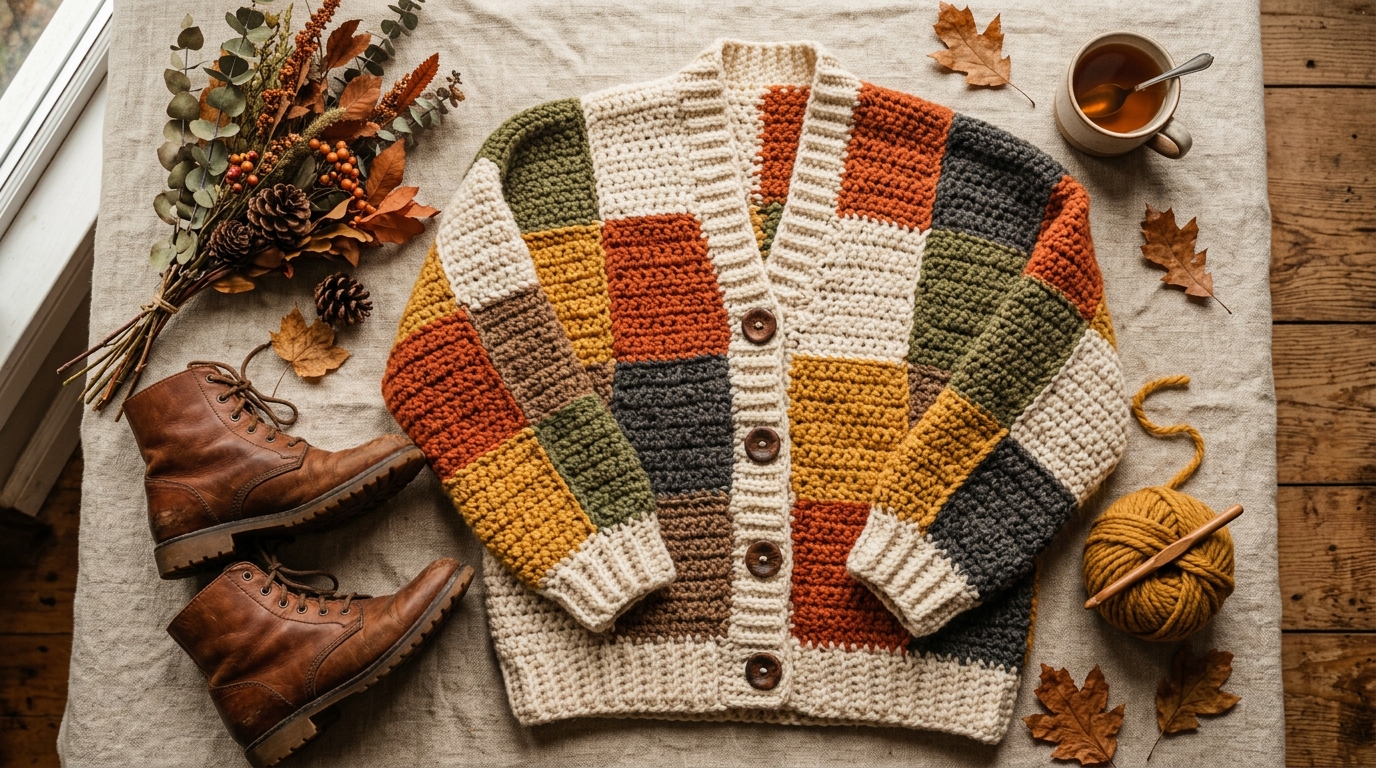
There is something truly magical about wrapping yourself in a handmade garment. Whether it is a chilly autumn evening or a crisp spring morning, an oversized crochet cardigan feels like a warm hug that you have crafted with your own two hands. If you have been dreaming of creating your own wardrobe staples but felt intimidated by the idea of making clothing, I have wonderful news: you are absolutely ready for this.
Learning to crochet your first sweater is a milestone in every fiber artist’s journey. By focusing on an oversized, boxy silhouette, we eliminate the need for complicated shaping or stressful fitting sessions. This project is intentionally designed to be approachable for beginners while offering enough customization for intermediate crocheters to truly make it their own. We will be working with simple stitches that create a beautiful, modern texture, ensuring that your finished piece looks sophisticated but feels cozy. I am so excited to guide you through this process, from your very first chain to the final polished weave of your yarn ends. Grab a fresh cup of tea, your favorite hook, and let’s get started on your next favorite wardrobe staple.
Quick Overview
This project is a beginner-friendly approach to garment making. It is designed as a modular assembly, meaning you will stitch four straightforward rectangular panels—two for the front, one for the back, and two for the sleeves—and sew them together.
- Skill Level: Beginner-Friendly Intermediate
- Estimated Time: 15–20 hours
- Finished Size: One size (Oversized, fits S–XL comfortably)
- Best Use: Everyday layering, cozy loungewear, or a thoughtful handmade gift.
- Why You’ll Love It: The pattern relies on basic stitches, making it meditative and easy to put down and pick back up without losing your place.
Materials and Tools Needed
To achieve that dreamy, slouchy drape, choosing the right materials is key.
- Yarn: Approximately 1,200 to 1,500 yards of Category 4 (Worsted/Aran weight) yarn. Soft acrylic blends or wool-acrylic mixtures are perfect for beginners as they are forgiving and easy to manage.
- Crochet Hook: Size I/9 (5.5 mm) is a great starting point. If you tend to crochet tightly, consider moving up to a J/10 (6.0 mm) hook to ensure your fabric stays drapey.
- Tapestry Needle: For weaving in your ends and seaming the shoulders and sides.
- Stitch Markers: These are essential for keeping your edges straight and marking your armhole placement.
- Measuring Tape: To ensure your panels meet the desired dimensions.
- Scissors: Any sharp pair will do.
Crochet Terms, Stitches, and Key Concepts
We will use standard U.S. crochet terminology throughout this project. Even if you are familiar with these, it is helpful to keep these definitions in mind as you work.
- Chain (ch): The foundation of most crochet projects.
- Single Crochet (sc): A short, dense stitch that provides structural support.
- Half Double Crochet (hdc): A slightly taller stitch that is the “goldilocks” of comfort—not too dense, not too airy.
- Extended Half Double Crochet (ehdc): We will use this to add length and drape to our sweater. To perform an ehdc, yarn over, insert hook, pull up a loop, yarn over, pull through one loop, then yarn over and pull through all three loops on your hook.
- Stitch Marker: Used here to hold panels in place while you seam them.
- Gauge: This is the measurement of stitches over a four-inch square. For this project, don’t stress too much about “perfect” gauge—because the design is intentionally oversized, slight variations won’t ruin your fit.
Helpful Notes Before You Start
Crochet garments behave differently than flat items like blankets. Because this sweater will hang from your shoulders, the weight of the yarn can cause the fabric to “stretch out” over time.
Keep your tension consistent, but aim for a relaxed grip. If your foundation chain is too tight, the bottom of your cardigan may pull inward. To prevent this, use a hook one size larger than your working hook just for your foundation chain. Also, remember that we will be working in rows. At the end of each row, you will chain 2 and turn your work. This chain-2 does not count as a stitch, which keeps your edges looking neat and straight.
Main Tutorial: The Oversized Cardigan
This cardigan is constructed in five flat pieces: one back panel, two front panels, and two sleeves.
Part 1: The Back Panel
- Foundation: Ch 62 (or any even number until you reach 22 inches wide).
- Row 1: Hdc in the 3rd ch from hook and in each ch across. Turn. (60 hdc)
- Rows 2–50: Ch 2, hdc in each st across. Turn.
- Finish: Fasten off, leaving a long tail for sewing.
Part 2: The Front Panels (Make 2)
- Foundation: Ch 30.
- Row 1: Hdc in the 3rd ch from hook and in each ch across. Turn. (28 hdc)
- Rows 2–50: Ch 2, hdc in each st across. Turn.
- Finish: Fasten off. You now have two mirror-image pieces that will form the left and right side of your cardigan front.
Part 3: The Sleeves (Make 2)
- Foundation: Ch 36.
- Row 1: Hdc in the 3rd ch from hook and in each ch across. Turn. (34 hdc)
- Rows 2–40: Ch 2, hdc in each st across. Turn.
- Decrease: Every 5 rows, skip the first and last stitch to create a gentle taper toward the wrist.
- Finish: Fasten off.
Assembly
Lay your back panel flat on a clean surface. Place the two front panels on top, aligning the outer edges with the back panel. Sew the top shoulders together using a whip stitch or mattress stitch, leaving about 8 inches in the center open for the neck hole. Then, attach the sleeves to the sides. Once the sleeves are attached, sew the underarm seam and the side seams of the body in one continuous motion.
Border
To give your cardigan a polished, boutique look, join your yarn at one of the bottom front corners. Work one round of single crochet evenly around the entire perimeter of the opening, placing three single crochets in each corner to ensure the fabric lays flat.
Step-by-Step Explanation
Think of this project as building blocks. First, you create the main spine of the sweater—the back panel. It is a simple, meditative rectangle. Then, you move to the front panels, which are just smaller versions of the back! When it comes to the sleeves, don’t feel discouraged if they look too wide at first. Once you seam them and they are positioned on your body, the “drop shoulder” construction creates that trendy, relaxed look we all love. The assembly is simply pinning pieces together and sewing them with a yarn needle. If the sewing part feels scary, remember: no one will see the inside seams, so perfection is not required! Your stitches just need to be secure and strong.
Common Mistakes to Avoid
Even experienced crocheters run into these snags. Let’s head them off:
- The “Growing” Edge: It is very common to accidentally add a stitch at the end of a row. Always count your stitches at the end of every row until you are comfortable with the pattern.
- The Twisted Chain: When starting, lay your foundation chain flat on the table, not twisted, before joining or working your first row.
- Tight Tension: If you find your cardigan is shrinking or feeling stiff, your tension is likely too high. Take a break, shake out your hands, and try to relax your grip on the yarn.
- Ignoring the Yarn Label: Different yarns have different “drags.” If you change yarn during the project, check that the weight (the little number in the icon) matches your initial choice.
Pro Tips for a Better Result
- Blocking: Honestly, this is the secret to professional-looking crochet. Once your sweater is assembled, lightly dampen it and pin it to its final measurements on a foam mat or towel. Let it dry completely. It completely transforms the drape of the fabric.
- Stitch Markers: Be generous with your stitch markers when seaming. Pinning your pieces together before you start sewing ensures that your edges will line up perfectly.
- Yarn Transitions: When you run out of a ball of yarn, join the new ball in the middle of a row rather than at the end. This makes the transition invisible.
Variations and Personalization Ideas
- The Belted Look: Crochet a long chain (about 60-70 inches) and create a simple sash to cinch the waist whenever you want a more defined silhouette.
- Color Blocking: Use two different colors—one for the back and sleeves, and another for the front panels—for a modern, graphic look.
- Extra Comfort: Add deep pockets to the front panels by crocheting two small squares and sewing them onto the front about 6 inches from the bottom.
Care and Storage
Because this is a handmade garment, treat it with love. Avoid hanging it on wire hangers in your closet, as this will stretch out the shoulders over time. Instead, fold your cardigan and store it on a shelf. When it needs a wash, hand-wash it in cool water with a gentle wool-safe detergent, gently squeeze (do not wring!) the water out, and lay it flat to dry on a clean towel.
FAQ
How do I know if the sweater will fit me?
Because this is an oversized, boxy design, it is very forgiving. If you want it larger, simply add more chains to your foundation row. If you want it smaller, use fewer chains.
Is it okay if my stitches aren’t perfectly even?
Absolutely! That variation in stitch size is what gives handmade items their “soul.” As long as your stitch count remains consistent, your sweater will look beautiful.
Can I use cotton yarn for this?
Yes! Cotton creates a much heavier, more structured cardigan. If you use cotton, keep in mind that the finished sweater will be quite warm and have less “bounce” than an acrylic or wool version.
What if I run out of yarn mid-row?
Don’t panic! Simply tie or weave in your new yarn tail, and keep working. If you are worried about the knot, use an “invisible join” technique, where you overlap the two yarn ends and carry them through the stitches as you go.
Is it hard to sew the pieces together?
It is actually quite straightforward. You are essentially sewing straight lines. Use a tapestry needle and a length of matching yarn, and go slowly. Take your time, and remember that you can always undo a stitch if it doesn’t look quite right the first time.
Conclusion
Congratulations on making it to the end of this guide! Creating a wearable piece of clothing like this oversized cardigan is a huge achievement. You have taken a ball of yarn and transformed it into a cozy, functional, and stylish item that you can be proud of every time you wear it. Whether you are wearing your new creation while reading a favorite book or heading out for a stroll on a crisp afternoon, carry that sense of accomplishment with you.
Practice makes progress; if your first sweater has a few tiny quirks, celebrate them! They are the marks of a human creator, not a machine. I hope this experience has given you the confidence to dive into more garment projects. There are so many beautiful patterns to explore and endless ways to express your creativity through crochet. Keep your hook handy, keep your stitches cozy, and most importantly, enjoy the beautiful, slow process of creating something special. Happy crocheting!