
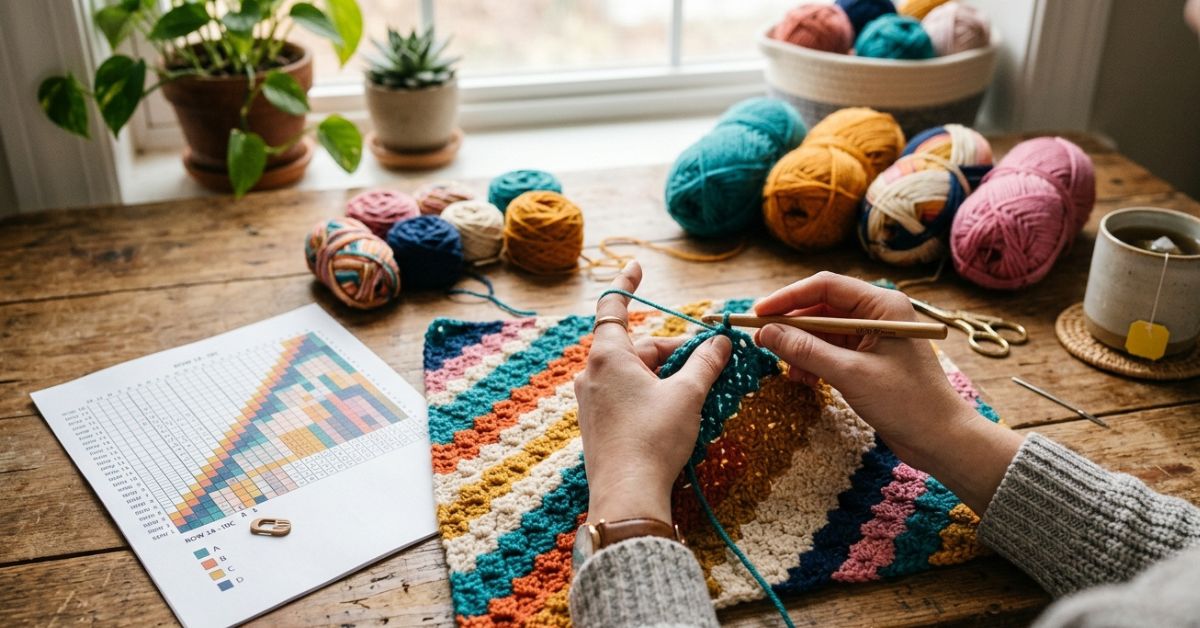
There is something profoundly magical about the corner-to-corner—or C2C—crochet technique. If you have ever scrolled through social media or visited a local craft fair and marveled at those pixel-perfect blankets, intricately detailed graphs, and stunningly smooth color changes, you have likely been looking at a C2C project. Many crocheters feel a slight flutter of hesitation when they first encounter a C2C pattern, intimidated by the idea of reading a graph or managing all those little yarn bobbins. I want to reassure you right now: C2C is not just achievable, it is arguably one of the most rewarding and meditative ways to crochet.
Once you master the rhythm of the basic “pixel” stitch, the world of graph-based crochet opens up to you. Whether you want to create a cozy baby blanket with a whimsical heart in the center, a decorative throw pillow for your living room, or a bold wall hanging, this technique is your best friend. In this guide, we are going to walk through the fundamentals of reading graphs, the logic behind increasing and decreasing, and a practical project to help you find your groove. Grab your favorite hook, a warm cup of coffee, and let’s settle into a beautiful, creative flow together.
Quick Project Overview
To help you practice, we are working on a “Modern Geo-Heart Square.” This is a perfect project for beginners wanting to bridge the gap into intermediate graph work.
- Skill Level: Beginner-friendly intermediate.
- Estimated Time: 4 to 6 hours.
- Finished Size: Approximately 12 inches by 12 inches.
- Best Use: A cute crochet washcloth, a decorative coaster, or one square of a larger blanket.
- Why You’ll Love It: You will gain the confidence to follow a grid, learn exactly where to flip your work to start your decreases, and end up with a polished, professional-looking piece of fiber art.
Materials Needed
You do not need a fancy studio to get started. For this practice square, keep it simple.
- Yarn: Worsted weight (Size 4) acrylic or cotton yarn. Cotton is lovely for home decor items because it has great stitch definition. You will need two contrasting colors (one for the background, one for the heart).
- Crochet Hook: Size H/8 (5.0 mm).
- Other Tools: A tapestry needle for weaving in ends, sharp scissors, and a highlighter or pencil to track your progress on your graph.
- Optional: Small clips or clothespins if you decide to keep your yarn colors separated in bobbins.
Stitches and Abbreviations
We use standard U.S. crochet terminology for all our projects.
- Chain (ch): The foundation of your work.
- Slip Stitch (sl st): Used for joining or moving across your work.
- Double Crochet (dc): The main stitch used to build the C2C pixel.
- Corner-to-Corner Pixel (C2C Pixel): Usually defined as ch 6, dc in 4th ch from hook and next 2 chs.
Pattern Notes Before You Start
Crochet is meant to be fun, not a race. Remember that C2C builds on the diagonal. You start in one corner, grow until you hit the desired width, and then decrease to match the other corner.
- Tension: Try to keep your slip stitches consistent. If your slip stitches are too tight, it becomes very difficult to work into them on the following row.
- The Grid: Each square on a graph represents one “pixel” or “block.”
- General Rule: You increase at the start of a row until you reach the widest point of the project, then you decrease at the end of every row until you finish.
Full Crochet Pattern: The Modern Geo-Heart Square
We will work this project in two distinct phases: the Increase Phase and the Decrease Phase.
Part 1: The Increase Phase
- Row 1: Ch 6, dc in 4th ch from hook and in each of next 2 chs. (1 block made)
- Row 2: Ch 6, dc in 4th ch from hook and in each of next 2 chs (this is your new block). Slip stitch into the top of the ch-3 space of the previous row’s block. Ch 3, 3 dc into that same ch-3 space. (2 blocks)
- Row 3: Ch 6, dc in 4th ch from hook and next 2 chs. Sl st into next ch-3 sp, ch 3, 3 dc in same sp. Repeat from to across to the end of the row. (3 blocks)
- Rows 4–12: Continue repeating the logic of Row 3. At the start of each row, ch 6 to add a block. At the end of every “gap” across the row, work your sl st and your 3 dc. You are effectively growing your square diagonally.
Part 2: Working the Graph
To incorporate your heart, you will need to switch colors. When the graph indicates a color change, finish the final pull-through of the last dc of the previous block with the new color. Carry your yarn loosely behind the work or use bobbins to manage the strands.
Part 3: The Decrease Phase
Once you reach the 12th row (or your side width), you stop adding blocks at the beginning of the rows. This is what creates the “corner” shape.
- Row 13 (First Decrease Row): Instead of chaining 6, do not add a block. Instead, sl st across the 3 dc of the first block you would have just worked. Sl st into the ch-3 space. Ch 3, 3 dc into that space. Continue in pattern to the end of the row.
- Rows 14–23: Repeat the decrease step at the start of every row. This will naturally shrink your project back down to the final single block in the opposite corner.
Part 4: Finishing
Once you complete the final block, fasten off and cut your yarn, leaving a 6-inch tail. Weave in all your ends on the back of the work. If you used multiple colors, ensure you have tied off those strands securely so your heart doesn’t unravel!
Step-by-Step Tutorial Explanation
When you look at a C2C graph, it looks like a piece of graph paper with squares filled in. The C2C technique is simply a way of coloring those squares by building them one by one. Imagine building a wall of bricks; you start with one base brick, then you build two on top of it, then three, and so on.
As you crochet, you will see little “clusters.” Each cluster is one block. If the graph shows a square of color A, you work that block in color A. When the graph shifts to color B, you change your yarn. The most important thing to remember is the “flip”: the work always sits on the diagonal. Beginners often worry that their work is curling or growing in the wrong direction, but as long as you are increasing at the start and decreasing at the end, your work will naturally form that perfect square shape.
Common Mistakes to Avoid
- The Chain-3 Tension: Many new crocheters make their starting chains very tight. This makes it impossible to insert the hook into those chains to create your dc stitches. Relax your hands—let the hook do the work.
- Twisted Starts: When starting a new block, be careful that your ch-6 isn’t twisted before you start your dc stitches. A twist here will show up as a bump in your otherwise smooth pixel.
- The “Decrease” Confusion: The most common mistake is forgetting to decrease. If you continue to add an extra block to the start of every row, your square will turn into a long, distorted trapezoid. Remember: once you hit your desired width, you must stop adding blocks at the beginning of the row.
Pro Tips for a More Beautiful Result
- The “Invisible” Join: To make color transitions truly seamless, always change your yarn color during the final loop-pull of the very last double crochet of a block. This ensures the new color starts right at the base of the next stitch.
- Blocking: Because C2C projects are worked on a diagonal, they can sometimes be slightly “lopsided” when they come off the hook. A quick steam block or a light soak and pin-out will make your edges straight and your stitches look uniform.
- Yarn Bobbins: If you are doing a complex heart, do not try to carry your yarn across the whole project. It will create messy “floats” on the back. Use small clothespins to hold your separate balls of yarn. It keeps your workspace tidy and keeps the yarn from tangling.
Variations and Personalization Ideas
- Simple Stripes: If you aren’t ready for a heart, practice your increase/decrease rhythm by making a blanket with simple diagonal stripes. Change colors every 2 rows.
- Weighted Blankets: Use a bulky (Size 5) yarn to turn this pattern into a quick, heavy, and incredibly cozy throw.
- Border Appeal: Once your square is finished, add a round of single crochet around the entire perimeter to give it a clean, framed edge. You can even add a lacy shell stitch border for a more feminine, delicate touch.
Care Instructions
To keep your handmade project looking fresh for years, treat it with gentle care. If you used acrylic yarn, it is generally safe to machine wash on a delicate cycle in a mesh garment bag and tumble dry on the lowest setting. If you used cotton, I recommend hand washing in cool water with a gentle detergent and laying it flat to dry. This prevents the heavy, water-logged cotton from stretching out of shape.
FAQ
How do I know when it is time to decrease?
You decrease when the number of blocks on your row matches your desired width. If you want a 12-inch square and your row is 12 blocks wide, that is your signal to stop increasing and start decreasing.
Can I use this technique for a rectangular blanket?
Absolutely! To make a rectangle, you increase at the start of the row on one side, but you continue to add a block at the end of the row on the other side until you reach the desired length. Once the length is met, you then decrease on both sides.
Why are my edges uneven?
This often happens if your tension varies throughout the row. If your first block of the row is much tighter than your last, your edge will look wavy. Practice keeping a consistent grip on your yarn.
What is the advantage of using bobbins?
Bobbins keep your yarn colors separate. Without them, your yarn balls will dance around each other, creating a tangled “yarn nest” that can be very frustrating to fix.
Is C2C suitable for clothing?
Yes! C2C sweaters are very popular, though they tend to be a bit thicker and stiffer than standard crochet fabric. It is a fantastic choice for a structured, cozy, oversized cardigan.
Conclusion
I hope this tutorial has helped pull back the curtain on the C2C technique. It truly is one of the most satisfying ways to crochet once you grasp the simple logic of the increase and decrease. There is something so peaceful about watching a pattern emerge as you turn each pixel into a structural element of your project. Whether you are crafting a gift for a loved one or creating something special to brighten your own home, remember that your stitches are a reflection of your patience and your care. Take your time, enjoy the rhythm, and don’t be afraid to pull back a row if things feel a bit off—that is simply part of the creative process. Keep your hook moving, and happy stitching!