
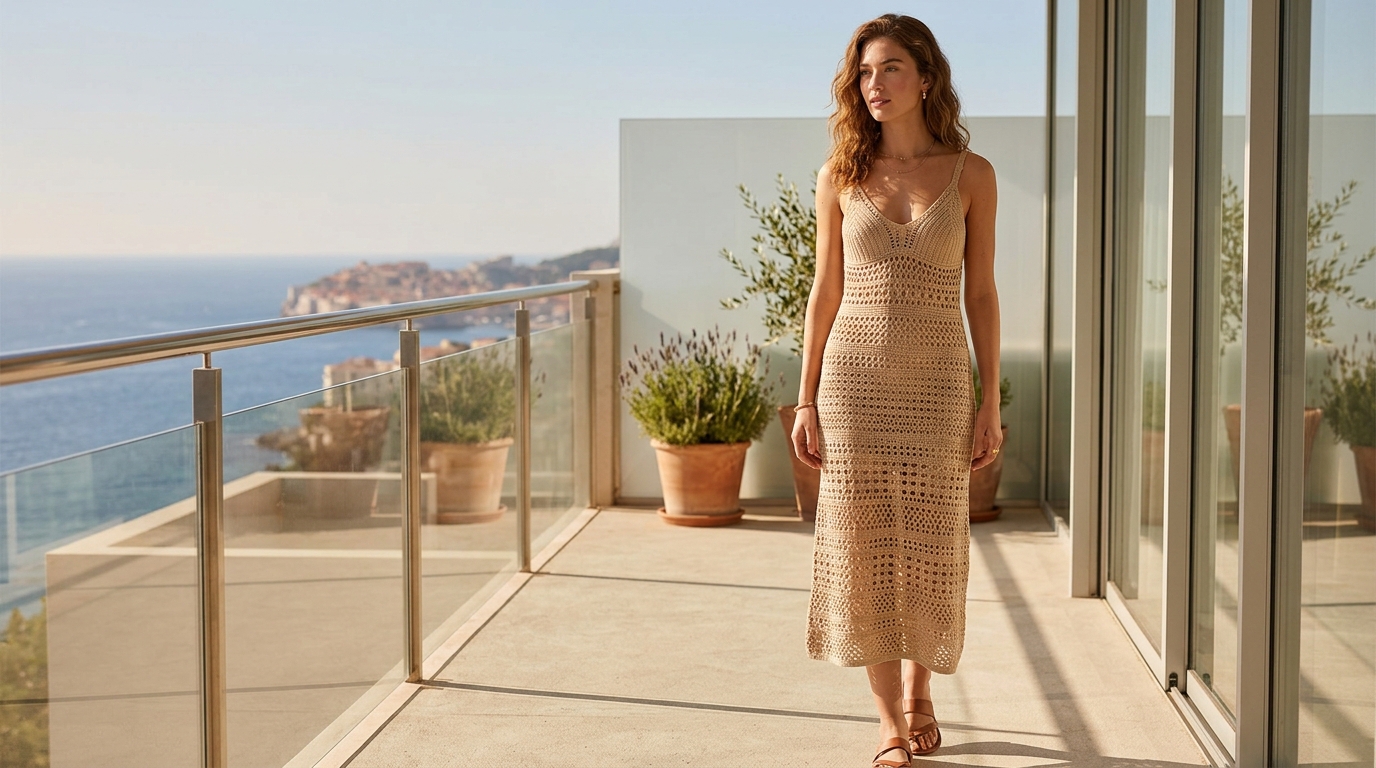
There is something uniquely magical about wearing a garment you created with your own two hands. A crochet dress is the ultimate expression of slow fashion—a chance to slow down, pick out your favorite yarn color, and construct a piece of art that fits your body and your personality perfectly. Whether you are dreaming of a breezy, beach-ready cover-up for a summer vacation or a structured, elegant dress for an afternoon tea, crochet offers endless possibilities.
While the idea of making a full-length garment can feel intimidating to someone just starting their fiber arts journey, I want to reassure you that it is much more accessible than you might think. By sticking to simple, rhythmic stitches and focusing on modular construction, we can create a stunning, fashionable outfit that looks professional while remaining beginner-friendly. This guide is designed to walk you through the process of creating a classic, versatile crochet dress, helping you build confidence with every single stitch.
Quick Overview
This project is tailored for the confident beginner to the intermediate crocheter. It focuses on a simple, timeless silhouette that highlights the texture of your yarn.
- Skill Level: Beginner-Friendly Intermediate
- Estimated Time: 15–25 hours, depending on speed and size
- Finished Size: Customizable (instructions provided for standard S/M/L)
- Best Use: Summertime outings, layering over a slip, or as a chic beach cover-up
- Why You’ll Love It: This design uses basic stitches, meaning you can listen to your favorite podcast or audiobook while you work. Plus, it is highly customizable for length and fit.
Materials and Tools Needed
To create your crochet dress, you will need to gather a few essential supplies. I recommend choosing a natural fiber or a soft cotton blend, as these drape beautifully against the skin and are breathable.
- Yarn: Approximately 1,200 to 1,600 yards of DK-weight (Category 3) yarn. Cotton/bamboo blends offer a lovely, polished sheen.
- Crochet Hook: Size G/6 (4.0 mm) or size needed to obtain your desired gauge.
- Stitch Markers: Essential for keeping track of your sides and shaping.
- Measuring Tape: Crucial for ensuring your dress fits your specific body measurements.
- Tapestry Needle: For weaving in your ends securely.
- Scissors: A sharp pair makes finishing much more enjoyable.
Understanding Key Concepts
Before you pick up your hook, let’s briefly touch on the fundamental concepts that make this project a success.
- Gauge: This is the measurement of stitches per inch. Since we are making clothing, checking your gauge is non-negotiable. If your stitches are too tight, your dress will be stiff; too loose, and the fabric may sag over time.
- Stitch Tension: Keep your tension consistent throughout. If you notice your hands getting tired, take a break! Consistent tension leads to a professional finish that doesn’t look “homemade” in a negative way.
- Flat Construction: We will be working in two main rectangular or trapezoidal panels (front and back) and seaming them at the sides and shoulders, which is much easier than working in the round for beginners.
Helpful Notes Before You Start
- Blocking: Never skip this step! Once your dress panels are finished, soak them in water with a delicate wash, lay them flat on towels to dry, and gently shape them to your desired size. This evens out all your stitches and gives the garment a soft, finished look.
- Customization: Because this is a panel-based dress, you can easily adjust the width by adding or subtracting foundation chains. Just ensure your total count matches the stitch multiple of your chosen pattern.
- Support: If you are nervous, try testing a small swatch before starting the main body to ensure you love the “look” of the stitch pattern with your chosen yarn.
The Crochet Dress Tutorial
This design utilizes the Half Double Crochet (HDC) stitch for the base, providing a sturdy, comfortable fabric with beautiful depth.
Part 1: The Front Panel
Foundation: Chain 80 (or enough to reach half your desired chest circumference plus 2 inches for ease).
Row 1: Work 1 HDC in the 3rd chain from the hook and each chain across. Turn.
Row 2-40: Chain 2 (counts as first stitch), HDC in each stitch across. Turn.
(Optional: Shaping) From row 41 onward, decrease one stitch at the beginning and end of every 4th row to create a subtle waist taper. Continue until the panel reaches your desired length.
Part 2: The Back Panel
Repeat the instructions provided for the Front Panel. You can choose to keep the back neck higher than the front for modesty and support.
Part 3: The Assembly
Lay the front and back panels together with the right sides facing each other. Use your tapestry needle and a length of yarn to whip stitch the side seams, leaving roughly 7 inches open at the top for your armholes.
Next, join the shoulders. Measure your neck width and sew the shoulder seams, again using the whip stitch method.
Part 4: The Neckline and Armhole Borders
Working directly into the edge of the armhole, join your yarn with a slip stitch. Work one round of single crochet evenly around the opening. Repeat this for the neckline. This gives the dress a finished, clean, and intentional look.
Part 5: Finishing Touches
Weave in all your ends with a tapestry needle. Ensure you pull the yarn through the back loops of the stitches so your work stays secure through multiple wash cycles. Once your ends are woven in, perform your final blocking.
Step-by-Step Explanation for Success
Think of the construction as building a silhouette. You aren’t just making a pouch; you are creating “fabric shapes.” When you finish the panels, lay them out on your bed. If they look too wide, you can still tighten your seams slightly before knotting the yarn. If the armholes feel restrictive, simply unpick the last inch of your side seam. This accessibility is the true beauty of crochet—it is entirely forgiving.
Common Mistakes to Avoid
- The “Tight Chain” Trap: Beginners often work their foundation chain too tightly, causing the bottom of the dress to pucker. Try using a hook one size larger for your starting chain only, then switch back to your regular hook for the rest of the work.
- Skipping the Turning Stitch: If you lose a stitch count every row, you are likely forgetting to work into the “turning chain.” Always count your stitches at the end of each row.
- Ignoring Drape: Using a yarn that is too thick will make your dress feel like a blanket. Stick to sport or DK weight for a garment that moves gracefully with you.
Pro Tips for a Better Result
- The “Secret” Seam: When sewing your panels together, use the mattress stitch instead of a whip stitch if you want a seamless, invisible finish. It makes the sides look like they were crocheted in one continuous piece.
- Color Blocking: If you are feeling adventurous, switch colors every 20 rows. It is a fantastic way to use up leftover yarn from other projects.
- The Slip Solution: Because crochet has natural gaps between stitches, create a simple jersey knit slip lining. You can sew this directly inside the neckline of the finished dress.
Variations and Personalization
- The Maxi Transformation: Simply continue adding rows of the main stitch pattern until the dress reaches your ankles.
- The Belt Option: Crochet a long, thick cord using a foundation single crochet stitch to create a matching belt, which perfectly cinches the waist for a bohemian look.
- Lace Edging: Add a row of shell stitches (5 double crochets in one space) along the bottom hem for a feminine, vintage-inspired flourish.
Care and Next Steps
To keep your new favorite dress in pristine condition, always hand wash it in cool water using a gentle soap. Never hang a wet crochet dress on a hanger, as the weight of the water will stretch it out of shape. Instead, roll the dress in a towel to remove excess moisture and dry it flat on a mesh drying rack.
Once you have mastered this dress, you are ready to explore more complex stitch patterns, such as the V-stitch or shell stitch, for your next garment. Challenge yourself to try making a cardigan or a simple summer top next!
FAQ
Can I change the yarn weight for this pattern?
Yes, you can, but it will change your gauge. If you use a thicker yarn, your dress will be warmer and heavier; a thinner yarn will require more stitches and patience. Always recalibrate your starting chain based on your body measurements if you switch yarn weights.
How do I know if the dress is the right size?
The best way is to hold your work up to your body or compare it to a garment you already own and love. Remember that crochet naturally has some “stretch” to it, so it is often better to make it slightly more form-fitting than you think.
Why does my dress look wavy at the bottom?
This usually happens if your tension is too loose or if your gauge wasn’t consistent. Blocking usually fixes this: wet the dress, pin it into a perfectly straight shape on your blocking mat, and let it dry completely.
Do I need a lining for a crochet dress?
It depends on the stitch pattern and the yarn. If you use a dense stitch like the HDC, a lining may not be necessary. However, for a more professional and comfortable feel, a simple slip is always recommended.
Is it hard to join the pieces together?
Not at all! Using the mattress stitch, you simply pick up the horizontal bars of the edge stitches and pull the yarn through. It takes a little practice to get the tension right, but it becomes second nature within just a few inches.
Creating a crochet dress is a journey of patience and creativity. By taking it one row at a time, you aren’t just following a pattern—you are crafting a piece of history that represents your skill and dedication. Happy hooking, and enjoy every moment of your creative process!