
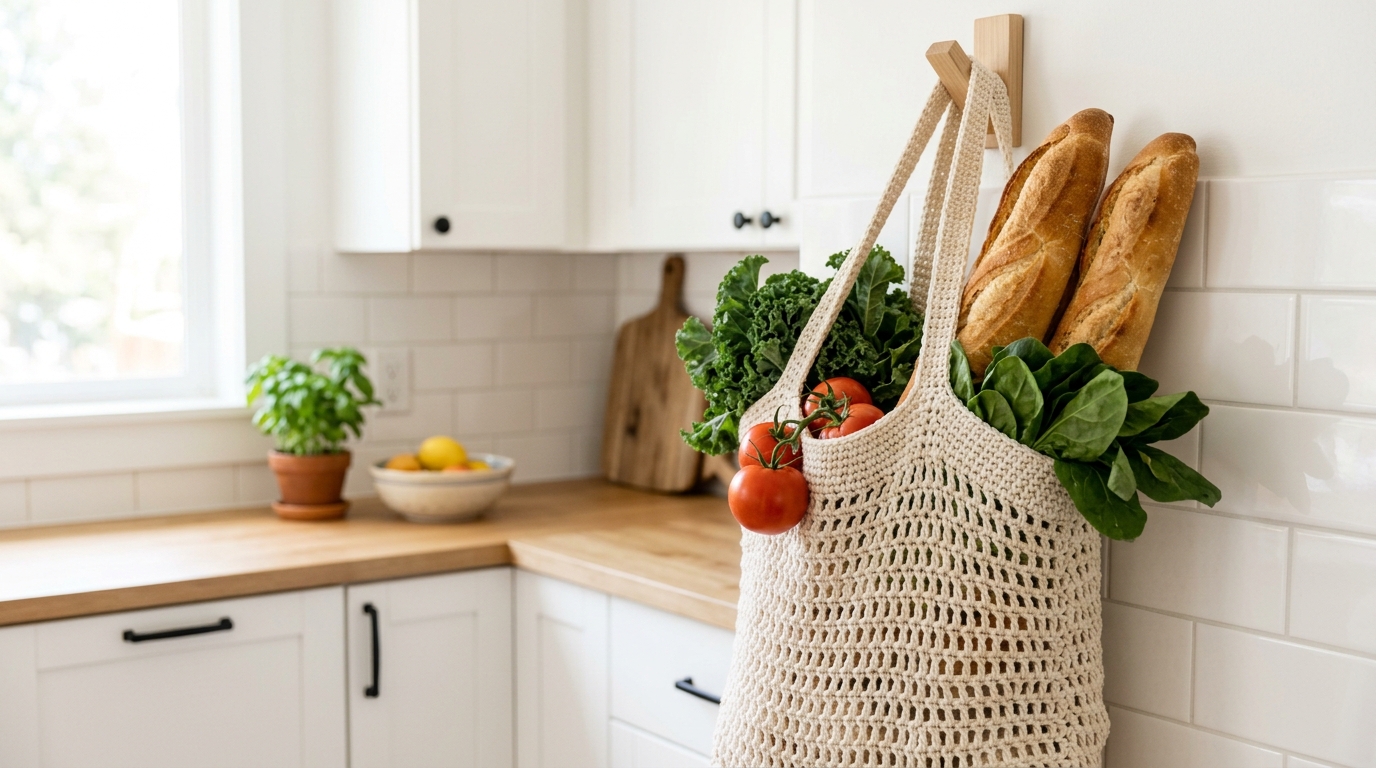
There is something incredibly grounding about carrying a handmade bag to the farmers market. Whether you are picking out fresh flowers, ripened heirloom tomatoes, or just heading to your local library, a sturdy, hand-crocheted market tote is the ultimate companion. It is spacious, breathable, and best of all, it carries the spirit of your creativity wherever you go. Unlike mass-produced plastic bags that thin out and end up in landfills, a cotton crochet tote is a gift that keeps on giving. It is the perfect beginner-friendly project because it uses basic stitches that build rhythm and confidence.
If you have been eyeing those chic net bags and wondering if you could make one yourself, the answer is a resounding yes. You don’t need years of experience to create something beautiful and functional. This tutorial is designed to walk you through the process, from choosing your first strand of yarn to fastening off that final loop. We will focus on building a durable structure that expands to hold your treasures without losing its shape. Grab a cup of tea, find your favorite crochet hook, and let’s get started on your next favorite everyday essential.
Quick Overview
This market tote is designed to be an accessible project for beginners who have mastered basic stitches and a relaxing, repetitive project for intermediate crocheters.
- Skill Level: Beginner-friendly.
- Estimated Time: 6 to 8 hours depending on your speed.
- Finished Size: Approximately 14 inches wide by 15 inches long (excluding handles), with plenty of stretch.
- Best Use: Grocery shopping, beach days, or as an eco-friendly gift.
- Why You’ll Love It: This bag uses a durable, reinforced base and a versatile stitch pattern that stretches just enough to hold your items while remaining strong.
Materials or Tools Needed
To ensure your bag has the longevity required for market trips, selecting the right material is the first step toward success.
- Yarn: Approximately 350-400 yards of worsted weight (Category 4) cotton or cotton-blend yarn. Cotton is essential here because it does not stretch out permanently like acrylic or wool, and it handles the weight of groceries beautifully.
- Hook: Size H/8 (5.0 mm) crochet hook. This creates a tight enough stitch for structure but keeps the fabric flexible.
- Stitch Markers: Essential for keeping track of your rounds, especially when working in a spiral.
- Tapestry Needle: For weaving in your yarn ends securely.
- Scissors: Any sharp pair will do.
- Measuring Tape: To ensure your base is the desired size.
Crochet Terms, Stitches, or Key Concepts
Before we dive into the pattern, let’s quickly refresh the shorthand:
- Ch (Chain): The foundation of most crochet projects.
- Sc (Single Crochet): A short, dense stitch that provides great stability.
- Dc (Double Crochet): A taller stitch that works up quickly and creates the “net” feel in the upper portion of the bag.
- Sl St (Slip Stitch): Used to join rounds and finish edges cleanly.
- St (Stitch): Referring to the base of the previous row.
- Inc (Increase): Placing two stitches into one space to widen your circle.
- YO (Yarn Over): The motion of wrapping yarn around the hook.
Helpful Notes Before You Start
Tension is everything when making a bag. If you find your stitches are very loose, don’t be afraid to drop down a hook size to keep the fabric dense at the base. You want the bottom of your bag to be solid—this is where your heavy items will sit, so keeping those single crochets tight is the secret to a bag that doesn’t sag. Also, note that while this pattern works in the round, the top portion uses chain spaces, which allows the bag to expand horizontally. If you are new to working in the round, place a stitch marker in the first stitch of every round so you never lose your place.
Main Tutorial
Phase 1: The Sturdy Base
The base is worked in a flat circle, which will eventually form the bottom of your bag.
Round 1: Start with a magic ring. Ch 1, work 8 sc into the ring. Join with a sl st to the first sc. (8 sc)
Round 2: Ch 1, 2 sc in each st around. Join with a sl st. (16 sc)
Round 3: Ch 1, 1 sc in next st, 2 sc in next st repeat from to around. Join with a sl st. (24 sc)
Round 4: Ch 1, 1 sc in next 2 sts, 2 sc in next st repeat from to around. Join with a sl st. (32 sc)
Round 5: Ch 1, 1 sc in next 3 sts, 2 sc in next st repeat from to around. Join with a sl st. (40 sc)
Round 6: Ch 1, 1 sc in next 4 sts, 2 sc in next st repeat from to around. Join with a sl st. (48 sc)
Round 7: Ch 1, 1 sc in next 5 sts, 2 sc in next st repeat from to around. Join with a sl st. (56 sc)
Round 8: Ch 1, 1 sc in each st around, working into the back loops only (BLO) to create a crisp edge for the base sides. Join with a sl st. (56 sc)
Phase 2: The Body
Now we transition from the flat circle to the walls of the tote.
Round 9: Ch 1, 1 sc in each st around. Join with a sl st.
Round 10: Ch 3 (counts as dc), ch 1, skip 1 st, 1 dc in next st. Repeat around until you reach the end, ch 1, sl st to the 2nd ch of your starting ch-3.
Round 11–25: Repeat Round 10. You will notice the bag beginning to grow upward and become “net-like.” This mesh creates the classic market bag aesthetic while allowing for incredible capacity.
Phase 3: The Rim and Handles
This provides the durability needed to carry your market haul.
Round 26: Ch 1, work 1 sc in every dc and every ch-1 space around. Join with a sl st.
Round 27–29: Work 1 sc in each st around. This creates a solid, comfortable rim for the handle attachment.
Round 30 (Handles): Ch 1, sc in next 10 sts. Ch 60 (this is the size of your handle; you can make more or fewer chains for longer or shorter handles). Skip 20 sts, sc in next 8 sts. Ch 60, skip 20 sts, sc in final sts. Join with a sl st.
Round 31: Sc around the entire outer and inner perimeter of the handles and the rim. This adds a layer of strength to the handle connection points. Fasten off and weave in your ends securely.
Step-by-Step Explanation
Once you finish your base, it should look like a small, flat coaster. When you start the “back loops only” (BLO) round, you will notice the sides of the circle starting to curl upward—this is exactly what we want! Think of the base as a foundation for a house. If your base is neat and tight, the rest of the body will hang correctly. The “mesh” part of the bag is simply a dance between double crochets and small chains. By skipping a stitch and chaining one, you create that airy, diamond-shaped pattern that characterizes these traditional market bags. Don’t worry if the bag looks small while you are crocheting it; cotton yarn has a lot of “give,” and once you load it with fruit or books, it will stretch to a generous size.
Common Mistakes to Avoid
The most common mistake is neglecting the base tension. If your base is too loose, your items will poke through the bottom. Keep your stitches firm there. Another frequent issue is counting your skip spaces incorrectly in the mesh pattern. Take a moment after every round of mesh to ensure you have an even number of holes or consistent spacing. Lastly, never skip the step of reinforcing your handles with a final row of single crochet. If you don’t do this, the handles will stretch and thin out significantly over time.
Pro Tips for a Better Result
- Blocking: Once finished, lightly steam your bag or soak it in cool water and lay it flat to dry. This relaxes the stitches and makes the net pattern pop uniformly.
- Color Customization: Use a variegated cotton yarn for a bohemian look, or stick to a neutral “natural” cotton color for a classic, clean aesthetic that hides dirt from the grocery store floor.
- Handle Comfort: If you plan on carrying heavy items, consider crocheting the handles slightly wider by making two rows of single crochet over the ch-60 section instead of one.
Variations, Examples, or Personalization Ideas
If you feel like being creative, try adding a row of solid single crochet stitches every five rounds to create “stabilizer bands.” This prevents the bag from stretching too thin. You can also add a drawstring using a simple chain of 100 stitches, woven through the holes in the final round of the mesh, to create a cinched top. For a bit of flair, attach a small crocheted leaf or flower to the handle junction.
Care, Storage, or Next Steps
Because cotton is durable, you can toss this bag in the washing machine on a gentle cycle, but I always recommend putting it inside a pillowcase first to prevent the handles from tangling. After washing, reshape it while damp and let it air dry. When not in use, fold it flat and tuck it into your glove box or store it hanging in your pantry. Now that you have mastered the basics of a market tote, you might want to try your hand at a “market basket” using a thicker, rope-style yarn for more structural rigidity.
FAQ
Can I make the bag bigger?
Yes, simply increase the size of your base by adding more rounds before moving to the sides. Just remember that a larger base diameter will require more yarn.
What is the best yarn for market bags?
100% cotton is the industry standard. It is strong, absorbent, and doesn’t stretch significantly under load like wool or nylon would.
My bag looks too small, should I be worried?
Not at all. Cotton mesh crochet is designed to be very stretchy. It will look small when empty but will expand impressively when you put items inside.
How do I join new yarn if I run out?
The safest way is to finish your current row and join the new yarn with a slip knot at the beginning of the next stitch, weaving in both tails securely as you work.
Are these bags machine washable?
Most cotton bags are. Use cool water and a gentle cycle, then lay flat to dry to maintain the shape of the circular base.
Conclusion
Creating your own market tote is one of the most rewarding milestones in a crocheter’s journey. Not only does it provide you with a tool that you will use for years to come, but it also serves as a peaceful reminder of the time you spent creating something meaningful with your own two hands. As you gain skill, you will find yourself noticing the way stitches lean and how yarn drape changes with every hook size you test. Embrace the process, don’t worry about perfect stitches, and enjoy the rhythm of your hook. Every little loop you make is one step closer to a beautiful, handmade life. Happy crocheting!