
Introduction
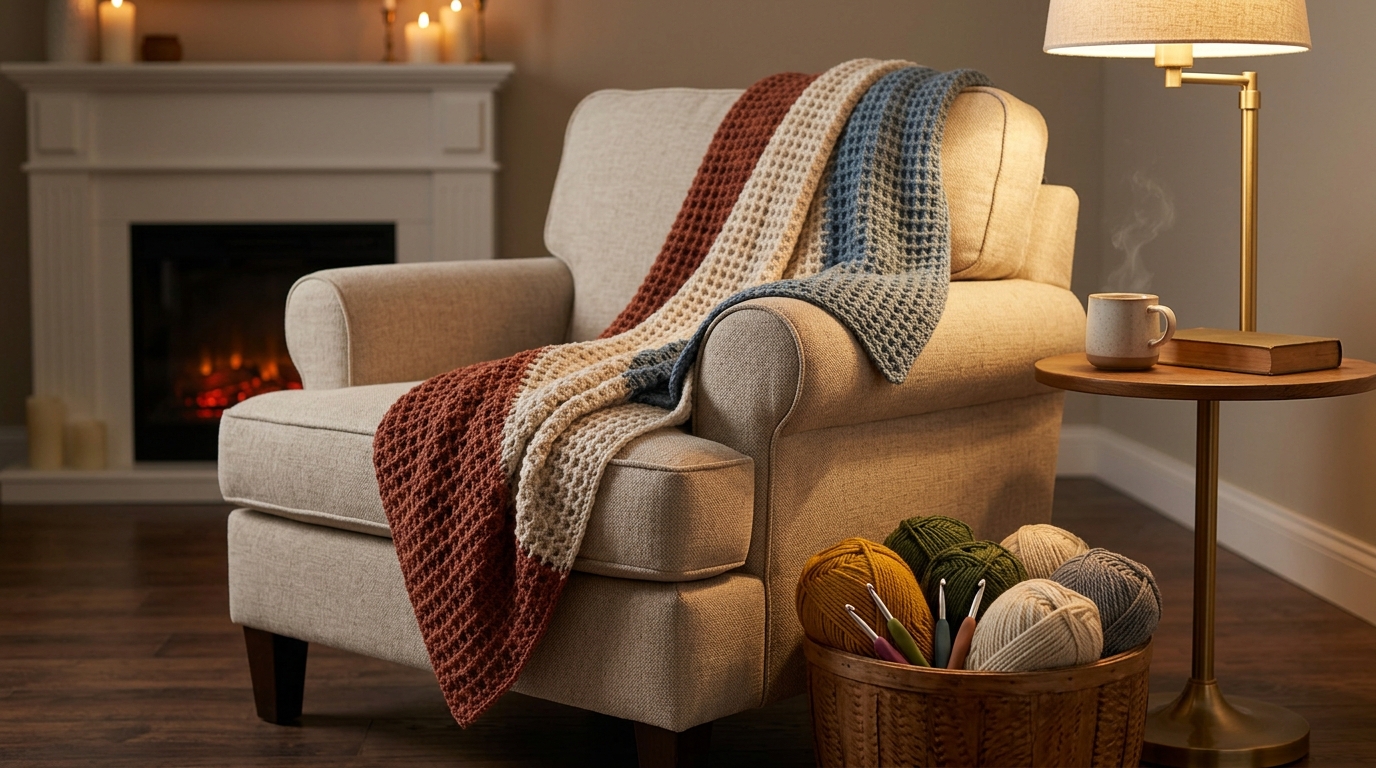
There is something truly magical about the weight of a handmade blanket resting across your lap on a chilly evening. Whether you are curling up on the sofa with a new book, enjoying a cup of coffee on the porch as the seasons change, or looking for a meaningful, heirloom-quality gift for a loved one, a crochet throw is the ultimate expression of care and comfort. If you have ever felt hesitant to start a “big” project, I want to reassure you: a beautiful, cozy blanket is not just for experts. It is, in fact, the perfect way to build your confidence and fall in love with the rhythmic, meditative art of crochet.
This guide is designed for the woman who appreciates timeless home decor and the satisfaction of creating something with her own two hands. We will walk through everything you need to know to create a stunning, texture-rich blanket step-by-step. You don’t need years of experience; you just need a bit of patience and a love for cozy things. By the time you fasten off your final stitch, you won’t just have a warm accessory—you’ll have a sense of accomplishment that carries over into every other aspect of your creative journey. Let’s gather our yarn and get started on this soothing, beautiful project.
Quick Overview
This project is tailored specifically for the beginner who is ready to move beyond small swatches and jump into a full-sized piece. By focusing on a timeless, classic stitch pattern, you will gain consistency in your tension, learn how to keep your edges straight, and master the art of transitioning between rows.
- Skill Level: Beginner-Friendly.
- Estimated Time: 15–25 hours, depending on your pace and how much television you watch while stitching!
- Finished Size: Approximately 45″ x 60″ (a generous throw size perfect for any couch).
- Why You’ll Love It: This pattern uses a simple, repetitive stitch combination that creates gorgeous, squishy texture without requiring complex counting, making it the ideal “low-stress” project.
Materials or Tools Needed
To create your throw, keeping your materials simple is the secret to a stress-free experience.
- Yarn: Approximately 2,200 to 2,500 yards of Medium (Size 4 / Worsted) weight yarn. I recommend choosing a soft, machine-washable wool blend or a high-quality acrylic that feels soft against the skin.
- Crochet Hook: A size H/8 (5.0 mm) hook. This size generally creates a nice, dense fabric that isn’t too stiff. If your stitches feel tight, don’t hesitate to size up to an I/9 (5.5 mm).
- Stitch Markers: These are essential for beginners. Use them to mark the first and last stitch of every row to ensure your edges stay uniform.
- Tapestry Needle: A large-eye, bent-tip needle is best for weaving in those final ends securely.
- Scissors: Any pair of sharp craft scissors will do.
Crochet Terms, Stitches, or Key Concepts
Before we begin our rows, let’s get comfortable with the terminology used in this pattern. We will be using standard U.S. crochet terms.
- Chain (ch): The foundation of most crochet projects. Yarn over and pull through the loop on your hook.
- Single Crochet (sc): Insert your hook into the stitch, yarn over, pull up a loop, yarn over, and pull through both loops on the hook. This creates tight, sturdy fabric.
- Double Crochet (dc): Yarn over, insert your hook, yarn over, pull up a loop, yarn over, pull through two loops, yarn over, and pull through the final two loops. This adds height and drape to your blanket.
- Stitch (st): The individual gap or loop where you place your hook.
- Turning Chain: The chains you make at the beginning of a row to bring your hook up to the height of the next row.
- Fasten Off: Cutting the yarn and pulling the tail through the final loop to secure your work.
Helpful Notes Before You Start
Crocheting a blanket is a commitment, and the most important rule is to keep your tension consistent. If you start your blanket while feeling stressed or tense, you might grip the hook too tightly, leading to a blanket that feels rigid. Try to crochet when you can relax.
A Note on Gauge: For a blanket, exact gauge isn’t strictly critical—it doesn’t have to fit you like a sweater! However, do check your tension after the first few inches. If the fabric feels like cardboard, go up a hook size. If it looks like a loose net with giant holes, go down a hook size. You want a fabric that feels fluid but cozy.
The Cozy Texture Throw Pattern
We will be working in rows back and forth. The combination of single and double crochet stitches creates a lovely, bumpy texture known in the crafting world as the “Lemon Peel Stitch.” It’s incredibly easy but looks sophisticated and intentional.
Foundation: Chain 160 (or any even number if you choose to resize your blanket).
Row 1
Starting in the second chain from your hook, work one single crochet stitch in each chain across. Turn your work. (Total: 159 stitches).
Row 2
Chain 2 (this counts as your first double crochet). Skip the first stitch, then work one double crochet in the next stitch. Then, work one single crochet in the following stitch. Continue alternating: one double crochet in the next, one single crochet in the following, all the way to the end of the row. End with a double crochet in the last stitch. Turn your work.
Row 3
Chain 1 (this counts as your first single crochet). Skip the first stitch, then work one single crochet in the next stitch. Then, work one double crochet in the following stitch. Remember: you are always placing a single crochet into the top of a double crochet from the previous row, and a double crochet into the top of a single crochet. This creates that beautiful, offset texture. Repeat until the end of the row. Turn.
Continuing the Pattern
Repeat Row 2 and Row 3 until your blanket reaches your desired length, usually about 60 inches. I suggest counting your stitches every 10 rows just to ensure you haven’t accidentally skipped a stitch at the end of a row.
Finishing and Borders
Once you have finished your final row, do not cut your yarn yet! For a professional, polished look, I suggest a simple border. Chain 1 and work one round of single crochet stitches along the entire perimeter of the blanket. Place three single crochets in each corner to ensure your border lies flat without bunching. Slip stitch to the first stitch to join, then fasten off. Take your tapestry needle and weave in your ends, threading the yarn tail back and forth through the stitches on the back side of the blanket to hide them securely.
Step-by-Step Explanation
Think of this blanket as a series of small, rhythmic steps. When you finish your foundation chain, don’t worry if it looks a bit messy. The work truly begins to take shape once you finish those first three rows. By Row 5, you will notice a “rhythm” developing. Because the pattern alternates, you don’t have to memorize a complex sequence. Just remember: if you see a “bump” (the double crochet), you place a “flat” stitch (the single crochet) into it. This intuitive flow is why this specific stitch is so popular for beginners. If you feel like your blanket is growing by itself, it usually means you are adding a stitch at the end of the row. This is why using those stitch markers on the very last stitch of every row is your best friend.
Common Mistakes to Avoid
The most common hurdle for new crocheters is the “Triangle Blanket” effect. This happens when you accidentally miss the very last stitch of a row, causing your blanket to shrink little by little until it becomes a triangle.
- The Solution: Always count your stitches at the end of the row for the first 20 rows. If you notice your edge starting to slant, count again.
- Tight Tension: If your starting chain is tighter than your rows, your blanket will have a curved “frown” shape at the bottom. Try using a crochet hook one size larger JUST for your foundation chain to keep it nice and stretchy.
- Ignoring the Turning Chain: Ensure you understand whether your turning chain counts as a stitch. In this pattern, we count it as a stitch, which is why we skip the first gap—this prevents you from adding extra stitches inadvertently.
Pro Tips for a Better Result
If you want your blanket to look like it came from a high-end boutique, blocking is your secret weapon. After you’ve finished, soak your blanket in cool water with a little bit of gentle wool wash. Gently squeeze (don’t wring!) the excess water out using a towel, and lay the blanket flat on a large bed or rug. Gently stretch it into a perfect rectangle and let it dry completely. This relaxes the stitches and makes the blanket look uniform and professional. It is the single most effective way to elevate the quality of your finished project.
Variations, Examples, or Personalization Ideas
- Color Blocking: You can change yarn colors every 10 inches to create a modern, color-blocked look. Simply join your new yarn at the start of a row and keep going.
- Weighted Feel: If you want a heavier “weighted” feel, use a wool or alpaca blend yarn with a tighter stitch tension.
- Seasonal Styling: Use soft pastels in cotton yarn for a spring version, or rich burgundy and forest green in a thicker wool for a holiday-ready Christmas throw.
- The Gift Factor: Add a leather tag to one corner before gifting it. It’s a small, inexpensive touch that makes your handmade gift feel even more special and store-bought-chic.
Care, Storage, or Next Steps
To keep your blanket looking brand new, store it folded in a cool, dry place. If you used a wool blend, keep it away from direct sunlight for long periods to prevent fading. Whenever you decide to wash it, always use a mesh laundry bag to prevent the blanket from snagging on other items in the machine. Wash on a delicate cycle and lay flat to dry. Once you finish this, you will have the confidence to try more complex stitch patterns, such as waffle stitch or cables!
FAQ
How do I stop my blanket edges from getting wavy?
Wavy edges often happen because your tension is too loose or your borders are too tight. Make sure you aren’t adding extra stitches at the end of each row and keep your tension even. If the edges still ripple, try going down one hook size for the border.
What if I run out of yarn in the middle of a row?
Don’t worry! Simply join your new skein of yarn at the start of the next stitch. Leave a four-inch tail of the old yarn and the new yarn, then crochet over the tails for a few stitches to secure them. You can trim the excess later.
Is it okay to use cotton yarn?
Absolutely! Cotton yarn is wonderful because it is durable and easy to wash. Just keep in mind that cotton has no “stretch,” so your hands might get a little more tired than they would with a wool blend. It is a fantastic choice for a summer throw.
How do I know if my tension is correct?
Your fabric should feel soft and pliable, not stiff like paper. If you can push your finger through the fabric and it feels rigid, increase your hook size. If the holes are so large that you can see through the blanket easily, decrease your hook size.
Can I make this blanket smaller for a baby?
Of course! To make it smaller, simply reduce your starting chain. The stitch pattern is an even number, so you can chain 100 or 120 instead of 160 to create a lovely baby-sized security blanket.
Conclusion
Congratulations on taking the first step toward creating your own cozy heirloom! Learning to crochet is a journey of patience, creativity, and self-care. There is something profoundly healing about the quiet click of the hook and the way the fabric grows with each passing hour. Remember, every “mistake” is just part of the hand-crafted character of your work. Don’t compare your first blanket to the perfect photos you see online—love it for the time you spent, the comfort it will provide, and the skill you built to make it happen. I hope this throw becomes a staple in your home, warming your shoulders on cold mornings and reminding you of your own creative capability for years to come. Grab your hook, pour a cup of tea, and enjoy the process of making.