
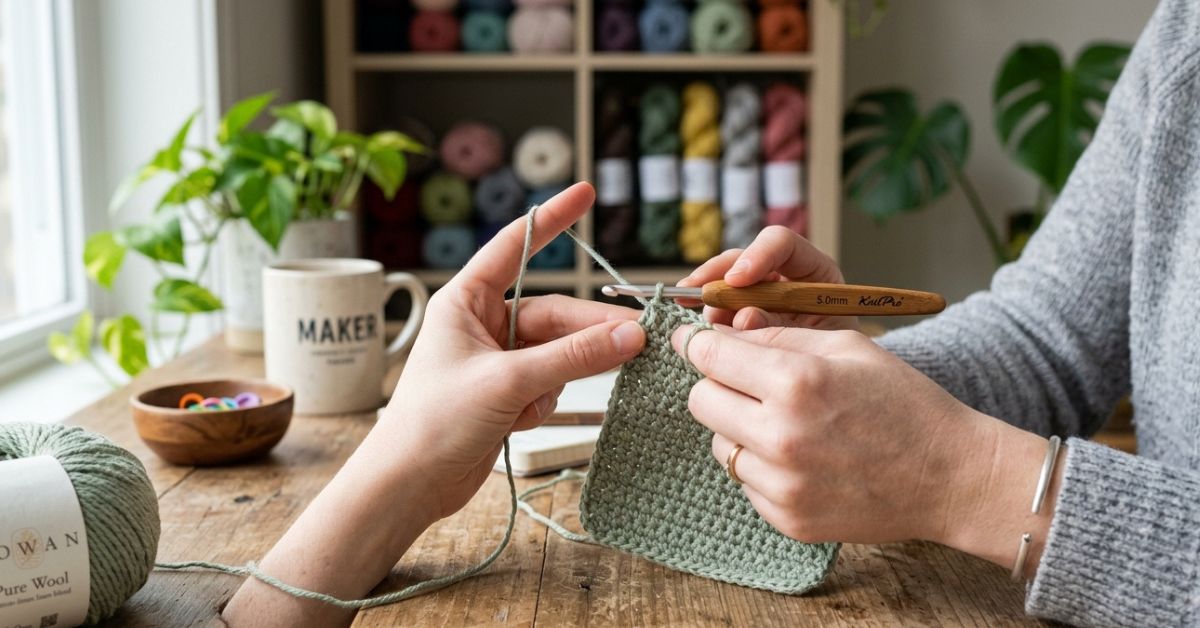
There is something incredibly soothing about the rhythmic motion of a crochet hook dancing through yarn. If you are just starting your crochet journey, you might feel a mix of excitement and a tiny bit of overwhelm. You see gorgeous blankets, intricate sweaters, and adorable accessories online, and you want to be able to make them too. But before you dive into complex stitches or delicate lacework, the secret to professional-looking, polished finished items lies in one fundamental skill: mastering your tension and flow through simple, foundational stitches.
Think of these beginner stitches as the alphabet of your crochet language. Once you understand them and can work them with a consistent, comfortable rhythm, the entire world of crochet opens up to you. This guide is designed to be your cozy companion, helping you slow down, breathe, and enjoy the process of creating fabric with your own two hands. We will explore how to build that essential “muscle memory” that makes your stitches look even, your edges straight, and your projects feel like a dream. You are exactly where you need to be, and I am so happy to walk this creative path with you.
Quick Overview
In this guide, we are focusing on the foundational stitches that every crocheter needs in their toolkit: the chain, single crochet, half double crochet, and double crochet. You will learn:
- Understanding Tension: How to hold your yarn so it flows without tangling or straining your hands.
- Stitch Foundations: The mechanics behind the three most common stitches used in 90% of crochet patterns.
- Flow and Rhythm: Exercises to practice your consistency so you aren’t constantly second-guessing your stitch size.
- Troubleshooting: Identifying why your piece might be growing or shrinking, and how to fix those common “beginner curves.”
This guide is for the absolute beginner who is just picking up a hook for the first time, as well as the intermediate crocheter who feels their edges are a bit wavy and wants to get back to basics to refine their technique. No matter your level, there is always room to improve your flow.
The Essential Toolkit for Practice
You do not need a mountain of supplies to start mastering your tension. In fact, keeping things simple is the best way to develop good habits. I recommend starting with a smooth, light-colored acrylic or cotton-blend yarn in a “medium/worsted” weight (usually labeled as a #4 weight). A light color, like cream, mint, or soft lavender, makes it much easier to see the structure of your stitches.
For your hook, a size H/8 (5.0 mm) is the “gold standard” for beginners. It is large enough to handle easily but small enough to create a nice, tight fabric. Beyond that, keep a pair of sharp scissors, a yarn needle for weaving in those practice tails, and a few stitch markers handy. Stitch markers are not just for experts; they are a beginner’s best friend for keeping track of the first and last stitches in a row.
Fundamental Crochet Terms
Before we start, let’s get comfortable with the vocabulary you will see in almost every pattern in the United States:
- Slip Knot: The starting loop on your hook.
- Chain (ch): The foundation loop system.
- Single Crochet (sc): A short, dense stitch perfect for sturdy items like baskets or thick warmers.
- Half Double Crochet (hdc): The “Goldilocks” stitch—taller than a sc but shorter than a dc. It creates a beautiful, soft drape.
- Double Crochet (dc): A taller stitch that works up quickly, ideal for scarves and blankets.
- Slip Stitch (sl st): Used for joining rounds or moving across a row without adding height.
- Gauge: The number of stitches and rows in a specific area (usually a 4×4 inch square) that determines the final size of your project.
Helpful Notes Before You Start
The most important advice I can offer as a designer is this: Do not fear the “frog.” In the crochet community, when we have to pull out our stitches because we made a mistake, we call it “frogging” (because you “rip-it, rip-it”). It is not a failure; it is a sign that you are paying attention.
When practicing, don’t worry about making a finished product. Make “swatches.” A swatch is just a small square of practice fabric. If it looks a little messy, that is just evidence of your progress. Finally, pay attention to your hands. If your shoulders are up near your ears or your knuckles are turning white, put the hook down, take a deep breath, and shake out your hands. Crochet should never hurt; it should feel like a gentle, rhythmic meditation.
Mastering Tension and Flow
The “flow” of your crochet is a physical balance between your dominant hand (holding the hook) and your non-dominant hand (holding the yarn).
The Yarn Hold
There is no “correct” way to hold yarn, only the way that works for you. Most beginners find success by weaving the yarn through their fingers (often over the index finger and under the middle and ring fingers) to create a bit of friction. This tension is what makes a stitch tight or loose. If your yarn is too loose, your stitches will be gap-filled and uneven. If it’s too tight, you won’t be able to insert your hook into the next stitch. Experiment with how many fingers you snake your yarn through until you feel a gentle resistance.
The Hook Hold
You can hold your hook like a pencil or like a knife. Try both. The pencil grip often feels more dainty and controlled, while the knife grip can provide more leverage for longer sessions. Don’t feel pressured to pick one; your hands will naturally pull you toward the one that feels most comfortable after a few minutes of practice.
Exercises to Build Your Technique
To practice these stitches, I recommend creating a “Sampler Scarf” or just a series of long rectangular swatches.
Step 1: The Foundation Chain
Start with a slip knot and chain 20. When you count your chains, look at the “V” shapes. The loop on your hook doesn’t count. The chain should look like a neat little braid. Keep your tension consistent—if you notice your chain looks like a string of pearls of different sizes, simply undo it and try again. Practice until your 20 chains look identical in size.
Step 2: The Single Crochet
Insert your hook into the second chain from the hook, yarn over, and pull up a loop. You now have two loops on your hook. Yarn over again and pull through both loops. Repeat this until the end of the row. This stitch creates very little “height,” so it is excellent for practicing how to keep your edges straight. If you find your edges are curling, you are likely too tight! Relax your grip on the yarn.
Step 3: The Half Double Crochet
This is where your rhythm starts to shine. Yarn over before you insert your hook into the stitch. Pull up a loop (you now have three loops on your hook). Yarn over once more and pull through all three loops at once. This stitch is incredibly forgiving and creates a lovely, squishy texture that is perfect for blankets.
Step 4: The Double Crochet
This is the workhorse of the crochet world. Yarn over, insert hook, pull up loop (3 loops on hook), yarn over, pull through two loops (2 loops remain), yarn over, pull through the remaining two. This stitch has a bit of “dance” to it because of the two distinct pull-through steps.
Common Mistakes to Avoid
The most common frustration for beginners is the “disappearing stitch” or the “extra stitch.”
- The Disappearing End: At the end of a row, it is very common to skip the last visible stitch, which causes your work to start sloping inward. Use a stitch marker to mark the first stitch you make in a row, and keep an eye out for the very last stitch of the row. It often likes to hide.
- The Tight Starting Chain: Beginners often chain much too tightly. If you find it impossible to push your hook into the chain for the first row, go up one or two hook sizes just for the foundation chain, then switch back to your regular hook for the rest of the project.
- Miscounting Stitches: If you are making a flat square, count your stitches at the end of every row for the first few days. It feels tedious, but it trains your eyes to see the shape of the stitch rather than just guessing.
Pro Tips for a Polished Professional Finish
If you want your projects to look like they came from a high-end boutique, attention to detail is key. First, weave in your ends securely. Don’t just clip the yarn after finishing a section. Use a tapestry needle to stitch the tail of your yarn back and forth through the base of the stitches twice, and then bury it inside a thick part of the fabric.
Second, consider blocking. Blocking is the process of gently misting your finished project with water and pinning it into the desired shape while it dries. It relaxes the fibers and makes your stitches look uniform and professional. It sounds like an extra step, but for accessories, it is the difference between “handmade” and “handcrafted quality.”
Variations to Keep You Inspired
Once you have mastered these three stitches, you can mix and match them to create different textures:
- The Moss Stitch: Alternate a single crochet and a chain-one, skipping one stitch in the row below. This creates a beautiful, woven-look fabric that is very stretchy.
- Ribbing: Work your single crochet stitches only into the “back loop” of the stitch below (the loop furthest away from you). This creates a flexible, knit-like ribbed texture that is perfect for the cuffs of sweaters or brims of hats.
- Color Blocking: Practice changing colors at the end of a row. When you make your very last pull-through of a stitch, drop the old color and pull the new color through instead. It creates a clean, seamless transition.
Care and Storage Tips
Treat your crochet pieces with love. When washing, hand-wash in cool water with a gentle wool-safe detergent. Never wring out your work; instead, roll it in a clean, fluffy towel and press down gently to squeeze out the excess moisture. Lay it flat to dry on a mesh surface if possible, away from direct sunlight. When storing your yarn, keep it in a cool, dry place away from direct sun to prevent fading, and keep it in baskets or airtight bags to protect it from dust.
FAQ
How do I know if my tension is too tight or too loose?
If your hook is difficult to insert into stitches, your tension is likely too tight. If your fabric has large, uneven holes where your hook doesn’t seem to have “grip,” your tension is likely too loose. Aim for a tension where the hook glides smoothly but leaves no large gaps.
Why does my crochet project look like a trapezoid?
This almost always happens because you are accidentally adding or skipping stitches at the ends of your rows. Use a stitch marker in the first and last stitch of every row to ensure you are consistently working the correct amount of stitches.
Is it better to hold the hook like a knife or a pencil?
There is no difference in the quality of the work! The “best” way is physically whatever causes your hand the least amount of tension. If you feel cramps, experiment with the other grip.
What should I do if I run out of yarn in the middle of a row?
Don’t worry! Simply join a new ball of yarn. You can either knot the two ends together very tightly and weave in the ends after finishing the project, or, for a more professional finish, work the last pull-through of your last stitch with both the old and new yarn ends simultaneously.
How long does it usually take to get “good” at crochet?
Crochet is a skill that develops with muscle memory. You will feel comfortable after a few hours of practice, but you will feel truly “proficient” after you have completed a few small projects. Be kind to yourself—everyone’s first project has a few wonky edges!
Conclusion
The journey of crochet is not about reaching the end of a project perfectly; it is about the quiet hours of creativity you gift yourself. Every stitch you make adds to your skill and your confidence. Whether you are crocheting a simple coaster or dreaming of a large, chunky throw, remember that the only difference between you and an expert is the amount of practice time logged.
Don’t feel the need to rush into complex patterns. Stay here in this space of basic stitches for as long as you need. When you are ready, try a new pattern, play with a new color, or perhaps even treat yourself to a special skein of hand-dyed yarn. You are building something beautiful, and most importantly, you are cultivating a skill that will bring you joy for years to come. Keep your hook handy, keep your yarn close, and most of all, enjoy every single loop. Happy crocheting!