
Introduction
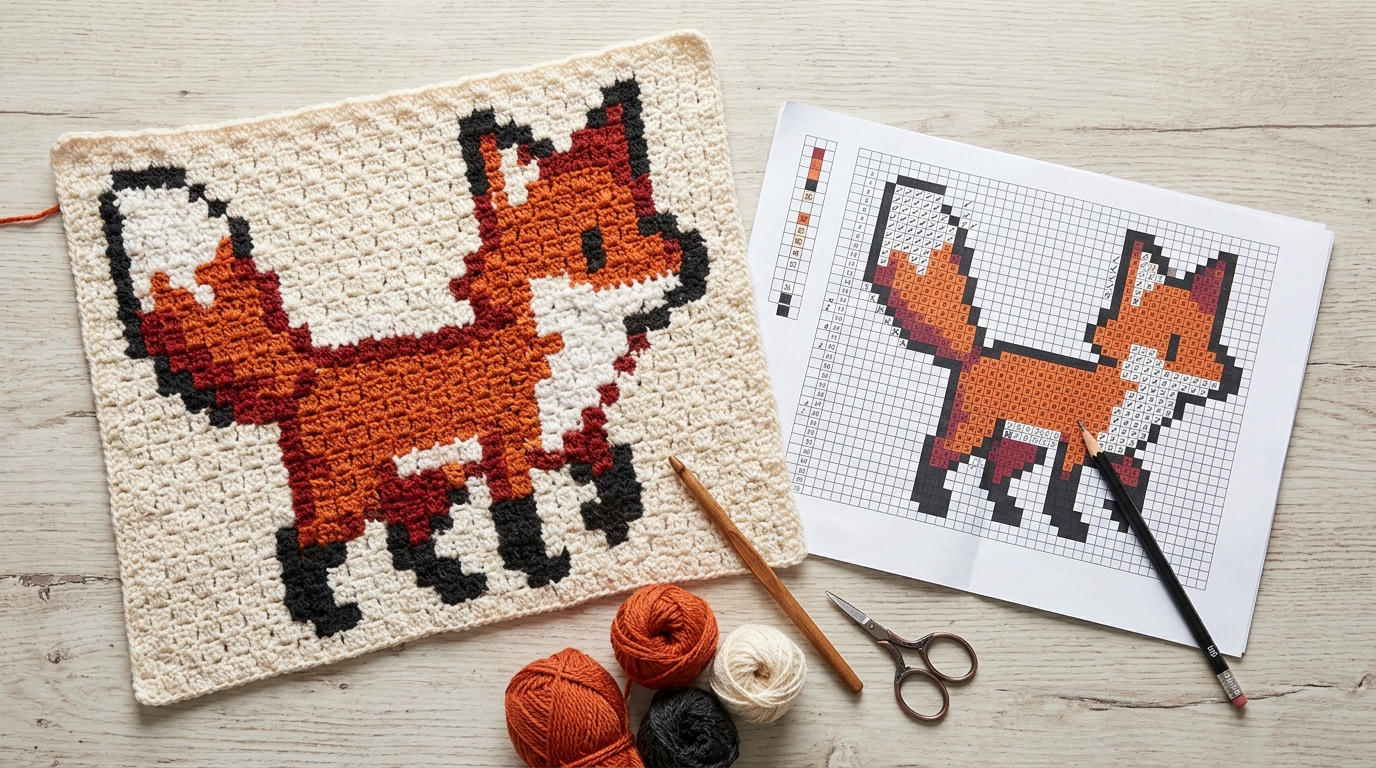
There is something truly magical about watching a picture emerge from a simple ball of yarn, one tiny square at a time. If you have ever scrolled through social media and stopped dead in your tracks at the sight of a stunning, pixel-perfect crochet blanket or wall hanging, you have likely encountered the Corner-to-Corner (C2C) technique. It is one of the most beloved methods in the crochet world, and for good reason! It’s rhythmic, addictive, and incredibly versatile.
Whether you dream of crocheting a vintage-inspired floral graph, a modern geometric design, or even a personalized nursery blanket with a baby’s name, C2C is your doorway to artistic freedom. I know it can look a little intimidating at first—all those color changes and diagonal rows—but I promise you that it is much simpler than it appears. Once you master the basic “pixel” (which is just a tiny cluster of double crochets), you are essentially painting with yarn. This guide is designed to be your cozy companion as you learn the ins and outs of graphing, color working, and finishing stitches, allowing you to create beautiful, heirloom-quality pieces that bring warmth and personality into your home.
Quick Overview
In this guide, we are focusing on the educational aspect of the C2C method. You will learn the anatomy of a C2C pixel, how to read a graph, the best way to handle color intensity, and how to manage your yarn so your projects stay neat. This guide is perfect for the adventurous beginner who knows how to chain and double crochet, as well as the intermediate crocheter looking to polish their technique for cleaner, more professional pixel art. By the end of this journey, you will feel confident enough to pick up any graph pattern and start your masterpiece immediately.
Materials to Have on Hand
While you do not need a full pattern to understand the mechanics, having the right supplies will make your learning process a breeze:
- Yarn: I recommend starting with a smooth, worsted-weight (Category 4) acrylic, cotton, or wool blend. Avoid dark, fuzzy, or mohair-style yarns while learning, as it is difficult to see the stitches.
- Crochet Hook: Use the hook size recommended on your yarn label. You want your stitches to be snug enough so that the holes between the pixels don’t look too large, but loose enough that the fabric remains soft.
- Stitch Markers: These are your best friends when keeping track of your rows.
- Graph Paper: Great for sketching out your own simple pixel designs.
- Bobbins or Clothespins: Highly recommended once you start using more than two colors. They keep your yarn from tangling while you carry it across the back of your work.
Crochet Terms and Key Concepts
To master C2C, we utilize standard U.S. crochet terms. Here are the core concepts you will be working with:
- The Pixel: In C2C, what we call a “pixel” is technically a square made of 6 chains and 3 double crochets (or a similar cluster depending on your preference).
- The Increase: This is how you grow your piece from one corner to the widest point. You add a new pixel at the start of each row.
- The Decrease: Once you reach your desired total width, you stop increasing and start decreasing, which creates the other flat edge, eventually leading to the final corner.
- Graph Reading: Pixel designs are read diagonally. Each square on your graph corresponds to one pixel in your crochet work.
- Right Side (RS) vs. Wrong Side (WS): Because C2C is worked in a diagonal back-and-forth motion, your “front” and “back” will alternate. It is helpful to mark your “Right Side” with a small progress keeper or stitch marker.
Helpful Notes Before You Start
The most important thing to remember with C2C is that tension is the secret to a professional look. Because this technique creates a slightly “holey” fabric by nature, you want to ensure your double crochets are even. If you notice your squares look more rectangular, try adjusting your hook size downward.
Another essential note is the “carry vs. cut” debate. When working with colors, you can carry the yarn behind your work if the distance is very short (1-2 pixels), but for larger gaps, it is much better to carry it underneath your stitches or attach a new bobbin of that color. Carrying yarn too far across the back can cause the colors to “bleed” through to the front.
The Foundation of a C2C Pixel
The “pixel” is the building block of your design. Understanding how to build one means you can build any shape.
The Basic Pixel Assembly
- Chain 6.
- Double crochet (dc) into the 4th chain from the hook, and into the next 2 chains. You have now created your first little box. This is your foundation.
- To start the next pixel (the increase): Chain 6 again, turn your work, and dc in the 4th chain from the hook and the next 2 chains.
- Connecting your pixels: To join these to the previous row, slip stitch into the chain-3 space of the foundation pixel you just made. Chain 3, and work 3 dc into that same chain-3 space.
By repeating this pattern of “Chain 6 to start a move, or Join with slip stitch + Chain 3 + 3 dc,” you can grow your blanket horizontally and vertically at the same time.
Reading and Following a Graph
Reading a graph for C2C is like following a map. You begin at the bottom right corner (the “start” corner). You work your way diagonally up until the design starts to narrow.
Step-by-Step Navigation
- Identify the Start: Find the bottom-right corner of your graph. This is where you begin your first pixel (Row 1).
- Working Rows: Each diagonal of the graph represents one row of your crochet pattern.
- Tracking Progress: Use a highlighter or a piece of tape to mark off the rows on your graph as you complete them. This is the single biggest factor in preventing mistakes.
- Directionality: Remember that in C2C, your rows move in a zigzag. Row 1 is a small triangle, Row 2 is two triangles, and so on. Your graph tells you the color needed for each pixel. If the square on the graph is blue, your dc cluster should be blue.
Tips for Managing Multiple Colors
If you have ever tried a color-work project that turned into a giant, tangled web, you know how annoying yarn management can be! Here are some tips to keep your sanity:
- Use Bobbins: When a row requires multiple colors, wind each color-section onto a small plastic bobbin or even a clothespin. This keeps the yarn from tangling as you turn your work.
- The “Invisible” Change: To get a clean color transition, complete the final yarn-over of the last double crochet of a pixel with the new color. This ensures the top loops of your pixel are already the new color, making the join look seamless.
- Keep the Back Tidy: While the back of a C2C project isn’t meant to be hidden, keeping your floats of yarn short and secure makes the blanket much more comfortable to use and prevents snagging with toes or fingers.
Common Mistakes to Avoid
Even experienced crocheters run into trouble with these common pitfalls. Awareness is the first step to avoiding them!
The “Twisted” Start
If your first few rows look distorted, check that you aren’t twisting your foundation chain. Make sure the chains are laying flat before you connect them.
Ignoring Gauge
If your C2C project is looking huge or strangely shaped, your gauge is likely inconsistent. As you gain skill, your comfort level increases, which can often lead to tighter tension later in the project. Try to keep your hand relaxed throughout the session.
The Wrong Side Trap
It is very easy to forget which side is the right side once you are several rows in. Keep a locking stitch marker on one side of your work at all times. This will save you from accidentally weaving in your ends on the show side!
Over-Carrying
One of the biggest mistakes is trying to carry a color across too many pixels. It creates bulk, makes the project stiff, and the carried yarn will often show through the gaps. If the color skip is more than three pixels, it’s best to use a separate bobbin.
Pro Tips for a Polished Result
If you want your blanket or wall hanging to look like a pro-made gift, focus on these finishing touches:
- Blocking is Essential: Once your project is done, it might look a little “wavy” or misshapen. A good wet block (soaking the finished piece in water with a delicate wash and pinning it flat to dry) will open up the stitches, even out the pixels, and give the entire piece a professional drape.
- Weave Ends as You Go: This is a controversial tip, but in C2C, you have a lot of ends. If you wait until the very end to weave them in, you will be overwhelmed. Weave in your ends every time you finish a color section—you will thank yourself later.
- Choose a Border: A simple single crochet border around the entire edge ties the pixelated edges together beautifully and gives the project a finished look.
FAQ
How do I know when it’s time to start decreasing?
You start decreasing once you reach the maximum width/height of your graph design. If you are making a square piece, you continue increasing until you reach the desired width, then you begin decreasing on both sides to close the square.
Can I make a C2C blanket with any yarn weight?
Absolutely! You can use thin crochet thread, worsted weight, or even super-bulky yarn. Just remember that the final size of your “pixel” depends on your yarn and hook. A bulkier yarn will make a very fast, thick project.
How do I calculate how much yarn I need?
Since C2C uses more yarn than traditional crochet, it’s a good idea to overestimate. For most pixel designs, you can estimate by calculating the total number of pixels per color. A good rule of thumb is to measure the amount of yarn used for one pixel and multiply that by the number of pixels in your graph for that specific color.
Is C2C better for blankets or small items?
It works for both! Because of the square-based structure, it is perfect for blankets, but you can also use it for small projects like potholders, mug rugs, or even throw pillows by simply stopping when the piece reaches that size.
My pixels look like holes; how do I fix that?
It is natural for C2C to have little spaces because it is a dc-based construction. If you don’t like the look, try using a hook one size smaller or try a “mini” C2C which uses half-double crochets instead of double crochets for a denser finish.
Conclusion
The beauty of the C2C technique lies in its ability to transform a simple hook and yarn into a personalized piece of art. It is a slow, meditative process that rewards patience and attention to detail. Do not worry if your first few rows aren’t perfectly symmetrical or if your color changes feel a little clumsy at first—every single stitch is a step toward mastering a skill that will last you a lifetime.
Take your time with your first graph, breathe through the color changes, and most importantly, enjoy the rhythm of the work. You are creating something uniquely yours, and there is no greater joy in the world of crochet than that. Once you have finished your first project, you will look at every image and think, “I could turn that into a graph!” and that is exactly where the real creative fun begins. Happy crocheting!