
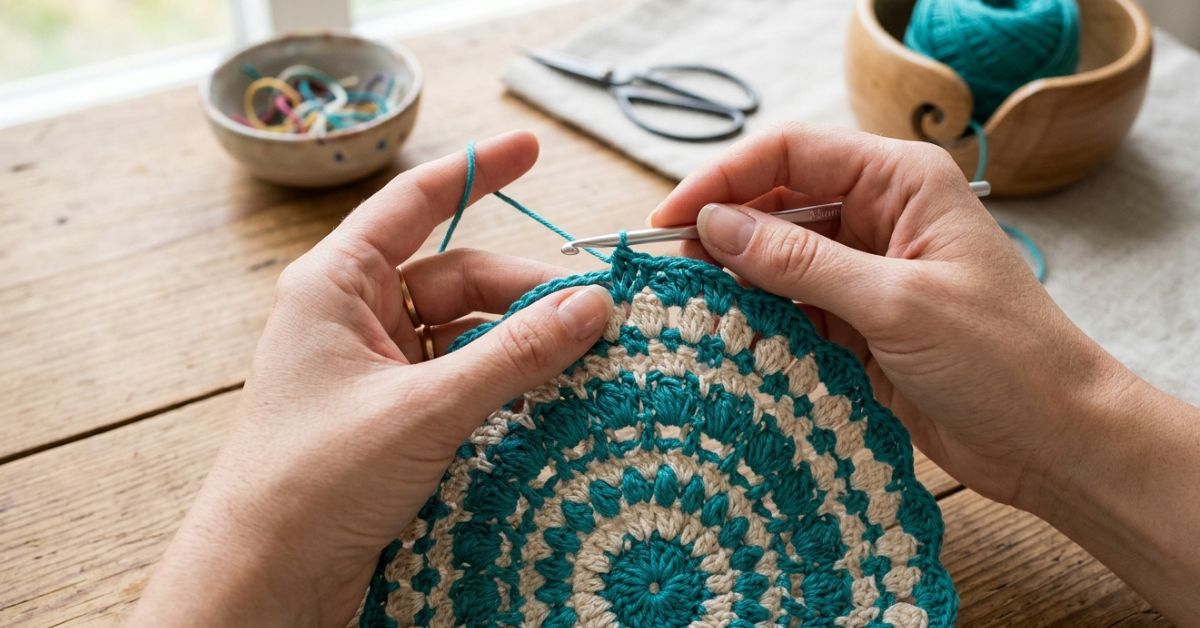
Becoming a confident crocheter is a journey of small, beautiful victories. One of the most common hurdles for those of us who love creating handmade treasures—whether it’s a cozy hat for winter, a delicate baby blanket, or a decorative piece for the home—is that moment when a project feels like it’s just not coming together perfectly. You’ve worked hard on your stitches, but when you finish a round or get to the edge of your work, things can sometimes look a little… jagged.
That is where the magic of the slip stitch comes in. Often overlooked as just a way to move across a piece of fabric, the slip stitch is actually the secret weapon of the professional crocheter. Mastering the slip stitch for joining rounds and smoothing out your edges will instantly elevate your work from “homemade” to “handmade with love and precision.” Whether you are a beginner picking up your first skein of yarn or an intermediate maker looking to refine your finishing techniques, this guide is designed to help you understand how to use these subtle, versatile stitches to create seamless, polished results that you’ll be proud to show off.
Quick Overview
This guide is designed for any crocheter who wants to understand the “why” and “how” behind professional finishing techniques. You will learn the purpose of the slip stitch in joining, how to maintain a flat surface when working in rounds, and how to create crisp, clean edges on your blankets, accessories, and garments. This guide is best suited for beginners who feel their work looks a bit messy at the transitions and intermediate crocheters who want to add a high-end, store-quality finish to their designs. Understanding these invisible details will change the way you look at every pattern you pick up.
Materials or Tools Needed
To practice these techniques, you don’t need anything fancy. In fact, most of these tips apply to whatever you have on your lap right now.
- Your current project: Have a swatch or a work-in-progress ready.
- A standard crochet hook: One that matches your yarn weight.
- Stitch markers: These are essential for keeping track of your joins in the round.
- A tapestry needle: For weaving in ends, which is the final step of professional finishing.
- A variety of yarn: If you are practicing, use a light-colored, medium-weight (worsted) yarn, as it makes it much easier to see exactly where your stitches are going.
Crochet Terms and Key Concepts
Before we dive into the techniques, let’s refresh our vocabulary of the U.S. crochet terms we will be using:
- Slip Stitch (sl st): Insert your hook into the stitch, yarn over, and pull the yarn through both the stitch and the loop on your hook. It’s the shortest stitch and creates almost no height, making it perfect for invisible joins.
- Chain (ch): Often used to start a round or to create a foundation for edges.
- Round: A continuous or joined circle of crochet.
- Joining: The process of connecting the end of a round to the beginning of the same round.
- Weave in ends: The process of securing your yarn tails into the fabric so they remain hidden and your project stays secure.
- Tension: The consistency of your yarn pull, which dictates how “tight” or “loose” your stitches look.
Helpful Notes Before You Start
The most important thing to remember is that crochet is meant to be flexible—literally and figuratively. Don’t get frustrated if your first join isn’t perfectly invisible. The key to professional finishing is consistency and “yarn management.” When joining, keep your yarn tail or working yarn snug, but not so tight that it puckers the fabric. If you find your work is curling, your tension might be too tight. If it’s wavy, you might have too many stitches or be working too loosely. Treat your practice time like a quiet moment of self-care. Relax your shoulders, breathe, and enjoy the rhythm of the hook.
The Art of Joining Rounds
Many patterns tell you to “slip stitch to the first stitch to join.” However, they often don’t tell you how to do it so that your seam doesn’t look like an ugly bump.
The Standard Join
This is the most common method. When you finish a round of double crochet, you bring your hook to the top of the beginning chain-3 of that round, insert the hook, and slip stitch. The trick here is to ensure you catch both legs of the top of that starting stitch. If you go too shallow, the join will look loose and gapped.
Creating an Invisible Join
If you are working in rounds and want your work to look like a continuous spiral (even when the pattern requires joining), you can use the “Invisible Join.” Instead of closing with a slip stitch, pull your loops through to the back of the work using a tapestry needle. This mimics the look of a regular stitch and makes the start and stop of your rounds virtually impossible to see.
Keeping Your Seam Straight
The biggest struggle with joining rounds is that your “seam” often wanders or twists slightly to the left. To prevent this, always count your stitches. If the pattern says you have 20 stitches, ensure you have 20 at the end of the round before you join. If you join into the wrong stitch, your seam will inevitably start to spiral or tilt.
How to Clean Up Your Edges
Creating a professional finish doesn’t stop at the join. The edges of your blankets or the cuffs of your sweaters are the frames for your hard work.
The Slip Stitch Border
If you have a row that looks a little uneven, a single round of slip stitches worked along the top or side of your project can act as a “binding.” It tightens the edge and makes it look firm and intentional. To do this, work one slip stitch into the edge of each row or stitch. Be careful not to create a “tight” edge that pulls your piece inward—this is the most common mistake for beginners.
Using the Right Stitch for the Edge
Sometimes, a simple slip stitch isn’t enough. If you want a decorative edge, try a “Crab Stitch,” which is a reverse single crochet. It creates a beautiful, rope-like texture that feels sturdy and adds a very high-end aesthetic to home decor projects like throw blankets or coasters.
Step-by-Step Guide to Professional Finishes
To get that “pro” look, follow these learning stages in your next project:
- Count as you go: Do not wait until the end of the project to realize your round is missing a stitch.
- Practice the “snug” slip stitch: When joining, pull your working yarn toward the back of the piece to close the gap before you start your next chain.
- Hide the tails properly: Don’t just snip your ends close to the knot. Weave them through the back of your stitches in both directions—this locks the tail in place so it won’t unravel with use or washing.
- Block your finished work: Even a messy edge can be saved with some steam or wet blocking. Laying your work out and pinning it into the correct shape teaches the yarn to behave.
Common Mistakes to Avoid
We have all been there. Here is how to navigate the common pitfalls that keep your work from looking standard-brand perfect:
- Skipping the first stitch: After a join, many crocheters accidentally work their first stitch of the new round into the same spot as the join, creating an accidental increase. Always double-check your anatomy of the stitch.
- The “tightness” trap: If you pull your slip stitch too hard, it ruins the stretch of your fabric. Aim for the same tension as your regular stitches.
- Cutting yarns too short: Always leave at least a 4- to 6-inch tail. Weaving in a 1-inch tail is nearly impossible and will eventually work its way out of the fabric.
- Ignoring the stitch marker: If you are working in rounds, a marker is the only thing standing between you and a crooked project. Use it!
Pro Tips for a Better Result
You can sharpen your skills by implementing these small habits:
- Invest in different sized hooks: Sometimes, using a hook that is one size smaller just for the final round of a join can make the seam much tighter and less visible.
- Pick up the third loop: When working in half double crochet, look for the “third loop” on the back. Working your joining stitches into specific architectural parts of the stitch makes the join look entirely different.
- Consistent tension is everything: If you are a naturally tight crocheter, go up half a hook size to compensate. Your seams will be much less puckered.
- Steam blocking: For synthetic yarns, steam blocking from a distance can help “set” your final stitches. For natural fibers, wet blocking is your best friend.
Variations and Personalization
Once you master the basic slip stitch join, you can play with variations. Use a contrasting color of yarn for your final slip stitch border to frame your project—this looks stunning on baby blankets. You can also try “Surface Crochet” using slip stitches to add decorative lines or monograms to your work. This is a fantastic way to turn a basic store-bought-style blanket into a custom, heirloom-quality gift. Remember, crochet should be fun, so don’t be afraid to experiment with different yarn textures on your final rounds to see how they change the “drape” of the edge.
Care and Storage for Your Handiwork
A professional finish includes how you care for the item after it is complete. Always follow the yarn label instructions, but generally, hand washing in cool water with a gentle detergent is the gold standard for handmade goods. Lay them flat to dry on a towel to preserve the shape you worked so hard to create. Storing your projects folded rather than on hangers will prevent them from stretching out over time, keeping your edges looking like they were finished yesterday.
FAQ
Why does my slip stitch join leave a visible gap?
Usually, this happens because the slip stitch is being pulled too loosely or because you are joining into the wrong part of the chain. Try inserting your hook directly into the middle of the “V” of the stitch you are joining to; it creates a much cleaner, tighter seal.
Should I count the starting chain as a stitch?
This depends on your pattern. If the pattern says “ch 3 (counts as dc),” then yes, you join into the top of that chain. If it says “ch 3 (does not count),” you must skip the chain and join into the first actual stitch. Always read the “Pattern Notes” section first!
Can I finish an edge without a slip stitch?
You can use a single crochet or a decorative border, but for a minimalist, clean look, the slip stitch is the undisputed champion. If you find slip stitches too difficult to work into, a small hook size and a steady hand are your best friends.
How do I stop my crochet round from spiraling?
If your work is spiraling, you might be accidentally increasing stitches. Count at the end of every round. Also, if you are working in a spiral (without joining), use a stitch marker at the start of every round so you know exactly where you are.
How do I weave in ends so they don’t show through?
The secret is to go back and forth. Weave the tail through the back of your stitches for an inch, then turn around and go back through the same path in the opposite direction. The “lock-in” effect makes it nearly impossible for the end to wiggle its way out.
Conclusion
Finishing your crochet projects with intention is the bridge between hobbyist and artisan. By slowing down to focus on your slip stitches, crisp joins, and clean edges, you are honoring the time and love you poured into every loop of your creation. Don’t feel pressured to have your work look perfect on the first try; even the most seasoned designers have “oops” moments. Practice these techniques on a small square swatch before tackling your next big blanket or garment to build your muscle memory. Before you know it, you’ll be adding those professional touches to everything you make, creating handmade treasures that are not only beautiful but durable enough to last a lifetime. Happy stitching!