
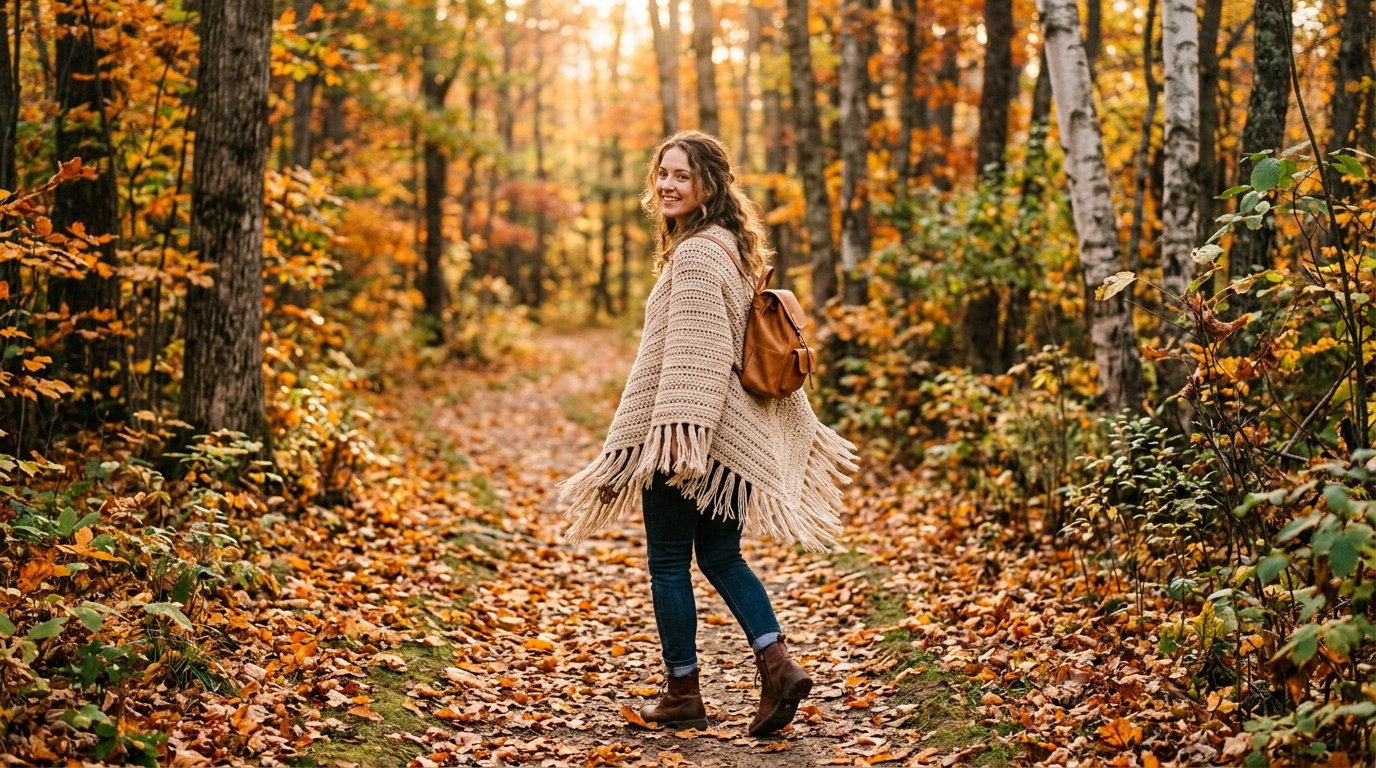
There is something incredibly grounding and soul-soothing about wrapping yourself in a handmade garment as the temperatures drop. A poncho is the quintessential winter staple—it bridges the gap between a cozy blanket and a stylish sweater, offering warmth without the restrictive feeling of fitted sleeves. For a beginner, the thought of garment making can feel daunting, but a poncho is one of the most forgiving and rewarding projects you can tackle. Because it doesn’t require complex shaping, gussets, or set-in sleeves, it allows you to focus on the meditative rhythm of the stitches while building the confidence you need for future clothing projects.
Whether you are looking for a quick evening project or a weekend heirloom, this oversized poncho is designed with simplicity in mind. We will be using basic stitches that create a beautiful, squishy texture, ensuring your final piece feels luxurious rather than “homemade.” You are capable of creating something truly beautiful, and I am here to guide you through every chain, stitch, and finish. Grab your favorite mug of tea, clear a cozy spot on your sofa, and let’s get started on your new winter favorite.
Quick Overview
This project is tailored specifically for the beginner who is ready to move beyond scarves and blankets.
- Skill Level: Beginner-Friendly.
- Estimated Time: 10–15 hours, depending on your speed.
- Finished Size: Customizable, but designed as an “Oversized/One Size Fits Most” drape.
- Best Use: Perfect for chilly mornings, coffee shop errands, or curling up with a book by the fireplace.
- Why You’ll Love It: There is no complicated assembly; this poncho is essentially two large rectangles joined together in a way that creates a gorgeous cowl neck and a flattering silhouette.
Materials Needed
To achieve that soft, oversized “drape” that feels like a hug, you need the right materials.
- Yarn: Approximately 1,200 to 1,500 yards of Category 4 (Worsted) or Category 5 (Bulky) yarn. Choose something with a soft “hand,” like a wool-acrylic blend. Avoid scratchy, pure wools unless they are labeled as “superwash” or “soft-touch.”
- Hook: A size J/10 (6.0 mm) or K/10.5 (6.5 mm) crochet hook. Larger hooks promote a better drape.
- Notions: A tapestry needle for weaving in ends, a pair of sharp scissors, and two locking stitch markers to help stabilize your seams during assembly.
- Customization Tip: If you want a more delicate look, stick to a worsted weight yarn. If you want maximum warmth and a chunkier appearance, opt for a bulky weight yarn.
Crochet Terms and Stitches
We will be using standard American crochet terminology. Before starting, ensure you feel comfortable with the following:
- Foundation Chain (ch): The starting row of loops.
- Double Crochet (dc): A taller stitch that works up quickly and creates a flexible fabric.
- Half Double Crochet (hdc): A stitch that falls between a single and double crochet in height, perfect for a dense yet soft texture.
- Slip Stitch (sl st): Used for joining seams or moving across the row without adding height.
- Gauge: The number of stitches and rows per inch. While this design is forgiving, aim for a tension where the fabric isn’t tight and stiff. If your fabric feels like a rug, go up a hook size!
Helpful Notes Before You Start
- Tension Matters: Since this is a wearable item, try to keep your tension consistent. If you find your stitches getting tighter when you are tired, take a break.
- The “Turning Chain”: In this pattern, our turning chain (usually 2 or 3 chains at the start of a row) does not count as a stitch. This ensures the edges remain straight and gaps are minimized.
- Blocking: I cannot emphasize this enough—block your finished rectangles! A simple steam or water-soak blocking helps the stitches relax and drape beautifully, transforming it from a “knitted-looking piece” into a professional-quality garment.
Main Tutorial: Creating Your Poncho
We will work this project in two identical rectangles. By joining them together, we create the signature V-shape that sits perfectly on your shoulders.
The Rectangles (Make Two)
Foundation: Chain 60 (or any even number if you choose to resize).
Row 1: In the third chain from the hook, work one half double crochet (hdc). Continue working one hdc in each chain all the way across. Turn. (58 stitches).
Row 2: Chain 2. Work one hdc in each stitch across. Turn.
Rows 3 through 80: Repeat Row 2 until your piece reaches desired length. Generally, for an average adult, this is approximately 30 to 35 inches in length.
Fastening Off: Once you reach your desired length, leave a long tail (about 20 inches) for seaming, then cut your yarn and pull the tail through your final loop to secure it.
The Assembly
The assembly is where the magic happens. A poncho is simply two rectangles sewn into a “T” shape.
- Lay your first rectangle flat on a table.
- Take the second rectangle and lay it horizontally against the top edge of the first one, forming an “L” or “T” shape depending on your orientation.
- Line up the top edge of the first piece with the long side of the second piece.
- Using your tapestry needle and the long yarn tail you left earlier, stitch them together using a mattress stitch or a simple whip stitch, moving from the outside corner toward the center.
- Stop about 8 to 10 inches before the center if you want a wider neckline, or continue closer if you prefer a tighter cowl neck.
The Border and Finishing
To elevate your poncho, add a simple border. Attach your yarn at any corner and work single crochet (sc) stitches evenly around the entire outer perimeter of the poncho. Join with a slip stitch, chain 1, and finish off.
Weaving in your ends is the final step to a polished piece. Thread your yarn tail through your tapestry needle and weave it back and forth through the back side of your stitches at least three times to ensure it won’t come undone during the wash.
Common Mistakes to Avoid
- The “Twisted” Foundation: It is easy to accidentally twist your starting chain. Lay it flat on a table before making that first join to ensure it’s straight.
- Skipping the Turning Chain: Beginners often forget their turning chains, leading to a poncho that shrinks in width as it gets longer. Count your stitches at the end of every few rows to be safe.
- Too Much Tension: If your poncho feels stiff, you are pulling your yarn too tight. Your goal is a drapey, flowing fabric. Don’t be afraid to go up a hook size if you notice the fabric losing its elasticity.
- Ignoring Color Changes: If you are changing colors, always join the new yarn on the “wrong” side (the inside) of the garment to keep your color transitions looking clean and deliberate.
Pro Tips for a Better Result
- Vertical or Horizontal Stripes: If you decide to use scrap yarn, change colors every 10 rows to create a beautiful, modern color-blocked effect.
- The Added Fringe: If you want a bit of bohemian flair, save some extra yarn to add fringe to the bottom edges. Cut 10-inch strands, fold them in half, and use your crochet hook to pull them through every other stitch along the bottom hem.
- Accessorize with a Brooch: If you find the neck too wide, use a large, decorative shawl pin or brooch to gather the fabric at your chest for a more fitted, sophisticated look.
- Weight Matters: If you’re making this for a very cold climate, use a wool or alpaca blend for warmth. For a “three-season” wrap, a cotton-acrylic blend is perfect because it breathes well.
Variations and Personalization
- The Cowl Neck: You can easily add a cowl neck by picking up stitches around the neck hole once assembled and working in the round for 4–6 inches using half-double crochets.
- Pocket Add-ons: Crochet two smaller squares (about 6×6 inches) and sew them onto the front panels of the poncho to create functional pockets.
- Asymmetrical Hem: If you want a high-low look, make one rectangle shorter than the other. This creates a stylish, modern slant to the bottom hem.
Care and Next Steps
To keep your poncho looking new, always hand wash it in cool water with a gentle wool wash. Never wring or twist the fabric; instead, roll it in a large towel to absorb excess water and lay it flat on a drying rack to block it back into shape. Avoid hanging your poncho on a hanger while it’s wet, as the weight of the water can cause the stitches to stretch out of shape.
FAQ
How do I know if the poncho will fit me?
Ponchos are incredibly forgiving. Because this design is essentially an oversized rectangle, “fit” is more about your personal preference for how much drape you want. If you want more coverage, simply make your foundation chain longer and your rows fewer.
Can I use cotton yarn for this project?
Yes! Cotton is great for a lower-maintenance, non-itchy poncho. Just keep in mind that cotton is heavier than wool and lacks the same “bounce,” so your poncho will have more of a weighted, structured drape.
How do I fix a mistake if I find it three rows down?
Don’t panic! You can “frog” (untravel) your yarn back to the mistake. It can be heartbreaking, but it is a normal part of the process. If the mistake is small and won’t affect the structural integrity or look of the poncho, sometimes it is better to “let it be” and view it as a unique mark of your handmade journey.
Do I really need to wash my swatch?
If you are worried about the fabric being the wrong size, yes. Gauge swatches can change size after being washed, so if you are aiming for a very specific fit, wash and dry your swatch before committing to the full project.
Is this appropriate for a absolute beginner?
Absolutely. This project uses only two basic stitches: the chain and the half double crochet. It is repetitive, which helps you build incredible muscle memory and creates a very even, professional-looking tension by the time you reach the second rectangle.
Conclusion
Creating your own garments is one of the most fulfilling journeys a crafter can take. By choosing to make this poncho, you aren’t just creating a piece of clothing; you are crafting a shield against the winter chill and an expression of your own creativity. Don’t worry if your first few rows look a little shaky—that is simply the start of your learning. As you continue to pull your hook through each loop, you’ll find the rhythm of the craft taking over, turning simple yarn into a stunning, cozy wrap you can be proud to wear. When people ask, “Where did you get that?” you will have the lovely answer, “I made it myself.” Enjoy every moment of the process!