
Introduction
Welcome to the wonderful, rhythmic world of crochet! If you have ever looked at a beautifully textured blanket draped over a sofa, a delicate handmade baby afghan, or a stylish, one-of-a-kind sweater and wished you could make it yourself, you are in exactly the right place. Crochet is more than just a craft; it is a cozy, meditative practice that allows you to transform a simple ball of yarn into something meaningful with just a single hook and your own two hands.
Many people feel intimidated when they first pick up a hook, worrying that the stitches look too complicated or the patterns too difficult to decipher. I want to reassure you: crochet is incredibly forgiving and approachable. Every intricate lace shawl or thick, squishy winter hat you see began with the very same foundational stitches we are going to explore today. By mastering just a few basic techniques, you unlock the ability to create almost anything you can imagine. This guide is designed to be your gentle companion, stripping away the mystery and giving you the confidence to start your first project today. Whether you are looking to create handmade gifts for loved ones, freshen up your home decor, or simply find a soothing creative outlet for your evenings, learning these stitches is your first beautiful step.
Quick Overview
In this guide, we will focus on the pillars of crochet. You will learn how the craft is structured and how to execute the four essential stitches that make up the vast majority of patterns you will encounter. This guide is tailored for absolute beginners who have never held a hook, as well as intermediate crocheters who may want to brush up on their technique, improve their stitch consistency, or refine their finishing skills.
By the end of this resource, you will understand:
- How to hold your yarn and hook for optimal comfort.
- The anatomy of a crochet stitch.
- The four foundational stitches: the chain, the single crochet, the half double crochet, and the double crochet.
- How to turn your work and begin a new row.
- Tips for keeping your edges straight and your tension even.
Materials to Get Started
You don’t need a massive collection of supplies to begin your crochet journey. In fact, starting with just a few basic items is often better, as it allows you to get comfortable without being overwhelmed.
- Yarn: For your first practice sessions, I highly recommend a smooth, worsted weight (Category 4) yarn in a light, solid color. Choosing a light color, like cream, tan, or soft yellow, makes it much easier to see your stitches and understand exactly where to insert your hook. Avoid dark colors, shiny yarns, or “fuzzy” novelty yarns until you have mastered the basics.
- Crochet Hook: A US size H/8 (5.0 mm) hook is the gold standard for beginners. It is large enough to handle easily but small enough to work well with most medium-weight yarns. Aluminum or ergonomic soft-grip hooks are wonderful choices for consistent, smooth movement.
- Scissors: Any sharp pair of scissors will work for trimming your yarn.
- Tapestry Needle: A large-eye, blunt-tipped needle is essential for weaving in your ends once you finish a section of work.
- Stitch Markers: These are little plastic clips that help you keep track of your first and last stitches, which is incredibly helpful when you are first learning to spot where a row ends.
Understanding Crochet Terms and Anatomy
Before you make your first loop, it is helpful to understand the language of crochet. All the instructions you will find online or in books use standardized terms.
- Slip Knot: The starting loop that secures your yarn to the hook.
- Chain (ch): The foundation for almost every project that isn’t worked in a circle.
- Yarn Over (YO): The act of wrapping the yarn over your hook from back to front. This is the “secret” move behind every stitch.
- The “V”: Look closely at the top of your stitches. You will see they look like little “V” shapes. When a pattern tells you to work “in both loops,” it means you should push your hook under both legs of that “V.”
- Turning Chain: When you reach the end of a row, you must chain a certain number of stitches to gain the height necessary to start the next row. This is called your turning chain.
Helpful Notes Before You Start
Your hands may feel a little clumsy at first—that is completely normal! Crochet requires a specific type of muscle memory that takes time to develop. The most common hurdle for beginners is tension. Tension refers to how tightly or loosely you hold the yarn as you pull it through the loops. If your stitches are too tight, you won’t be able to fit your hook into the next stitch. If they are too loose, the fabric will look gapped and holey.
Don’t worry about perfection. Your first few rows might look a bit wavy or uneven, and that is a beautiful part of the process. If you feel frustrated, put the project down, have a cup of tea, and come back to it later. Crochet should be a joy, not a chore.
The Foundations: Your First Stitches
The Slip Knot and Foundation Chain
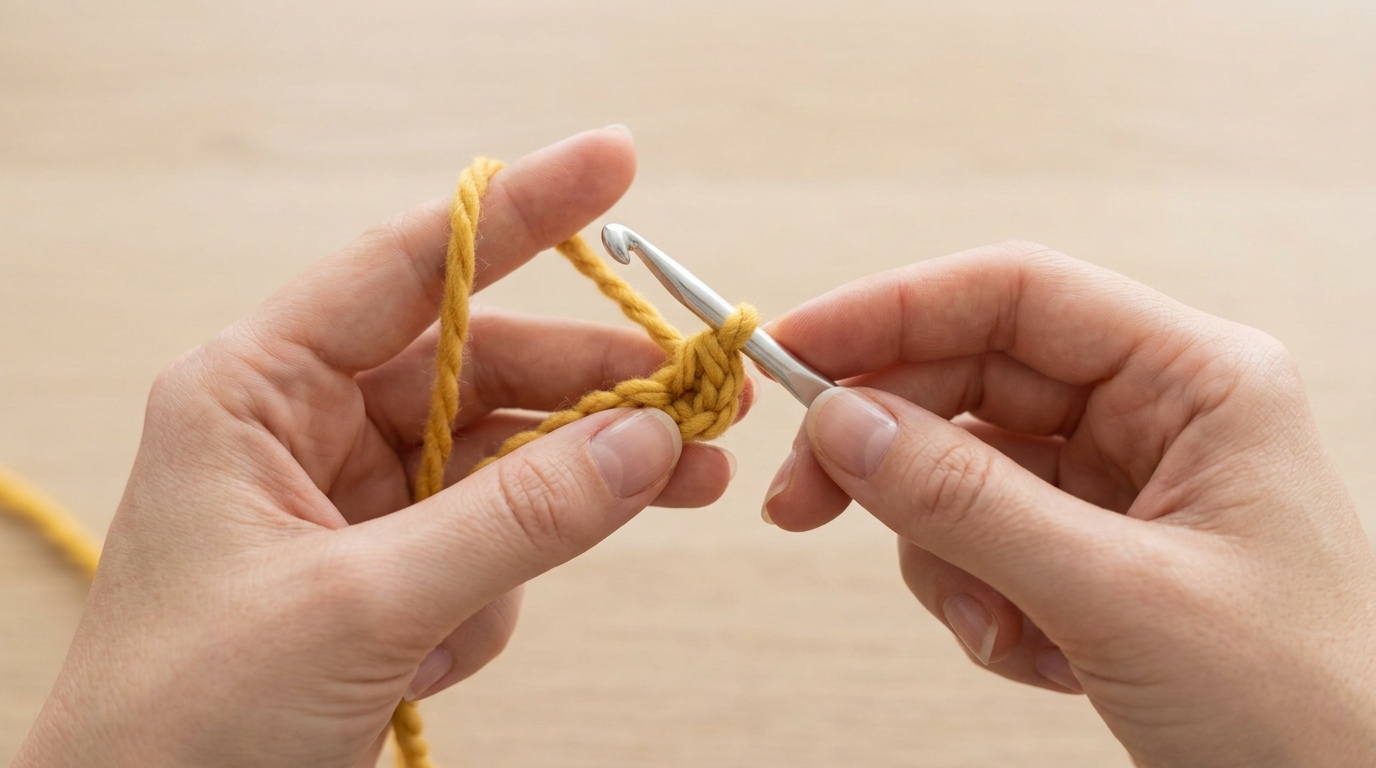
Every project begins with a slip knot secured firmly (but not tightly) onto your hook. Once the knot is set, hold the hook in your dominant hand and the yarn in your non-dominant hand. To create a chain, yarn over your hook and pull the yarn through the loop already on your hook. Repeat this. Practice making a long chain of about 20 stitches. Your goal is for every chain loop to look uniform in size.
The Single Crochet (sc)
The single crochet is the workhorse of the crochet world. It is short, dense, and perfect for sturdy items like bags or amigurumi.
- Insert your hook into the second chain from the hook.
- Yarn over and pull up a loop (you now have two loops on your hook).
- Yarn over again and pull through both loops on the hook.
You have now completed one single crochet! Repeat this in every chain across the row.
The Half Double Crochet (hdc)
The half double crochet is a wonderful “in-between” stitch. It is taller than a single crochet but shorter than a double crochet, providing a lovely, soft texture.
- Yarn over before you insert your hook into the stitch.
- Insert your hook into the stitch, yarn over, and pull up a loop (three loops on your hook).
- Yarn over and pull through all three loops at once.
The Double Crochet (dc)
The double crochet is used frequently for blankets and clothing because it works up faster and creates a nice, flexible drape.
- Yarn over, insert your hook into the stitch.
- Yarn over and pull up a loop (three loops on your hook).
- Yarn over and pull through the first two loops only (two loops remaining on your hook).
- Yarn over and pull through the final two loops.
Step-by-Step Practice Strategy
To truly master these, I suggest a simple “Practice Swatch” approach. Do not worry about making a “real” project just yet.
- Start: Chain 15 stitches.
- Row 1: Single crochet in the second chain from the hook and in every chain across. Count your stitches as you go—you should have 14.
- Turn: Chain 1 to prepare for the next row, then turn your work like you are turning the page of a book.
- Repeat: Work two rows of single crochet.
- Switch: For the next two rows, practice the half double crochet. Remember to adjust your turning chain (usually 2 chains for hdc).
- Move Up: For the final two rows, practice the double crochet (usually 3 chains for the turning chain).
By the end of this exercise, you will have a small, rectangular fabric that shows off the different heights and textures of the most common stitches. This is your “diploma” for completing your first lesson!
Common Mistakes to Avoid
- The Twisted Chain: When you begin your first row into a foundation chain, ensure the chain isn’t twisted like a cable. The little “bumps” on the back side of the chain should all be facing the same direction.
- Losing Stitches: Beginners often accidentally skip the very last stitch of a row, which causes the piece to narrow into a triangle. Use a stitch marker in your first and last stitches to ensure you aren’t leaving any behind.
- Skipping the Turning Chain: Remember that the turning chain often counts as your first stitch (or is meant to be ignored, depending on the pattern). Read your pattern notes carefully to see how the designer treats the turning chain.
- Using the Wrong Hook Size: Always check the yarn label. It will offer a “suggested” hook size. Starting with a hook that is too small for the yarn will make your fabric stiff and difficult to work; a hook that is too large will make it feel loose and stringy.
Pro Tips for a Better Result
- Comfort is Key: If your hands or wrists hurt, you are likely gripping the hook too tightly. Practice “holding” the hook like a pencil or a knife—whichever feels more natural—but keep your grip loose.
- The Power of Blocking: Once you finish a project, even a simple swatch, you can “block” it. This involves gently misting the piece with water and pinning it into shape on a towel or a foam mat while it dries. It transforms your work from “handmade” to “professional.”
- Read the Pattern Twice: Before you start a project, read the entire pattern through once while imagining the process. It will help you see the “rhythm” of the instructions.
- Weaving Ends: Never just knot your yarn and cut it. Use that tapestry needle to weave your ends in and out of the back of your stitches for several inches in different directions. This ensures your hard work doesn’t unravel after the first wash.
Variations and Personalization Ideas
Once you are comfortable with these stitches, you can start combining them. Did you know that the “Moss Stitch” is just a simple alternating pattern of single crochet and chain stitches? The “Granny Stitch” is just clusters of double crochets. You are already on your way to creating patterns that feel much more complex than they actually are. Try using two different colors of yarn in one swatch to see how stripes can completely change the look of your crochet, or try a variegated yarn to let the color transitions do the decorative work for you.
Care and Next Steps
To keep your crochet items looking beautiful, always check the yarn label for washing instructions. Most modern acrylic or wool-blend yarns are machine washable on a gentle cycle, but natural fibers like cotton or delicate wool usually prefer a gentle hand wash and a flat dry.
Your next step? Pick a simple “beginner” project. A dishcloth is the perfect first project because it is a small square, uses only single or double crochet, and is very forgiving. If you make a mistake, it’s just a washcloth! Once you feel successful with a square, look for patterns for a basic scarf or a small drawstring pouch. Each project will teach you a little bit more, slowly building your library of skills.
FAQ
How do I know if my tension is correct?
Your stitches should look uniform in size, and your fabric should feel flexible, not stiff like cardboard. If you find it nearly impossible to push your hook through the next stitch, your tension is likely too tight. Practice relaxing your hands and letting the yarn flow naturally through your fingers.
Why does my crochet piece look like a triangle instead of a square?
This happens when you accidentally skip the first or last stitch of a row. Counting your stitches at the end of every row is the best way to prevent this. If you started with 20 stitches, ensure you have 20 at the end of every row.
What is the difference between U.S. and U.K. crochet terms?
This is a very common point of confusion! U.S. terms are used in North America, while U.K. terms are used in Great Britain, Australia, and many other places. For example, a “single crochet” in U.S. terms is called a “double crochet” in U.K. terms. Always check the first page of a pattern to be sure which terminology is being used.
How do I join a new ball of yarn?
Don’t worry about complicated knots. When you reach the end of your yarn, simply leave a 6-inch tail. When you start your next stitch, hold the old tail and the new yarn together for the first few stitches to “anchor” them, or just start the new ball and weave in the ends securely at the end.
Can I crochet if I am left-handed?
Absolutely! Many of the world’s most talented crochet designers are left-handed. You can follow tutorials just the same; many people simply mirror the motions. There are plenty of resources specifically for left-handed crafters that can help you adapt the technique to feel intuitive for you.
Conclusion
I am so incredibly proud of you for taking this first step. Learning to crochet is a journey, and you have just opened the door to a craft that will provide you with relaxation, creativity, and the joy of creating something by hand for years to come. Remember, even the most advanced artisans once stood exactly where you are today—with a tangled-looking chain and a bit of uncertainty.
Be patient with yourself, keep your rhythm loose and light, and celebrate every stitch. The beauty of crochet isn’t in finding perfection; it is in the process of creating fabric, row by row, with your own hands. You have all the tools you need right now to begin. Grab your hook, choose a beautiful color of yarn that makes you feel happy, and start your first chain today. Happy crocheting!