
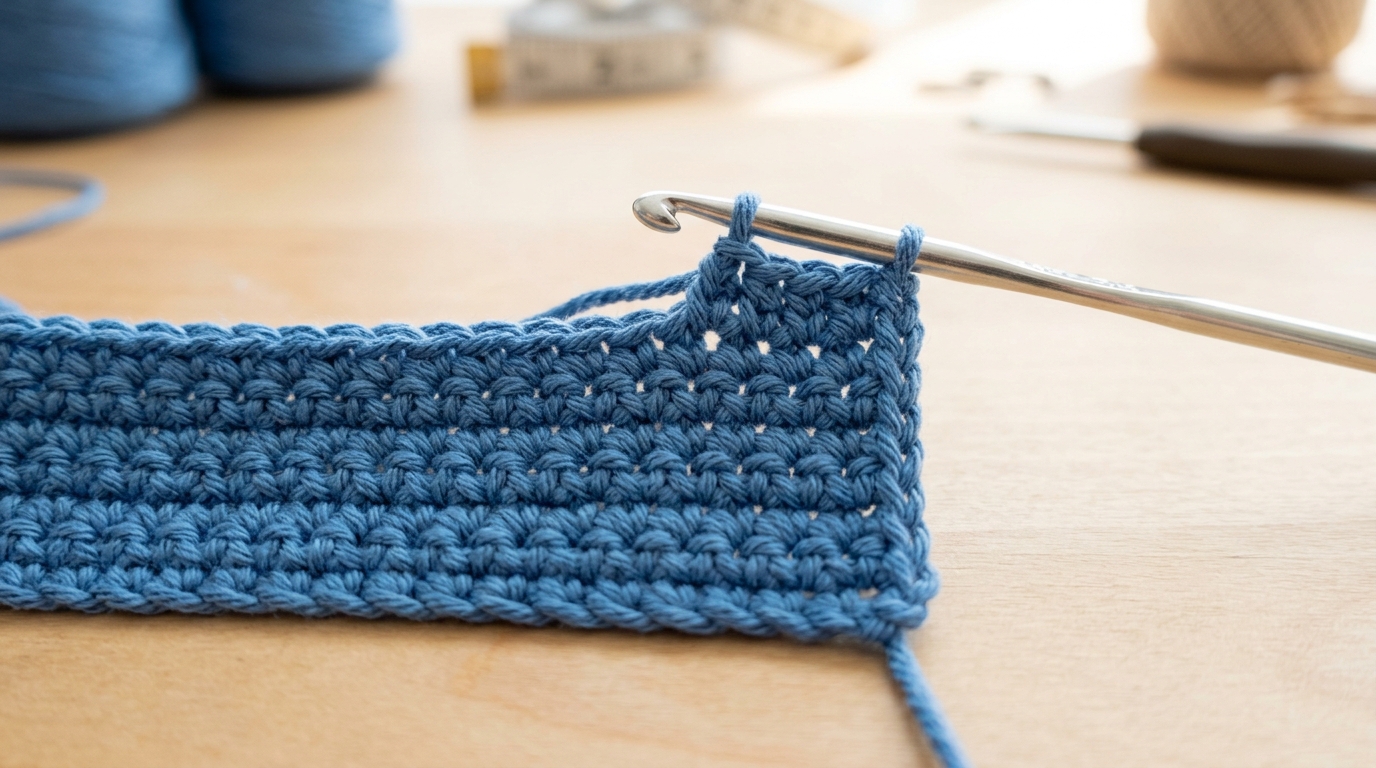
Mastering the Perfect Edge: How to Start a New Row with Confidence
There is a unique, quiet magic in sitting down with a fresh ball of yarn and a crochet hook. Whether you are working on a cozy autumn blanket or a delicate baby gift, the rhythm of the stitches is deeply grounding. However, many crocheters—from absolute beginners to those who have been crafting for years—often find themselves frustrated by one specific challenge: the edges of their work. Have you ever noticed that your piece starts to shrink, grow, or look a little wonky as you progress row by row? It’s a common rite of passage, and I want you to know that you are absolutely not alone.
The secret to perfectly straight, professional-looking edges lies in how you begin and end your rows. It’s all about the “turning chain” and understanding how your hook interacts with those first and last stitches. In this guide, we are going to demystify the process of starting a new row, turning your work, and maintaining those deliciously straight edges that make a handmade piece look truly high-end. We will walk through the logic of transition stitches together, ensuring that your future projects are as beautiful on the sides as they are in the center.
Understanding the Turning Concept
Before we dive into the “how,” let’s look at the “why.” In crochet, we work in rows, moving back and forth across the fabric. To move from the end of one row to the beginning of the next, we must “turn” the work. But simply flipping your piece over isn’t enough to reach the height required for your next set of stitches. This is where the turning chain comes in.
The turning chain, often abbreviated as “tch” in your favorite, brings your yarn up to the height of the stitch pattern you are about to work. If you are working in single crochet, your chain needs to be relatively short; if you are working in treble crochet, that chain needs to be quite tall. If you don’t account for this height, your work will start to pull at the edges, leading to that dreaded “staircase” effect or inward curling.
Vital Concepts for Clean Edges
To achieve straight edges, you must treat your turning chains and your final stitches with intention. Many patterns will specify whether your turning chain counts as a stitch. This is the single most important detail to watch, as it dictates exactly where you place your first stitch of the new row.
- The Turning Chain: Think of this as the “ladder” that elevates your hook. It does not exist merely to take up space; it acts as a placeholder.
- Stitch Count Awareness: The number of stitches in your first row should match the number in your second, third, and twentieth. If your count is dropping, you are likely skipping the first stitch after the turning chain or miscounting the last stitch of the previous row.
- Tension: Consistent tension is the aesthetic glue of crochet. If your turning chains are significantly tighter or looser than your standard stitches, the edges of your piece will ripple subtly.
Essential Tools to Help You Succeed
While you don’t need fancy equipment to improve your edges, a few simple tools make a world of difference.
- Stitch Markers: These are your best friends. Placing a stitch marker in the very first or very last stitch of a row ensures you never have to guess where to insert your hook when you return.
- The Right Hook Size: Using a hook that matches the weight of your yarn is crucial. If your hook is too small, your stitches become tight and difficult to work into; too large, and your edges will look gappy and loose.
- A “Practice” Gauge: If you are learning a new stitch, don’t jump straight into a large blanket. Practice with a small swatch of 15–20 stitches. This allows you to observe how your turning chains look without the pressure of a big project.
How to Start a New Row Properly
The method for starting your row changes slightly depending on the height of your stitches. Below is a breakdown of how to manage the transition for standard U.S. basic stitches.
The Single Crochet Start
Single crochet is short, so your turning chain is usually just one chain. Often, this chain does not count as a stitch.
- Finish your final single crochet of the row.
- Chain 1.
- Turn your work (usually in a counter-clockwise direction).
- Insert your hook into the very first stitch—the exact same spot where your turning chain just came out of—and place your next single crochet.
Starting with Half Double or Double Crochet
Because these stitches are taller, the turning chain is more significant. Two chains for half double crochet, and three for double crochet.
- Finish your row.
- Chain the required number (e.g., 3 for double crochet).
- Turn your work.
- If your pattern says the turning chain counts as a stitch, skip the first stitch of the row and place your next stitch in the second hole. If it does not count, place your first stitch back into that very first base stitch. This is the detail that saves your edges!
Step-by-Step: Keeping Edges Perfectly Straight
Achieving that “store-bought” look is simpler than you think once you develop a routine. Follow these steps to ensure your sides remain vertical and crisp.
- The Counting Ritual: Every 5 or 10 rows, stop and count your stitches. It is much easier to correct a missing stitch early than it is to frog an entire baby blanket.
- Identifying the Last Stitch: The last stitch of a row is often the most hidden one. It likes to tilt behind the turning chain of the previous row. As you approach the end of a row, pull the fabric open slightly with your fingers to expose that final “V” shape at the top of the last stitch. Work into that “V” clearly.
- Consistent Turning: Pick a direction—either always rotate your hook clockwise or counter-clockwise—and stick to it. While it may seem minor, turning consistently throughout your project helps keep the twist of the yarn uniform, which results in neater edges along both sides of your piece.
Common Mistakes to Avoid
Even experienced crocheters have “off” days. Watch out for these common culprits that lead to uneven edges:
- The “Shadow” Stitch: Forgetting to work into the very last stitch of a row is the most common reason for a narrowing triangle shape. Always count your stitches at the end of the row.
- Over-Tightening the Turning Chain: If you notice your edges are pulling inward, your turning chain is likely too tight. Try to relax your tension specifically when working those chains.
- Misunderstanding “Counted” Stitches: If a pattern says “ch 3 (counts as dc),” that chain is your first stitch. You must skip the first base stitch. If you don’t, you will accidentally add an increase to every row, and your piece will flair out significantly.
- Losing the First Stitch: When starting a new row, it is easy to accidentally skip the first stitch because it can look like part of the chain. Use a stitch marker to secure the top of your first stitch as you make it.
Pro Tips for a Polished Result
When you want your work to transition from “handmade” to “well-made,” keep these techniques in your back pocket.
- The Standing Stitch Alternative: Some advanced crocheters prefer to skip the turning chain entirely and start with a “standing stitch.” This involves attaching the yarn directly to the edge and working a stitch without a starting chain. It creates an incredibly clean, professional edge, though it requires a bit of practice to Master.
- Use Blocking to Your Advantage: Even if your edges aren’t perfect, blocking can work miracles. Spraying your finished piece with water and pinning it flat to a mat while it dries will relax the fibers and straighten out most minor tension inconsistencies.
- Embrace the Border: If you are worried about your edges being slightly irregular, don’t panic! A simple border, such as a round of single crochet or a decorative crab stitch, can hide a multitude of imperfections and provide a clean, frame-like finish to your project.
Troubleshooting Your Edges
If you finish a piece and realize one side is wavy and the other is tight, don’t let it discourage you. This is simply a sign that your natural tension shifted while you were working.
If you find that your piece is growing in size as you progress, you are likely accidentally creating extra stitches. Review your count. If you find your piece is shrinking, ensure you aren’t skipping the last stitch of each row. Remember, crochet should be a relaxing experience. If you find yourself frustrated, put the hook down, have a cup of tea, and come back in ten minutes. Fresh eyes almost always spot the mistake immediately.
FAQ: Your Questions Answered
Does the turning chain count as a stitch?
It depends entirely on the pattern! Always check the “Pattern Notes” section at the beginning of your instructions. If the pattern is silent, a good rule of thumb is that for single crochet, the chain does not count, while for taller stitches like double crochet, it often does.
Why does my crochet project get wider as I go?
This happens when you accidentally work extra stitches into the turning chain or add stitches at the beginning/end of the row. Use a stitch marker to keep track of your first and last stitches to ensure you aren’t adding extras.
How do I stop my edges from curling inwards?
Curling is often caused by tension that is too tight. Try going up a hook size, or consciously loosen your grip on the yarn, especially when working the turning chain.
What is the easiest stitch for beginners to get straight edges?
Single crochet is the absolute best for learning to keep straight edges. Because the height is minimal, it is much easier to see exactly where your stitches start and end compared to taller, more open stitches.
Is it normal for my edges to look slightly uneven?
Yes! Everyone has a unique “hand” or tension. Part of the beauty of handmade crochet is that slight variation. Even professional designers have subtle differences in their work. Don’t be too hard on yourself; your stitches will naturally become more even with practice.
Conclusion
Starting a new row doesn’t have to be a source of stress. Once you master the relationship between your turning chain and your first stitch, you’ll find that your confidence grows with every row you finish. Remember, every master crocheter was once a beginner who just kept going.
Take your time, use those stitch markers to guide your way, and don’t be afraid to pull back a few rows if things aren’t looking quite right. The beauty of this craft is that the yarn is always patient. As you continue your crochet journey, you will find that these technical nuances become second nature, allowing you to focus on the joy of creating something warm, beautiful, and uniquely yours. Happy crocheting!