
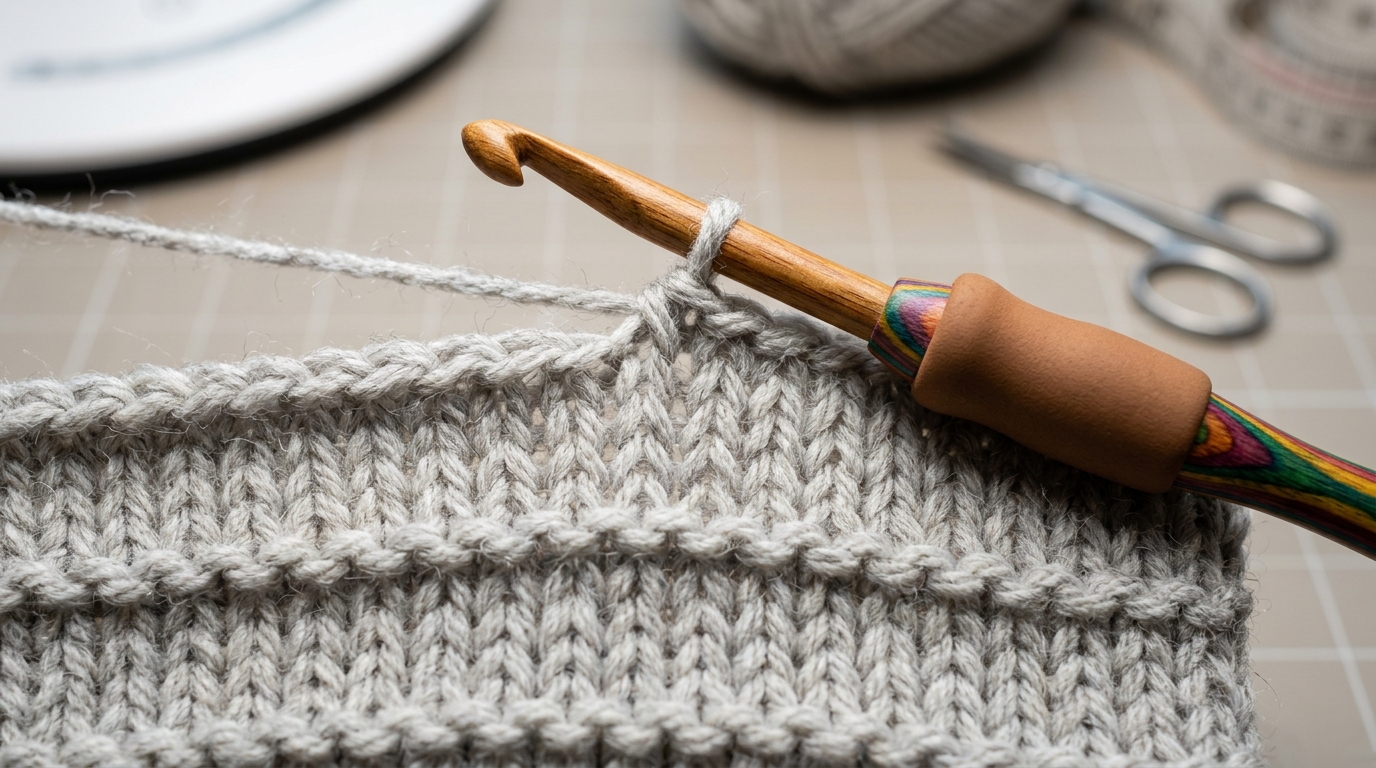
There is a unique, quiet magic in the way a handmade textile feels between your fingers. Many of us fall in love with crochet for its speed and the way it can transform a single strand of yarn into something three-dimensional and cozy. Yet, there is often a lingering admiration for the delicate, drape-y, and classic appearance of knitted fabrics—those tiny, uniform “V” stitches that characterize high-end knitwear. Perhaps you have found yourself staring at a store-bought sweater, wishing you could replicate that refined, tailored look with the crochet hook you already hold so naturally.
The good news is that you don’t need to store your hooks away or learn an entirely new craft to achieve that look. Combining traditional knitting aesthetics with the convenience of a crochet hook—often called “needle crochet” or “mock-knit crochet”—is a beautiful way to elevate your projects. By focusing on specific stitch placements and tension, we can coax our yarn into behaving exactly like a knitted fabric. This tutorial is designed to be your gentle guide into the world of waistcoat stitches and slip-stitch textures, allowing you to create pieces that look like they came from a boutique, all while staying firmly in your crochet comfort zone.
Quick Project Overview
- Skill Level: Intermediate (familiarity with basic stitches is helpful, but the technique is easy to learn)
- Estimated Time: 6–8 hours depending on pace
- Finished Size: Approximately 10 inches wide by 60 inches long (customizable)
- Best Use: A timeless, lightweight scarf that mimics a classic knitted ribbed fabric.
- Why You’ll Love It: It provides the “knit-look” drape that is highly sought after for accessories and clothing, without the technical difficulty of managing two needles simultaneously.
Materials Needed
- Yarn: 3 skeins (approx. 600 yards) of a DK-weight wool or acrylic blend. A smooth, plied yarn works best to show off the stitch definition.
- Crochet Hook: Size G/6 (4.0 mm) or H/8 (5.0 mm). Use a hook size slightly larger than the yarn label recommends to maintain a soft, fluid drape.
- Tapestry Needle: For weaving in your ends securely.
- Scissors: A sharp pair for professional-looking finishes.
- Measuring Tape: To keep your width consistent.
Stitches and Abbreviations
- Ch: Chain. The foundation of your project.
- Sl St: Slip stitch. The secret weapon for creating a knitted texture.
- Hdc: Half double crochet. Used here as a base for structure.
- BLO: Back Loop Only. This is the crucial technique used to mimic the knit “V” stitch.
- St(s): Stitch(es).
Pattern Notes Before You Start
Achieving the knit-look in crochet relies entirely on where you insert your hook. When we work in the Back Loop Only of a stitch, we leave the front loop untouched. This creates a horizontal bar that mimics the aesthetic of hand-knitted ribbing. The most important tip for this project is to keep your tension consistent. Because slip stitches are smaller than double crochets, there is a natural tendency to pull them too tightly. If you find your work curling or shrinking, loosen your grip on the yarn or go up a half-size in your hook. Remember, this project is meant to be soft and drapey, not stiff.
Full Crochet Pattern
This pattern creates a sophisticated “mock-rib” scarf that looks just like traditional stockinette or garter-rib stitch.
Part 1: The Foundation
Foundation: Ch 50. This creates a generous width for a scarf that can be wrapped twice. If you prefer a narrower neck warmer, decrease your starting chain to 30.
Part 2: The Main Body
Row 1: Hdc in the 3rd chain from the hook and each chain across. Ch 1, turn. (48 sts)
Row 2 (The Knit Look Row): Working in the Back Loop Only (BLO), insert your hook into the back loop of the first hdc and pull up a loop, then pull that loop through the loop already on your hook to complete a slip stitch. Repeat this in the back loop of every stitch across. Ch 1, turn.
Row 3: Repeat Row 2. Continue repeating Row 2 for the duration of the scarf. You will notice that as you work, the fabric begins to resemble the distinct vertical columns of a knitted garment.
Assembly and Finishing
Continue the pattern until your scarf reaches your desired length—usually 60 inches for a standard adult scarf. On your final row, fasten off the yarn, leaving a long tail of about 8 inches. Use your tapestry needle to weave the tail back and forth through the stitches on the wrong side of the fabric to secure it. If you wish to add a professional touch, you can add small handmade tassels at the corners.
Step-by-Step Tutorial Explanation
When you start this project, you might feel that the slip stitch is slower than what you are used to. That is normal! The key to this technique is the “flow.” Instead of wrapping the yarn over the hook as you would for a double crochet, keep your hook inserted into the back loop of the stitch, yarn over once with a fluid motion, and pull through both the stitch and the loop on your hook in one go. You should see a row of little braids forming on the surface of your work. That braid is the signature “knit look.” As you move through the rows, look for the “V” shapes at the top of your work; inserting your hook only into the back portion of that “V” is exactly what creates the illusion of needles having been used.
Common Mistakes to Avoid
Even experienced crocheters can struggle when switching to this technique. The most common pitfall is “tension creep.” Because slip stitches are inherently tighter than other stitches, many people subconsciously tighten their work as they go. This leads to a scarf that starts wide and ends up narrow. I recommend checking your work against a ruler every 10 rows.
Another common error is twisting the foundation chain. Ensure your chain is straight before joining your first row. Lastly, be careful not to skip that very last stitch in a row. It is often hidden, making the edge of your project look jagged instead of straight. Counting your stitches every few rows saved me from many headaches when I first started learning this method.
Pro Tips for a More Beautiful Result
The secret to a high-end finish is blocking. Once you have finished your scarf, soak it in lukewarm water with a gentle wool wash. Gently squeeze it out—do not wring it—and lay it flat on a towel. Reach out to the edges and pin it down to the exact dimensions you want. Blocking “relaxes” the stitches, evening out any minor tension inconsistencies and allowing the “knit” texture to truly pop. This is the difference between an item that looks “homemade” and one that looks “handmade.”
Regarding yarn choice, choose a yarn with a slight sheen or a multi-ply twist. Highly fuzzy yarns, like mohair or certain unspun wools, can hide the subtle “V” details of the stitches, making the knit-effect less visible. Stick to merino blends or high-quality acrylics for the most professional-looking results.
Variations and Personalization Ideas
Once you have mastered the mock-knit stitch, the possibilities are endless. You can create a “color-blocked” version by switching yarn colors every 20 rows. For a cozy winter accessory, you could use a thicker, bulky weight yarn and a 6.0 mm hook for a faster project that creates a chunky, oversized knit-look cowl. If you want to make a baby blanket using this method, consider using a soft bamboo-blend cotton in a pastel color; the drape of this stitch combined with bamboo yarn makes for an incredibly soft, breathable baby gift.
Care Instructions
To keep your handmade scarf looking store-bought and fresh, wash it by hand. Fill a basin with cool water and a small amount of mild detergent. Gently agitate the water, soak for fifteen minutes, and rinse thoroughly. Press out the excess water inside a clean towel and lay it flat to dry. Avoid hanging the item to dry, as the weight of the water can cause the stitches to stretch and distort over time. If you notice a stray thread over the years, simply use your tapestry needle to nudge it back into the fabric.
FAQ
Does this technique work for hats?
Yes! The slip-stitch-in-BLO method is actually excellent for hats because it provides a good amount of “squish” and stretch, which is essential for a comfortable fit around the head.
Can I mix this with regular crochet stitches?
Absolutely. You can create a beautiful piece by alternating four rows of this knit-look stitch with two rows of standard single crochet. This creates an interesting textural contrast.
Why does my work start curling at the edges?
This is usually caused by tension that is too tight. If this happens, try going up a hook size or focusing on keeping your slip stitches slightly looser.
Is this method suitable for delicate yarns?
Yes, it is, but be mindful of the “halo” of the yarn. As mentioned, very fuzzy yarns will obscure the stitches. Smooth yarns show off the technique best.
What is the advantage of this over actual knitting?
It allows you to use your crochet speed and muscle memory. Many people find they can work much faster with a hook than with needles, and it is significantly easier to fix a dropped stitch in crochet than it is in knitting!
Conclusion
It is a wonderful thing to master a technique that bridges the gap between different worlds of textile arts. The knit-look crochet style opens up so many possibilities, allowing you to create classic, sophisticated accessories that have that beautiful, uniform, and professional drape every time. Whether you choose to make a simple, elegant scarf or experiment with larger garments, remember that the joy of crafting is in the process itself. Keep your tension relaxed, choose a yarn that makes your heart smile, and enjoy the rhythm of your hook. Your handmade creations are a testament to your patience and creativity; wear them with pride, knowing they are as unique as the hands that crafted them. Happy stitching!