
Introduction
Welcome to the wonderful, rhythmic world of crochet! If you have ever looked at a beautiful handmade blanket or a dainty baby sweater and wondered, “Could I really make that?” the answer is a resounding yes. Every intricate lace shawl and every sturdy market bag begins with the very same foundation: the single crochet stitch. It is the heartbeat of crochet, the most fundamental move that every designer, from the most famous pattern-makers to the hobbyist sitting on their porch, uses daily.
Learning to master the single crochet is like learning to read music; once you understand this note, you can play almost any song. It is a sturdy, dense, and reliable stitch that creates a lovely fabric with a clean, braided appearance. Whether you are aiming to create cozy home decor, precious gifts for loved ones, or your very first wearable accessory, this guide is designed to walk you through the process with warmth and patience.
There is no rush here. Crochet is about the joy of the craft and the meditative feeling of the yarn sliding through your fingers. We will break down exactly how to hold your hook, how to insert it into your work, and how to maintain that perfect tension that makes your stitches look professional. You are exactly where you need to be, and I am so excited to help you get those first stitches under your belt.
Quick Overview
This guide is designed for the absolute beginner who wants to move beyond the starting chain, as well as the intermediate crafter who wants to refine their technique for more polished edges. We will focus on the anatomy of the single crochet stitch, the correct hand movements to prevent wrist strain, and how to keep your rows straight and even.
You will learn:
- The essential physics of the single crochet stitch.
- How to “read” your stitches to know exactly where to insert your hook.
- The secrets to maintaining consistent tension throughout your row.
- How to turn your work without creating gaps or uneven edges.
This is a skill-building guide. By the end of this article, you will feel confident enough to pick up any “beginner-friendly” pattern and know exactly what you are doing.
Tools You Will Need to Practice
Before we begin, gather a few simple supplies. You do not need anything expensive to learn; in fact, practicing with the right materials makes the process much smoother.
- Yarn: Opt for a light-colored, smooth worsted weight (Category 4) yarn. Light colors (like cream, light gray, or sky blue) make it much easier to see the structure of your stitches compared to darker shades like navy or black.
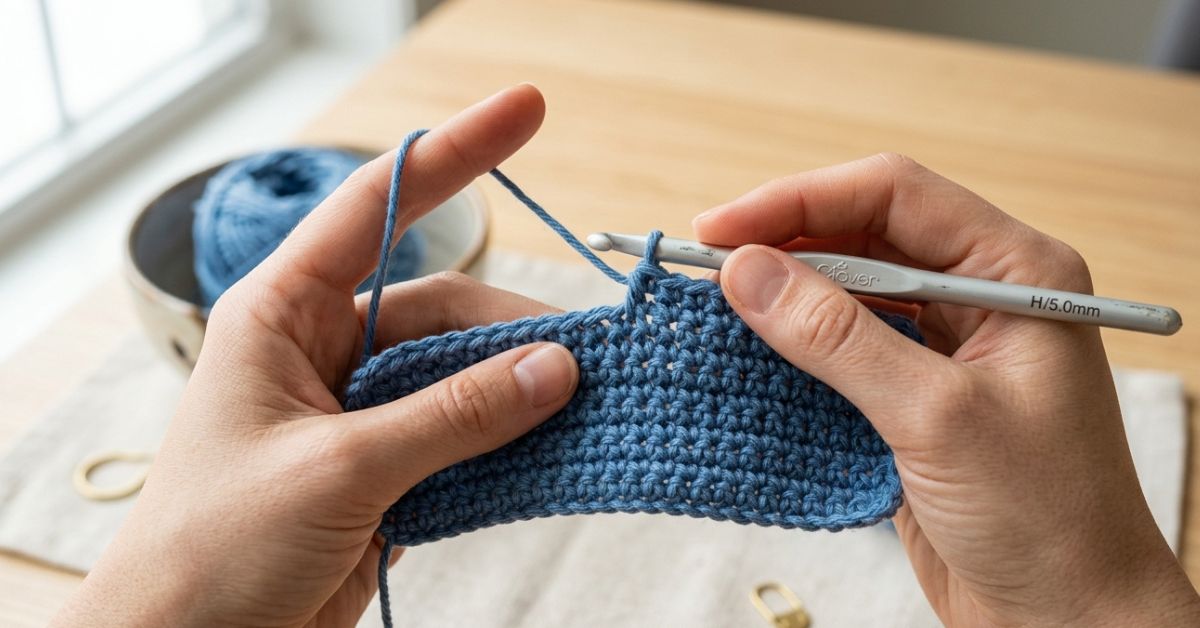
- Crochet Hook: For a standard worsted weight yarn, a size H/8 (5.0 mm) hook is the gold standard. It is large enough to handle easily but small enough to produce a tight, pleasing fabric.
- Stitch Markers: These are small, plastic clips that mark the ends of your rows. They are a beginner’s best friend because they help you keep track of where to place your last stitch of the row.
- A Comfortable Chair: Crochet is a craft of comfort! Make sure you are in a well-lit area where you can see your work clearly, and have a glass of water or tea nearby to keep you hydrated and relaxed.
Key Concepts Before You Begin
Before we dive into the physical movements, there are a few concepts that will make your learning journey much more intuitive.
- The Anatomy of a Stitch: Imagine your crochet stitches as a series of “V” shapes sitting on top of a base. When we talk about “the top two loops,” we are referring to the legs of that “V.” Understanding this “V” is vital because it is where you will insert your hook for almost every standard stitch.
- The Starting Chain: You will always begin by creating a series of chains (the foundation). Think of this as your canvas.
- Turning Chain: This is simply an extra chain (or two) you make at the end of a row to “climb up” to the height of the next row. For single crochet, we usually chain one extra at the end of every row.
Master the Single Crochet Step-by-Step
Let’s move through the process of making a single crochet stitch. Treat this as a slow, deliberate practice.
Step 1: The Setup
Start by making a slip knot and a foundation chain of 15 stitches. Hold your hook in your dominant hand and your yarn in your non-dominant hand. Tension is personal, so find a way to hold the yarn that feels comfortable to you, whether you wrap it around your index finger or weave it through your fingers.
Step 2: The Insertion
Look at your chain. Skip the first chain closest to your hook, and insert your hook into the center of the second chain. Be sure to pick up just the top loop (usually called the “back bump” or the “top strand” of the chain) so that two strands of yarn sit above your hook and one sits below.
Step 3: The Yarn Over
Bring your yarn over the top of the hook from back to front. This move is called a “yarn over.” Use the hook’s throat to catch the yarn securely.
Step 4: Pulling Through
With the hook caught on the yarn, pull the yarn through the chain stitch. You should now have two loops sitting on your hook.
Step 5: The Final Pull
Yarn over one more time and pull the yarn through both loops currently on your hook. You have now completed one single crochet stitch! You will be left with one loop on your hook, which serves as the “anchor” for your next stitch. Repeat this until you reach the end of your foundation chain.
How to Turn Your Work
Many beginners struggle at the end of a row. When you reach the last stitch of your chain, you have created a row. Now, look at that last stitch—it might feel a bit tight. Insert your hook, yarn over, pull through, and finish your stitch.
To start the next row, chain one extra stitch. This is your “turning chain.” Now, flip your entire piece of work as if you were turning the page of a book (always turn in the same direction to keep your edges neat). You are now ready to begin your next row by inserting your hook into the very first stitch of the row you just completed.
Beginner-Friendly Tips for Success
- Count Your Stitches: This is the most common place where beginners go astray. Count your stitches at the end of every row. If you started with 14 stitches, make sure you still have 14. If you have 13, you missed the last stitch; if you have 15, you accidentally added an extra one.
- Don’t Fear the Frog: In the crochet community, “frogging” means pulling your work out (rip it, rip it, rip it!). If a row looks lopsided or you made a mistake, there is absolutely no shame in pulling it back and trying again. It is how we learn!
- Loosen Your Grip: If you find it nearly impossible to pull your hook through the loops, your tension is likely too tight. Try to keep your hands relaxed. Your stitches should slide easily over the shaft of your hook without a struggle.
Common Mistakes to Avoid
Even though single crochet is straightforward, there are a few “traps” that even intermediate crocheters occasionally fall into.
The Missing End Stitch
This is the number one cause of triangular-shaped rectangular projects. Beginners often skip the very last stitch of a row because it looks like a knot or a corner. Use a stitch marker on the first and last stitch of every row to ensure you are catching them every single time.
The Twisted Chain
When you start, if your foundation chain is twisted like a corkscrew, your first row will be crooked. Lay your chain flat on a table before you begin and make sure all those “V” shapes are facing in the same direction—upward.
Splitting the Yarn
Sometimes, your hook will accidentally pierce the middle of a strand of yarn rather than grabbing the whole loop. This is called “splitting.” If you notice your stitches look thin or stringy, you may have split the yarn. Simply pull back and re-insert your hook, being careful to catch the entire strand.
Pro Tips for Polished Results
To take your work from “handmade” to “heartfelt and professional,” focus on these small details.
- Blocking: Once you finish a square of single crochet, it might look a little rolled at the edges. A light steam block—using a damp cloth and a warm iron over the piece—will relax the fibers and make your stitches lie perfectly flat.
- The Turning Chain Choice: Some crocheters prefer not to count their turning chain as a stitch, while others do. Whatever you choose, stay consistent throughout the entire project.
- Gauge Awareness: Your natural tension changes based on coffee intake, stress level, and how long you have been crocheting. Try to check your tension every 15 minutes of work to ensure the tightness of your stitches remains consistent from start to finish.
Personalization and Creative Ideas
Single crochet is incredibly versatile. Once you are comfortable with the basic move, try incorporating these variations:
- Back Loop Only (BLO): Instead of inserting your hook under both strands of the “V,” insert it only into the loop furthest from you. This creates a beautiful, stretchy ribbed texture that is perfect for hats or cuffs.
- Color Blocking: Single crochet is the perfect base for changing colors. To switch, finish your last “pull through” of a stitch with the new color. The transition will be seamless and sharp.
- Adding Texture: You can work single crochet into the posts of the stitches below rather than the top loops to create a dense, thermal fabric that feels wonderful for cold-weather items like coasters or potholders.
Care and Storage for Your Crochet
The best way to keep your crochet work looking fresh for years is to handle it with love. For most acrylic or cotton yarns, a gentle hand wash in cool water with a mild detergent is the safest option. Lay your item flat on a towel to dry, shaping it into its proper form, and avoid hanging the piece, as gravity can stretch the fibers over time. When storing larger blankets, try to keep them in breathable cotton bags rather than plastic to prevent them from smelling musty.
FAQ
Why does my crochet project keep narrowing?
This is almost always due to missing the very last stitch of each row. Count your stitches at the end of each row and use a stitch marker in the first and last stitch to ensure you are working every available space.
Why is it so hard to push the hook through the loops?
You are likely crocheting with “tight tension.” Try to relax your hands, or consider moving up one size in your crochet hook. A slightly larger hook can help you maintain a looser, more comfortable stitch without changing the texture of the yarn.
What is the difference between single crochet and other stitches?
Single crochet is the shortest, most dense stitch. As you learn more, you will encounter the double crochet and half double crochet, which are taller and create a different, often drape-ier, fabric. Single crochet is the best for structure and detail.
Do I have to use a stitch marker?
You don’t have to, but it is highly recommended for beginners! It takes the guesswork out of where your row ends. Even experienced designers use stitch markers to keep track of their progress and stay organized.
How do I fix a mistake I made three rows ago?
You can use a “tink” (the word “knit” spelled backward) method. Carefully pull your hook out and gently undo your stitches one by one until you reach the mistake. It takes patience, but it is much faster than starting the whole project over.
Conclusion
Mastering the single crochet is a milestone worth celebrating. You have taken a piece of string and transformed it into a piece of fabric, and that is truly magical. Don’t worry if your first few rows aren’t perfectly square or if you had to start over a few times—every single stitch you work is an investment in your skill.
Keep practicing your tension, keep counting your stitches, and most importantly, keep enjoying the process. Whether you spend ten minutes a day or two hours on the weekend, crochet is a hobby that gives back as much as you put in. Keep this guide handy for those times when you need a quick refresher, and remember that you are capable of creating beautiful, cozy things. The yarn is in your hands—happy crocheting!