
Introduction
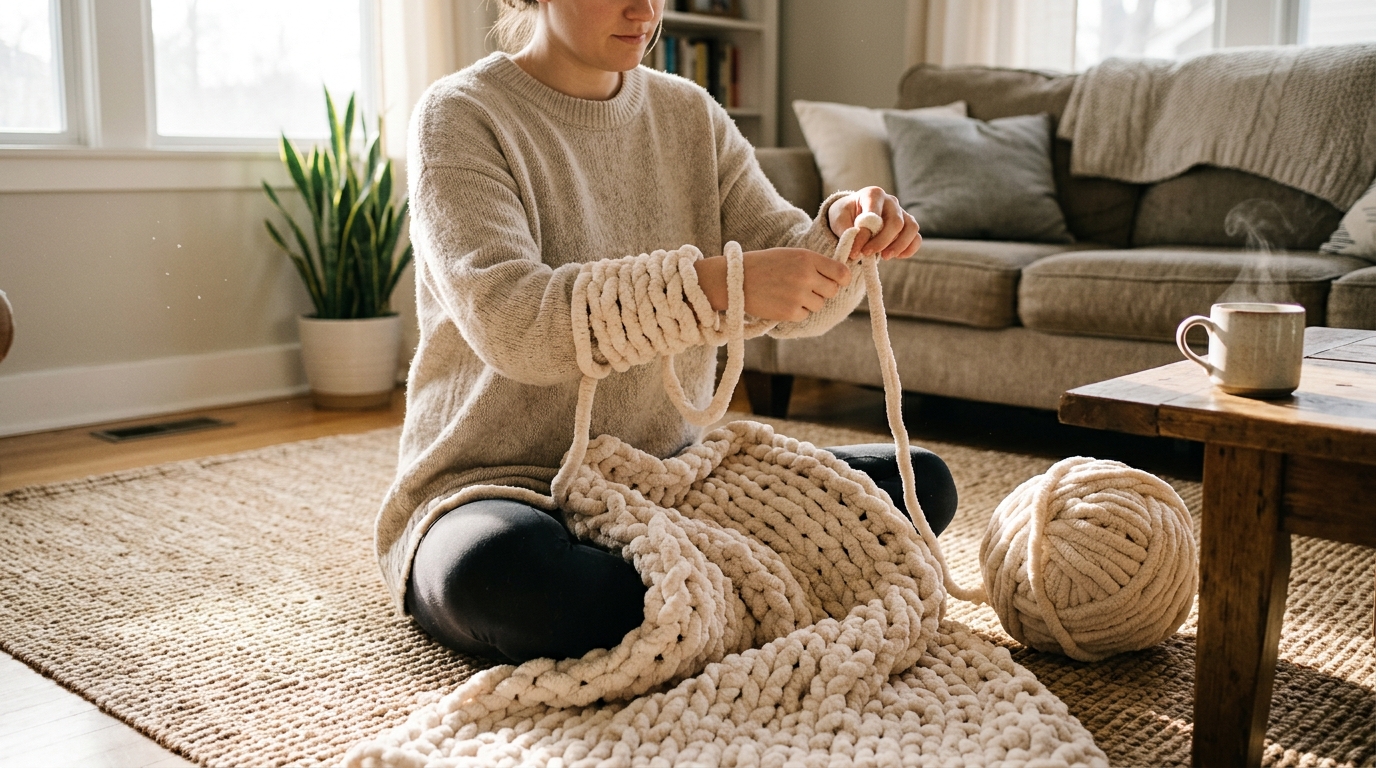
There is something inherently magical about creating a handmade blanket with nothing but your own two hands. Often referred to as “finger crochet” or “chunky hand braiding,” this technique strips away the complexity of traditional crochet hooks and leaves you with the pure, tactile joy of working with soft, oversized yarn. Imagine sitting on your couch on a rainy Sunday afternoon, wrapping yourself in a blanket that you crafted yourself in just a few short hours. It is the ultimate form of cozy DIY—accessible, deeply rewarding, and incredibly stylish.
Many beginners feel intimidated by the idea of learning crochet because it involves mastering hook sizes, tension control, and reading complex stitch diagrams. Hand crocheting changes the narrative. By using your hands as the “hooks,” you gain an immediate sense of how the loops interact, which builds a fantastic foundation for future fiber arts. Whether you are looking to create a thoughtful handmade gift for a loved one, a modern accent piece for your living room, or a relaxing weekend hobby, this guide will walk you through the process step-by-step. You don’t need any fancy tools, expensive equipment, or prior experience—just a few skeins of chunky yarn and a bit of enthusiasm. Let’s get started on your first hand-crocheted masterpiece!
Quick Overview
This guide is designed for the absolute beginner who wants to jump straight into making a beautiful, oversized throw blanket.
- Skill Level: Beginner-friendly. No prior experience required.
- Estimated Time: 2 to 4 hours.
- Finished Size: Approximately 40 inches by 50 inches (perfect for a lap throw).
- Best Use: Home decor, heirloom-quality DIY gifts, and cozy winter styling.
- Why You’ll Love It: This project provides instant gratification, requires no equipment storage, and creates an incredibly high-end, boutique aesthetic for a fraction of the cost.
Materials Needed
For this project, the most important element is your yarn choice. Because you are working with your hands, you need a yarn that is thick, soft, and easy to manipulate.
- Yarn: Look for “jumbo” or “super bulky” weight chenille-style yarn. These are often labeled as “tube yarn” or “velvet chunky yarn.” For a standard lap throw of 40×50 inches, you will need approximately 7 to 9 skeins (about 250–300 yards total depending on the brand).
- Scissors: A sharp pair of household scissors for cutting the yarn at the end.
- A Flat Surface: A large dining table or a clean area of floor space is essential to lay out your loops and keep your rows even.
- Measuring Tape: Optional, if you want to be very precise with your blanket dimensions.
Key Concepts and Terms
Even though we are bypassing the crochet hook, we are still utilizing fundamental crochet concepts. Understanding these will help you troubleshoot as you go.
- The Loop: In hand crochet, your loops are your stitches. You will pull one loop of yarn through another.
- The Foundation Row: This is your starting row, where you establish the width of your blanket.
- Tension: This refers to how tightly or loosely you pull the yarn. In finger crochet, consistent tension is the secret to a professional-looking blanket. Try to keep your loops roughly the same size—about two to three inches high is usually ideal.
- Working Yarn: This is the portion of the yarn still attached to the skein that you are actively using to create new rows.
- Working “Through” the Loop: You will be pulling the working yarn up through the existing loops to create a new, continuous braid effect.
Helpful Notes Before You Start
Before you cast on your first stitch, keep these pointers in mind to ensure your experience is enjoyable and stress-free:
- Work on a Flat Surface: Unlike traditional crochet where you might hold your work in your lap, hand crochet is best done on a table. This allows you to see the “grid” of your blanket clearly, ensuring no loops get twisted or skipped.
- Consistency is Key: The beauty of a hand-crocheted blanket lies in the uniformity of the loops. Every few minutes, stop and look at your stitches. If one loop looks significantly larger than the others, gently pull the working yarn to tighten it up.
- Don’t Over-Tighten: While you want consistency, you don’t want to yank the yarn. If you pull too tightly, the blanket will become rigid and stiff. It should feel squishy, soft, and flowing.
- Managing Your Skeins: If you are changing from one skein of yarn to another, don’t worry about complicated knots. Simply overlap the new end with the old end for about six inches and “braid” them together as you form your stitches, or secure them with a discreet knot at the back of the blanket once finished.
Hand Crochet Blanket Pattern
Part 1: Establishing the Foundation
Lay your yarn out on your table. Start by creating a line of “slip knots.” To do this, make a loop then pull a segment of the yarn tail through the loop to create a new loop. Continue this until you have about 15–20 loops in a row. This will dictate the width of your blanket. Make sure the foundation row is laid out straight, with all the openings of the loops facing upward like little arches.
Part 2: Working the Rows
Take your working yarn (the yarn still attached to the ball). You are going to pull this yarn through your foundation loops.
- Starting from the end of the foundation chain where your working yarn is attached, pull a loop of the working yarn up through the first foundation loop.
- Move to the next loop in the row and pull another loop of the working yarn through it.
- Continue this across the entire row. You have now established your first “live” row.
- Once you reach the end, turn your work or simply work back toward the other side. You will now pull the working yarn through the loops you just created, moving in the opposite direction.
Part 3: Maintaining the Pattern
Repeat the process of pulling the working yarn through the existing loops for each row. You will soon see a beautiful, cable-like texture emerging. Be sure to count your loops at the end of each row. If you started with 15 loops, you should have 15 loops in every row. If you accidentally have 14 or 16, you have either dropped a stitch or created an extra one.
Part 4: Finishing the Edge
When your blanket has reached your desired length, it is time to “bind off.”
- Starting at the edge opposite the working yarn, take the first loop and pull the second loop through it.
- Take the third loop and pull it through the loop you just created.
- Continue this “chaining off” process across the entire row until you have only one loop left.
- Cut the working yarn with about 6 inches of a tail. Pull the end of the yarn through the final loop and pull tight to secure.
Step-by-Step Explanation for Success
The easiest way to think about hand crochet is as a “through-the-loop” process. Imagine you are weaving a fence. Each row relies on the structure of the row before it. If you visualize the row as a series of arches, your goal is to push the next row of yarn through those arches. If you find a loop is twisted, simply untwist it before you pull the next one through. If you ever feel like you’ve made a mistake, do not panic! Because there are no “hidden” stitches, you can simply pull the working yarn back row by row until you reach the point of the error. It is very forgiving.
Common Mistakes to Avoid
Even in a project this simple, there are a few traps that beginners fall into:
- The Twisted Loop: If you accidentally twist a loop before pulling another one through, it will create a “puckered” spot in your blanket. Always make sure your loops are lying flat and facing the same direction.
- Losing Count: This is the most common issue. When you reach the ends of your rows, it is easy to skip the very last loop or accidentally pull two loops through one space. Take a moment to look at the edge of your blanket—the edges should be straight.
- Varied Tension: If you crochet while tired or tense, your loops may tighten up. Try to maintain a relaxed posture. If you find your hands are cramping, take a 10-minute break.
- Forgetting to Bind Off: When you finish, the last row will still have open loops. You must perform the “binding off” step described above, or the blanket will unravel the moment you move it.
Pro Tips for a Better Result
- The “Double” Edge: For a cleaner, more professional-looking edge, when you reach the end of a row, pull the working yarn through the last loop and then “tuck” it slightly, ensuring that the edge loop isn’t stretched too wide.
- Yarn Choice: If you want a more substantial, heavy blanket, look specifically for “merino wool” or “vegan wool” giant roving. If you want something machine-washable and durable, stick with synthetic chenille-style tube yarns.
- Blocking: If your finished blanket looks a little uneven, lay it out on a bed, straighten the edges with your hands, and let it sit for 24 hours. The weight of the yarn will naturally “block” the blanket into a more uniform shape.
- Spacing: If you notice your blanket feels “gappy” or see too many holes, you are likely pulling your loops too high. Keep them closer to the fabric of the previous row.
Variations and Personalization
Once you master the basic stitch, you can elevate your blanket in several ways:
- Color Blocking: Create a modern look by using one color for the first 10 rows and switching to a contrasting color for the remaining rows.
- Multi-Strand: If you have thinner bulky yarn, hold two strands together as if they were one single, thicker strand. This creates a beautiful marled effect.
- The Chunky Border: Once the blanket is finished, you can “surface crochet” a border by weaving a different color yarn through the perimeter loops for a pop of color.
- Baby Blanket Size: For a baby shower gift, reduce your foundation row to 10 or 12 loops. It’s the perfect size for a car seat or stroller cover.
Care and Storage
Hand-crocheted blankets, especially those made with chunky chenille-style yarn, should be treated with care.
- Washing: Check your yarn label. Most synthetic tube yarns are machine washable on a delicate cycle in a mesh laundry bag. However, air drying is always best to preserve the fluffiness of the fibers.
- Storage: Avoid hanging your blanket, as the weight of the chunky yarn can cause it to stretch out of shape over time. Instead, fold it neatly and store it in a basket or on a shelf.
- Maintenance: If the yarn pills after heavy use, you can gently use a fabric shaver to keep it looking brand new.
FAQ
How do I join a new skein of yarn?
Simply lay the end of your old yarn against the beginning of your new yarn and continue pulling both through the loops as one strand for about three or four stitches. Once you have a few inches of extra end, you can trim the excess or weave it into the back.
Is this harder than using a crochet hook?
In many ways, it is easier. You don’t have to worry about hook size or holding a tool correctly. It is effectively “finger knitting.” If you can tie a knot, you can hand crochet.
Why does my blanket keep getting wider?
You are likely accidentally pulling two loops through one foundation stitch. Count your stitches at the end of every row to ensure you have the same number you started with.
Can I wash this in the washing machine?
Most chenille yarns are machine washable. Use a gentle cycle, cold water, and a mesh laundry bag. Never use a hot dryer; high heat can melt the fibers of synthetic yarns.
How do I fix a dropped stitch?
If you realize you skipped a loop, put your hand through the gap, pull the yarn from behind, and create a new loop. It is very easy to perform “surgery” on your blanket at any stage.
Conclusion
Hand crocheting is more than just a technique; it is a gateway into the world of texture, color, and creation. By using your own hands to craft something beautiful, you are participating in a timeless tradition that brings warmth and intention into your home. Whether this is your very first craft project or just the latest in a long line of creative pursuits, take pride in the fact that every loop was formed by you.
As your blanket grows, remember that perfection is not the goal—comfort and joy are. Your stitches will become more uniform with practice, and soon you will be picking out yarn for your next color-blocked throw or a matching set for a friend. We hope this guide has given you the confidence to dive in and get started. Embrace the process, enjoy the meditative movement of your hands, and get ready to curl up in your cozy, handmade masterpiece!