
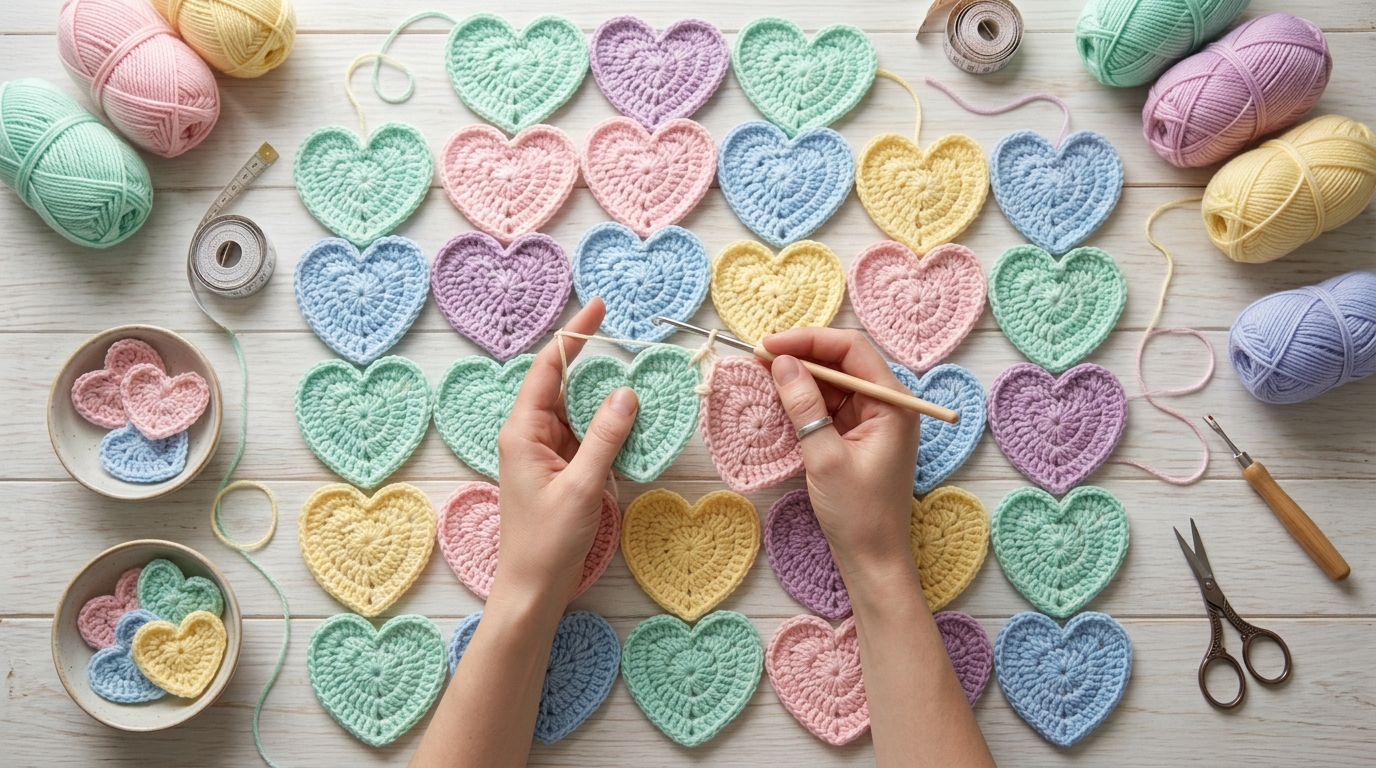
Welcome to Your Next Cozy Project
There is something truly magical about the humble crochet heart. It is more than just a shape; it is a symbol of affection, care, and the time we pour into our handmade creations. Whether you are crafting a heartfelt gift for a loved one, creating a sweet addition to a baby blanket, or simply looking to use up your scrap yarn, crocheted hearts bring a touch of whimsy to any project.
If you have been dreaming of creating a blanket covered in these delicate motifs but feel intimidated by the idea of sewing them all together, you are in the right place. Joining small motifs—often called “joining as you go” or traditional seaming—can feel like a puzzle. However, once you learn a few simple, professional-looking techniques, you will find that the assembly process is just as meditative as the stitching itself. We are going to explore how to create the perfect crochet heart and, more importantly, how to blend them into a gorgeous, cohesive blanket that you will be proud to display in your home for years to come. Whether you are a beginner picking up a hook for the first time or an intermediate crafter looking for cleaner finishing techniques, this guide is designed to walk you through every step with warmth and clarity.
Quick Overview
- Skill Level: Beginner-Friendly
- Time Commitment: 15–20 minutes per heart (depending on speed)
- Finished Heart Size: Approximately 3 inches across (using medium weight yarn)
- Best Project Use: Throw blankets, baby blankets, or decorative cushions
- Why You Will Love This: This project is incredibly portable, uses minimal yarn, and allows for endless color customization to match any room in your home.
Materials Needed
To create your heart motifs and join them into a blanket, you will need the following tools:
- Yarn: Worsted weight (Size 4) yarn is ideal for beginners. Cotton blends provide great stitch definition, while acrylics offer softness and durability.
- Crochet Hook: A size H/8 (5.0 mm) hook is standard for worsted weight yarn, but feel free to adjust based on the yarn label recommendations.
- Yarn Needle: A blunt-tipped tapestry needle is essential for weaving in ends and seaming.
- Stitch Markers: These are life-savers for keeping your motifs aligned while you join them.
- Scissors: Any sharp pair will do the job.
Crochet Terms and Key Concepts
To keep our patterns simple, we use standard U.S. crochet terminology. Here are the core stitches you will need:
- Chain (ch): The foundation of most crochet projects.
- Slip Stitch (sl st): Used for joining rounds and invisible seams.
- Single Crochet (sc): A short, sturdy stitch perfect for tight motifs.
- Half Double Crochet (hdc): Slightly taller than a single crochet, providing a nice balance.
- Double Crochet (dc): A taller stitch that adds height and softness to the heart lobes.
- Treble Crochet (tr): Used here to create the dip at the bottom of the heart.
- Fasten Off: Cutting the yarn and pulling the tail through the final loop to secure your work.
Helpful Notes Before You Start
Tension is everything when it comes to joining motifs. If your hearts are all different sizes because your tension changed, the blanket will ripple or pull in awkward ways. Try to crochet all your hearts in one sitting, or at least use the same hook throughout. If you are worried about consistency, don’t be afraid to use a stitch marker at the start of each round. For joining, remember that “less is more.” You do not need thick, bulky seams. A light, delicate touch often results in a more professional, “boutique-style” finish.
The Heart Motif Pattern
This heart is worked in one continuous round, making it very beginner-friendly.
- Round 1: Create a magic ring (or chain 4 and slip stitch to the first chain to form a circle).
- Round 2: Into the center of the ring, work (ch 2, 3 dc, 3 hdc, ch 1, 1 dc, ch 1, 3 hdc, 3 dc, ch 2, sl st) into the ring.
- Round 3: Pull the center ring tight to close the hole. You should now see the shape of your heart forming. Fasten off, leaving a 6-inch tail for weaving in.
Repeat this process until you have the desired number of hearts for your blanket layout.
How to Join Your Hearts
Once you have a collection of hearts, it is time to turn them into a blanket. There are two primary ways to join these motifs: the “sewn seam” and the “join-as-you-go” method.
The Sewn Seam Method
Lay your hearts out on a flat surface in the pattern you desire. Use a tapestry needle and a length of matching yarn (or a contrasting color for a pop of style). Use the “back loop only” (BLO) method to whip-stitch the edges together. By only picking up the back loops, your seam will lay flat rather than bunching up.
The Join-as-You-Go Method
If you want to avoid sewing, you can join the hearts with a decorative slip stitch border. As you complete the final edge of a heart, work a slip stitch into the corresponding spot on the previous heart. This creates a beautiful, lacy lattice effect between the motifs, which is perfect for a romantic, heirloom-style blanket.
Step-by-Step Assembly
- Layout: Arrange your hearts on a bed or floor. Don’t rush this; look at how the colors play against each other.
- Pinning: Use stitch markers to connect the corners of your motifs. This prevents the pieces from shifting while you work.
- Joining: Start from the bottom corner of your layout and work upward. If you are sewing, keep your tension loose so the blanket maintains its drape.
- Checking: Every ten hearts or so, pick up the piece and make sure it is lying flat. If it starts to “cup” or curve, loosen your joining stitches.
Common Mistakes to Avoid
Even experienced crocheters run into trouble from time to time. Watch out for these common traps:
- Inconsistent Tension: If some hearts pull tight and others are loose, the blanket will ripple. Block your hearts before joining to ensure they are uniform in size.
- Failing to Weave Ends: It is tempting to skip weaving in ends because there are so many of them, but loose ends are the fastest way for a blanket to unravel in the wash. Weave them in securely crossing different directions of the stitches.
- Mixing Yarns: Try to stick to the same weight (e.g., all worsted weight) for the whole blanket. Mixing a thin yarn with a thick one will make the blanket drape unevenly.
- Neglecting Blocking: Blocking is the “secret sauce” of professional crochet. Simply pinning your hearts to a damp towel and letting them dry in shape makes the joining process much easier because the edges will be straight and consistent.
Pro Tips for a Better Result
If you want your blanket to look like it came from a high-end boutique, consider these extra touches:
- The Border: Don’t stop at just the hearts! A simple border of single or half double crochet around the entire perimeter of your joined hearts will frame the project and give it a clean, finished look.
- Color Transitions: If you are using many different colors, try using a neutral yarn (like cream, grey, or soft white) for all your joining seams. This helps “anchor” the colors and creates a sophisticated, cohesive look.
- Weight Matters: If you are making a large throw, consider using a lighter-weight yarn toward the edges to keep the blanket from becoming too heavy to handle comfortably.
Variations and Personalization Ideas
The beauty of this project is that it can change with the seasons. Use vibrant reds and pinks for a Valentine’s Day gift, soft pastels for a baby shower, or rich jewel tones for a cozy winter throw. You can also vary the size of your hearts by using a larger hook and thicker yarn for some motifs, creating a “mixed-media” look that adds depth and texture to the blanket. If you are feeling extra creative, try adding a small crocheted flower or a button to the center of every third heart for an added touch of charm.
Care and Storage
Because your blanket consists of many joined motifs, it is a delicate item. When it comes time to wash it, always place the blanket inside a mesh laundry bag to prevent the hearts from catching on other items in the machine. Use a gentle cycle with cool water and mild detergent. Lay the blanket flat to dry on a clean towel—avoid hanging it, as the weight of the water can cause the joining seams to stretch out and lose their shape over time.
FAQ
How many hearts do I need to make a blanket?
This depends entirely on the size you want. For a small baby blanket (approx. 30×30 inches), you might need 40 to 60 medium-sized hearts. For a full-sized throw, aim for 150 to 200. I recommend starting with a smaller project, like a cushion cover, to see how many hearts you prefer before committing to a larger blanket.
Do I really have to weave in all those ends?
While it is the least exciting part of crochet, it is the most important for the longevity of your project. If you are making a gift, you want it to last. Think of the time spent weaving as an act of love—you are anchoring your hard work so it stays beautiful forever.
Can I join hearts of different sizes together?
Yes! Mixing sizes adds a wonderful, whimsical texture. If you choose to do this, keep the centers aligned when you join. It creates a fun, organic look that is perfect for a bohemian-style nursery or a cozy reading nook.
What is the best way to keep my tension consistent?
Take breaks! If you find your hands are getting tired, your tension will tighten. Crochet for 30 minutes, then get up and stretch your hands and wrists. Also, check your gauge against your first heart every few days to ensure you haven’t changed your style.
What if I don’t like sewing?
You don’t have to sew! The “join-as-you-go” method is a fantastic alternative for those who prefer to keep their crochet hook in their hand at all times. It is faster, and it often creates a more flexible, drapey fabric than individual sewing.
Conclusion
Joining small motifs like hearts into a single blanket is a labor of love, but the result is a piece of art that radiates warmth and comfort. Remember, there is no “perfect” way to craft; the small imperfections are what make your blanket unique and authentic. Take your time, enjoy the rhythm of your stitches, and know that every loop you pull through is a bit of joy you are creating for yourself or someone special. Whether you decide to keep this blanket for your own home or wrap it up as a heartfelt gift, I hope this guide gives you the confidence to dive in and let your creativity shine. Happy crocheting!