
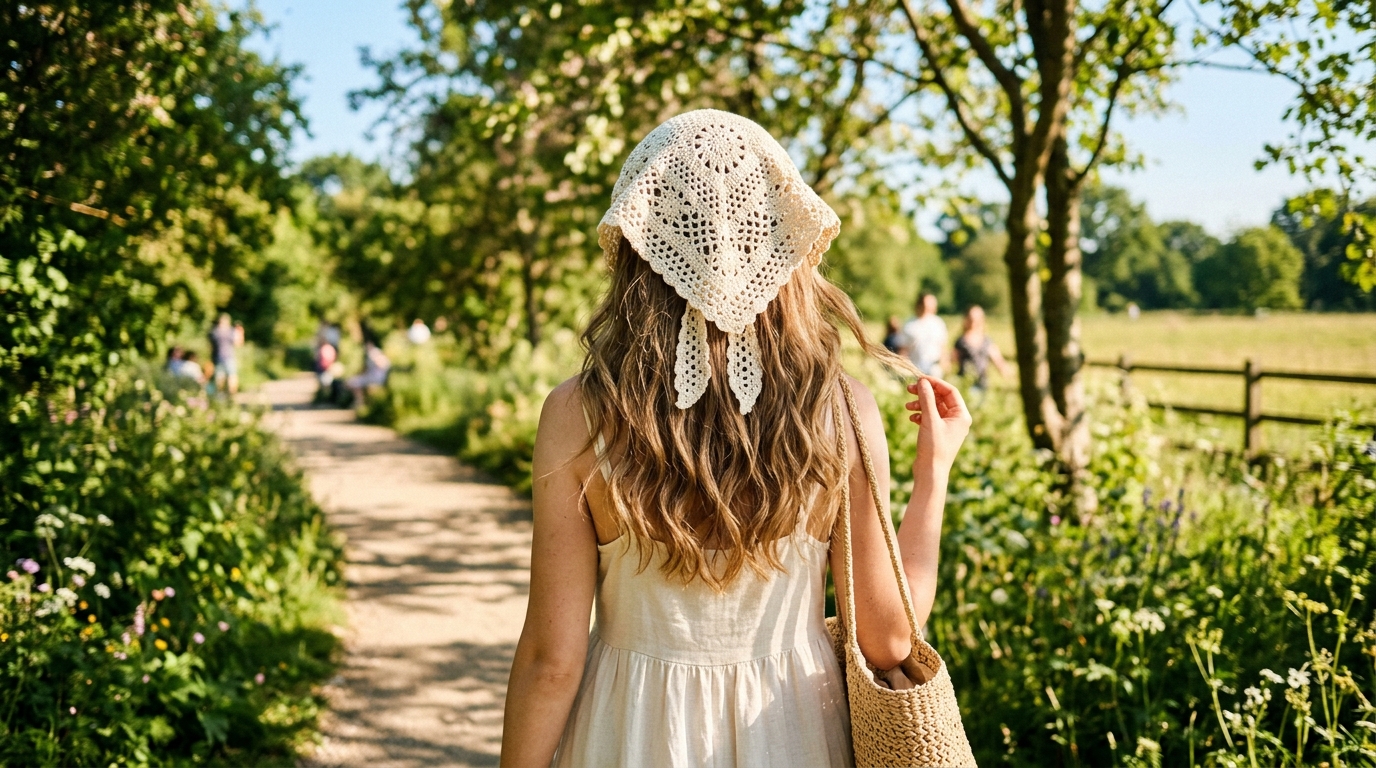
There is something uniquely magical about creating your own accessories. Whether you are prepping for a sunny afternoon at the farmers market, heading to a music festival, or simply looking for a chic way to keep your hair back while running errands, a handmade crochet bandana is the perfect solution. It’s a project that speaks to the heart of the “slow fashion” movement—it is quick, customizable, and creates an instant bohemian aesthetic that feels both nostalgic and modern.
If you are a beginner, you might feel a little intimidated by the idea of shaping a garment, but rest assured: this bandana is essentially a simple triangle. It relies on basic stitches and rhythmic increases, making it a meditative process that you can finish in a single afternoon. For the more experienced crocheters, this pattern offers a wonderful blank canvas to experiment with delicate yarn weights, intricate color changes, or even the addition of beads and lacey edgings. Let’s gather our hooks and yarn and dive into this cozy, creative journey together.
Quick Overview
- Skill Level: Beginner-Friendly.
- Estimated Time: 2–4 hours depending on crafting speed.
- Finished Size: Customizable (Standard adult size is approximately 18-20 inches across the top edge).
- Best Use: Everyday boho-chic accessory, gift for a friend, or a great scrap-yarn buster.
- Why You’ll Love It: It is a low-commitment project that yields high-impact, wearable results. It’s easy to throw in your bag and works up beautifully in almost any natural fiber yarn.
Materials or Tools Needed
To get started, you don’t need a massive investment in supplies. In fact, most of these items are probably already hiding in your craft stash.
- Yarn: Approximately 100–150 yards of DK (weight 3) or light Worsted (weight 4) cotton yarn. Cotton is highly recommended because it offers great stitch definition and keeps its shape well on your hair.
- Crochet Hook: Size G/6 (4.0mm) or H/8 (5.0mm). Use the size that feels best with your chosen yarn to reach a comfortable, slightly airy tension.
- Tapestry Needle: Essential for weaving in those ends neatly.
- Scissors: Any sharp pair will do.
- Stitch Markers: Optional, but helpful if you want to keep track of your increase rows.
- Measuring Tape: To ensure your triangle grows to your desired width.
Crochet Terms, Stitches, and Key Concepts
Before we begin, let’s go over the standard U.S. terminology we will use to ensure your bandana comes out perfectly.
- Chain (ch): The foundation of our work and used for transitions.
- Single Crochet (sc): A compact, sturdy stitch that gives the bandana structure.
- Double Crochet (dc): A taller stitch that provides the classic “v” texture associated with bandana patterns.
- Slip Stitch (sl st): Used primarily to move across rows or finish off.
- Turn: At the end of each row, you will flip your work to build the fabric.
- Increase: Adding stitches at the edges to make the triangle grow wider as you work downward.
Helpful Notes Before You Start
The beauty of this project lies in its simplicity, but there are a few things to keep in mind to ensure a polished look.
First, pay attention to your tension. If you crochet tightly, you might end up with a bandana that feels more like cardboard than fabric. Try to keep your hands relaxed; the piece should have a nice drape. If you notice your stitches look cramped, don’t be afraid to go up half a hook size.
Secondly, consider your yarn choice. While acrylic is fine for practice, bamboo or cotton-blend yarns offer that soft, breathable quality that feels comfortable against the skin for hours of wear. Finally, remember that this is a triangle worked from the top down. The “top edge” is the straight side that sits against your forehead, and the point hangs down toward your nape. You can make this as long or as short as you like—just stop adding rows once it reaches your desired coverage.
Main Tutorial: The Boho Bandana
This pattern is worked in rows flat to create a classic triangular shape.
Part 1: The Foundation
Start by creating a slip knot and placing it on your hook. Chain 4.
Row 1: In the 4th chain from the hook, work 1 double crochet. Chain 3 (this counts as your first stitch for the next row).
Row 2: Work 2 double crochet into the same space as the first stitch. Chain 3 and turn. You should have a small triangular “point” starting to form.
Part 2: The Increasing Rows
Now we establish the rhythm.
Row 3: Working into the very first space, place 2 double crochet. Then, work 1 double crochet in each stitch across to the end. Place 2 double crochet in the final stitch. Chain 3 and turn.
Row 4 and beyond: Repeat Row 3. You are essentially increasing at both ends of every row. Continue this process until the triangle measures your desired width. For a standard head size, you will likely want to work until the top edge (the widest part) measures about 18–20 inches across.
Part 3: The Ties
Once you reach the desired size, do not fasten off. Instead, chain 40 to 50 stitches (depending on how long you want your ties to be). Turn and work a slip stitch into each chain all the way back to the main body of the triangle. Slip stitch along the top edge of the triangle to the other side, then repeat the chain-and-slip-stitch sequence for the second tie. Fasten off and secure your yarn.
Finishing and Edging
Weave in your ends securely. If you want a more “boho” finish, you can add a simple picot border: work a single crochet, chain 3, and slip stitch back into the first chain, then skip one stitch and move to the next. This creates a delicate, scalloped edge that adds so much charm to the finished piece.
Step-by-Step Explanation
When you first start, it might feel like your triangle is growing too slowly. That is completely normal! Focus on the rhythm of the double crochet. You will see that by adding two stitches at the beginning and two at the end of every row, the shape expands naturally into a perfect triangle. When you reach the stage of making the ties, just remember that the more you chain, the longer your ties will be. A chain of 45-50 is usually perfect for a standard bow at the back of the head.
Common Mistakes to Avoid
Beginners often struggle with “losing” stitches at the edges. Because we are increasing in the first and last stitch, it is very common for a new crocheter to accidentally skip the final stitch, which will cause your triangle to become lopsided or “scrunched.”
Another common error is forgetting to count your turning chain. That chain 3 at the start of a row counts as a double crochet, so ensure you are working your final stitch into the top of that chain from the previous row. Finally, avoid “yanking” your yarn. If you pull too hard, the fabric will lose its flexibility. Let the hook do the work!
Pro Tips for a Better Result
- Blocking is everything. Because this project uses cotton and is triangular, it may look a little wavy right off the hook. Wet block your finished bandana by soaking it, pinning it into a perfect triangle shape on a towel, and letting it air dry. It will transform the piece, making it look professionally made.
- Add a personal touch. Consider attaching small wooden beads to the ends of your ties. It gives the bandana that quintessential boho finish.
- Check your color palette. If you want a vintage feel, try using earthy tones like terracotta, sage green, or deep mustard. If you want a summer vibe, opt for bright pastels or crisp white.
Variations and Personalization Ideas
- Lacy Variation: Instead of solid double crochet rows, add a row of “chain 1, skip 1, double crochet” every few rows for a lacy, open-work effect that is perfect for very hot days.
- Contrast Border: Use a different thread color for the final edging to make the triangle “pop.”
- Granny Style: If you prefer a more classic look, you can work this in “Granny” clusters (groups of 3 double crochets worked into the same space) to give it that retro 70s flair.
Care, Storage, and Next Steps
To keep your handmade accessory looking beautiful, hand wash your bandana in cool water with a gentle detergent. Lay it flat to dry in the shade to prevent the sun from fading the fibers. When storing, fold it gently or hang it on a rack—avoid keeping it in a tangled pile, as cotton can sometimes hold creases. Now that you have mastered this triangle shape, you have the foundational skill to move on to other projects, like larger shawls or even simple chevron-style scarves.
FAQ
How do I know if the bandana is the right size?
You can hold the triangle against your forehead while you work. The top edge should span from behind one ear to behind the other, covering your crown comfortably.
Can I use scrap yarn for this project?
Absolutely! This is the perfect pattern for using up leftover yarn. You could even create a striped bandana by changing colors at the start of each row, which looks incredibly stylish.
Does the tightness of the chain 3 at the turn matter?
Yes, it does. If your turning chain is too tight, the outer edge of your triangle will pull inward. Use a slightly larger hook just for the turning chain if you find your edges are curling.
Is this pattern suitable for children?
Yes! Simply stop working the increase rows once the bandana reaches the desired width for a child’s head, then proceed to the ties.
What is the best yarn weight to use?
DK or light Worsted weight is ideal. Too thin, and it takes forever; too thick, and it feels bulky and heavy on your head.
Conclusion
Crocheting your own accessories is a wonderful way to slow down, practice mindfulness, and express your personal style. This bandana project is more than just a piece of fabric; it’s a reflection of your time, your patience, and your creative vision. Whether you make one for yourself or as a thoughtful gift for someone dear, there is a special joy in knowing you crafted it from start to finish. Don’t worry if your first attempt isn’t perfect—every single row you crochet is helping you build your skills, confidence, and your own unique “maker’s hand.” Enjoy every stitch, take your time, and most importantly, wear your finished bandana with pride!