
Introduction
There is something truly magical about the way a simple hook and a bit of yarn can transform into something so incredibly squishy and soft. If you have ever looked at a store-bought blanket and wished you could recreate those luxurious, fluffy textures at home, you are in the right place. The puff stitch is one of those foundational techniques that feels like a professional secret, yet it is surprisingly approachable for anyone who knows the basics of crochet.
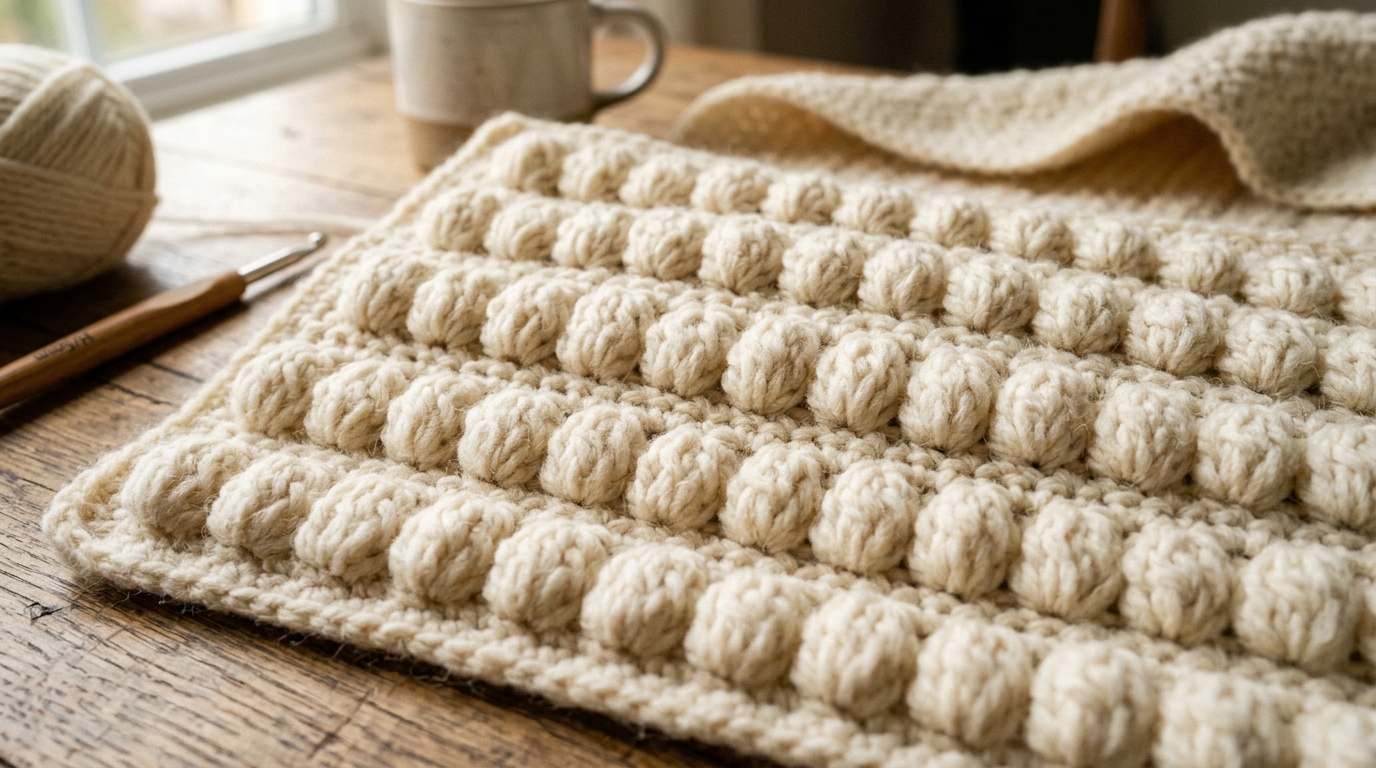
When you work a puff stitch, you aren’t just making a loop; you are creating a little pocket of air and warmth. It adds a beautiful, three-dimensional element to your work that elevates a simple project into a cozy heirloom. Whether you are looking to add an elegant border to a baby blanket, create a chunky, textured scarf that keeps the winter chill away, or simply want to expand your crochet vocabulary, mastering the puff stitch is a wonderful milestone in your crafting journey.
I know it can feel a little intimidating to try a new stitch, especially when it involves multiple loops on your hook. But take a deep breath—I am going to guide you through every step. We will break down exactly how to achieve that perfect, plump puff without any of the frustration. By the end of this guide, you will feel confident adding this delightful texture to all your future handmade projects.
Quick Overview
In this guide, we are focusing on the mechanics and mastery of the puff stitch. This is an informational and educational guide designed to build your skills. If you are a beginner, you will learn the step-by-step process of constructing the stitch. If you are an intermediate crocheter, you will discover tips on how to keep your puffs uniform, how to adjust the “plumpness” of your stitches, and how to incorporate them into various stitch patterns. This guide is for anyone who wants to bring more tactile beauty into their crochet work.
Tools You Will Need
While you don’t need fancy equipment to practice the puff stitch, having the right setup makes a world of difference:
- Yarn: I recommend starting with a smooth, light-colored worsted weight yarn for your first practice swatch. A light color (like cream, light gray, or soft pink) makes it much easier to see exactly where you are inserting your hook and how many loops you have on your hook.
- Crochet Hook: Choose a hook that corresponds to your yarn weight—usually a size H (5.0mm) or I (5.5mm) for worsted weight is perfect.
- Stitch Markers: These are essential for keeping track of where your puff stitches begin and end, especially when you are just starting out.
- Patience and Practice: Because the puff stitch uses more loops than a standard double crochet, it can feel a bit crowded at first. Remember to keep your tension consistent, and don’t be afraid if your first few attempts aren’t perfectly plump!
Understanding the Puff Stitch
At its heart, a puff stitch is essentially a collection of half-double crochet stitches worked into the same space, which are then closed together at the top. It differs from a “bobble” or a “cluster” in how it is constructed—the puff stitch relies on multiple yarn-overs being pulled through the same stitch, resulting in that signature round, cloud-like shape.
The most important thing for a beginner to understand is the “yarn-over” count. A standard puff stitch usually consists of 3 to 5 yarn-overs. The more yarn-overs you use, the “puffier” and wider the stitch will be.
Helpful Notes Before You Start
- Tension is Everything: Because you are pulling up multiple loops, it is very easy to make your final loop too tight or too loose. Try to keep your pulling-up motion consistent for every yarn-over.
- The “Anchor” Chain: When working puff stitches in a row, you will often find yourself skipping a chain or a stitch in between to allow the puff to sit comfortably. Always read your pattern to see if you need to chain one after your puff stitch to “lock” it in place.
- Don’t Rush the Finish: The final step—pulling through all the loops—is the most sensitive part. If you find your hook resisting, don’t force it. Use your fingers to help guide the hook through the loops.
How to Work the Puff Stitch
Let’s go through a standard 5-loop puff stitch. Once you master this, you can easily adjust the number of loops for different effects.
Step 1: The Initial Yarn-Over
Start by wrapping your yarn over the hook (yarn-over) and inserting your hook into the stitch or space specified by your pattern.
Step 2: Drawing Up the Loop
Yarn over again and pull up a long loop. You should now have three loops on your hook. Take care to pull this loop up to the height of a regular double crochet or half-double crochet stitch; if it is too short, your puff will look squashed.
Step 3: Repeating the Process
Repeat the [“yarn-over, insert, pull up a loop”] sequence the specified number of times. For a 5-loop puff, you will repeat this for a total of 5 times. You will end up with 11 loops on your hook (the original loop, plus 2 loops for each of the 5 yarn-overs).
Step 4: Closing the Stitch
Yarn over one final time and carefully pull your yarn through all 11 loops on your hook.
Step 5: Securing the Puff
Chain 1 to close the stitch. This chain is what makes the puff “pop” and secures it to your fabric.
Step-by-Step Learning Guidance
If you are struggling to make your puffs look consistent, try this learning exercise:
- Start a foundation chain of 20 stitches.
- Work a row of double crochets. This gives you a nice, sturdy base.
- In your next row, alternate one puff stitch and one double crochet.
- By alternating, you can clearly see the difference in height and texture.
- If one puff looks smaller than another, check your tension on the third yarn-over. That is usually where our hands subconsciously tighten up.
Practice this small swatch until your rhythm feels natural. You will be surprised at how quickly your muscle memory takes over!
Common Mistakes to Avoid
Even experienced crocheters run into these snags. Keeping them in mind will save you a lot of frogging (unraveling):
- Twisting the Loops: If you don’t keep your loops organized on the hook as you work, they can accidentally twist, making it difficult to pull the final yarn-over through. Keep your loops aligned neatly.
- Tension Fluctuations: If you pull the first loop long and the last loop short, the puff will lean to one side instead of sitting perfectly straight. Aim for uniformity.
- Skipping the Closing Chain: Forgetting to chain one after the puff will cause your work to shrink in width, as the puff will pull tightly against the base row.
- Choosing the Wrong Yarn: Avoid using highly textured or novelty yarns (like metallic or eyelash yarns) when learning this stitch. These yarns hide the loops, making it nearly impossible to see your progress or count your yarn-overs.
Pro Tips for a Better Result
- Yarn Choice: Cotton yarn is excellent for puffs because it has less stretch and creates a very crisp, clean definition. Wool is wonderful for cozy, squishy blankets because the fibers “bloom” and fill out the stitch beautifully.
- Blocking: Once your project is finished, give it a gentle steam block. Do not press hard on the puffs! You want to keep that lovely loft. Just a light steam will settle the surrounding stitches and make the puffs stand out even more.
- Hook Sensitivity: If you are finding it hard to pull through all the loops, try using a slightly larger hook than the yarn label recommends. The extra room makes the transition much smoother.
Variations and Personalization Ideas
The beauty of the puff stitch is how versatile it is. Here are a few ways to personalize your projects:
- The Graduated Puff: Try working a row of 3-loop puffs, followed by a row of 5-loop puffs, and then 7-loop puffs. This creates a beautiful, undulating wave of texture that looks amazing on a statement pillow cover.
- Color Blocking: Work your puff stitch row in a contrasting color from the base row. It highlights the stitch and turns your project into a piece of modern art.
- The “Tiny” Puff Border: Use a smaller hook and a thinner yarn to add a delicate puff-stitch border to a tea towel or a baby bib. It adds an expensive, store-bought finish that always impresses.
Care and Storage Next Steps
Since puff stitches are, by nature, quite airy and textured, they can catch on things if your project is used roughly. To keep your items looking fresh:
- Washing: Always hand wash in cool water with a gentle wool wash. Lay flat to dry—never hang a heavy puff-stitch blanket as the weight will distort the stitches over time.
- Storage: Fold your items rather than hanging them. If storing for a long season, use a breathable cotton bag to protect them from dust.
- Next Steps: Once you have mastered the puff, consider exploring the popcorn stitch or the cluster stitch. They are “cousins” to the puff stitch and open up a whole new world of textured crochet design!
FAQ
Why is it so hard to pull my hook through all the loops?
This is almost always due to tension. Try using a hook with a more tapered throat, or simply make sure you are pulling each of your “drawn-up loops” to the same height. The more consistent the height, the easier the final pull-through will be.
Can I use the puff stitch for clothing?
Absolutely! The puff stitch adds wonderful structure to cardigans and sweaters. Just keep in mind that puff stitches use more yarn than basic stitches, so ensure you have enough yardage in your stash before starting.
How do I count my yarn-overs?
Think of it as a rhythm. Count them out loud as you work: “One-over, two-over, three-over…” If you lose track, look at your hook. Every yarn-over creates two loops. You should see a consistent pair of loops for every count you made.
Is the puff stitch the same as a bobble stitch?
They are often confused, but they are different! A bobble stitch involves working several incomplete double crochets and closing them all at once. The puff stitch is worked as a series of half-double crochet yarn-overs in one spot. The result is slightly different—the puff is usually softer and more rounded.
My puff stitches look flat; what am I doing wrong?
If your puffs look flat, you are likely pulling your loops too tight, or you aren’t using enough yarn-overs. Try increasing your count to 7, and make sure that final “closing chain” is nice and distinct to “pop” the puff outward.
Conclusion
Mastering the puff stitch is a beautiful way to bring character and depth to your crochet projects. It takes a little practice to find your rhythm, but once you do, that repetitive motion of pulling up those loops becomes incredibly meditative and relaxing. Don’t be discouraged if your first few puffs look a little shy; with each row, you are developing the steady hand and confidence of an experienced crafter.
Remember, crochet is not about perfection—it is about the joy of creating something by hand, one loop at a time. I hope this guide helps you feel more empowered to experiment with textures. Grab your hook, pick a lovely soft yarn, and enjoy the cozy process of making your world a little fluffier, one puff stitch at a time. I cannot wait to see what you create!