
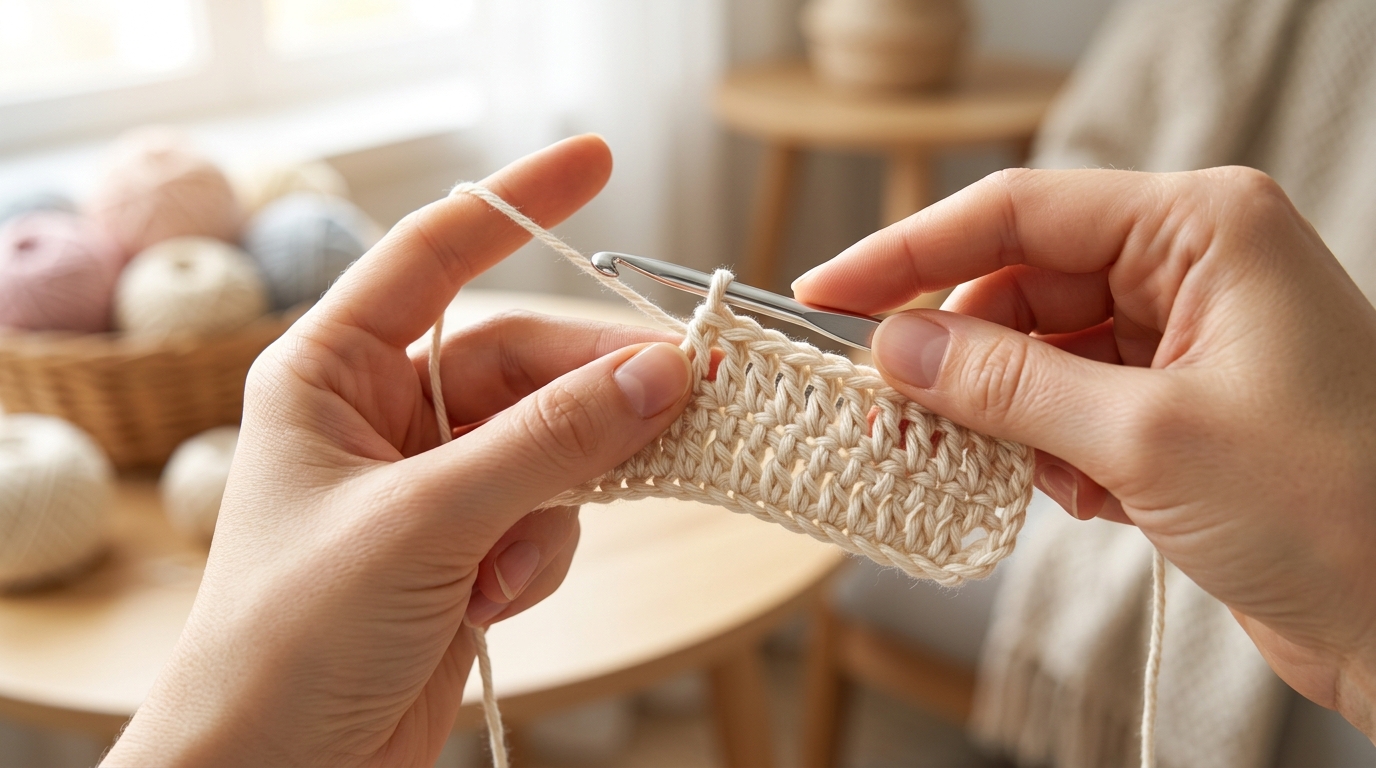
The double crochet stitch is truly the “bread and butter” of the crochet world. If you have been admiring cozy blankets, elegant cardigans, or quick-to-work-up accessories, you have almost certainly been looking at the work of the humble double crochet. This fundamental stitch is the gateway to faster projects, beautiful texture, and a more efficient way to build your fiber-arts stash.
When I started my own crochet journey, I was so focused on the single crochet that I felt like I was moving through molasses. Once I mastered the double crochet, everything changed. It is taller, more flexible, and incredibly versatile. In this guide, I will walk you through exactly how to master this stitch so you can stop laboring over small rows and start finishing your projects with confidence and speed. Whether you are a brand-new beginner or an intermediate maker looking to refine your technique, you are in the right place. Let’s sit down with our yarn and hooks and turn some string into something beautiful.
Quick Overview of the Double Crochet
This guide is designed to help you internalize the anatomy and execution of the double crochet stitch. You will learn the mechanics of the stitch, how to maintain consistent tension, how the turning chain works, and why this stitch is the secret to finishing projects in record time. This is for the woman who loves to create but cherishes her time—by leveling up your stitch repertoire, you will find that your handmade goals feel much more attainable.
Understanding the Double Crochet Concept
Before you grab your hook, it is important to understand what makes a double crochet “double.” In American crochet terminology, a double crochet is taller than a single crochet but shorter than a treble crochet. It is created by wrapping the yarn over your hook before you insert it into the fabric, which adds an extra “step” but provides significantly more height to your fabric.
Because of this additional height, a row of double crochet stitches grows twice as fast as a row of single crochet. If you are working on a large blanket, choosing a double crochet stitch pattern effectively halves the time it takes to see your hard work turn into a finished piece. It creates a fabric with a lovely drape, making it perfect for lightweight shawls, house-cozy sweaters, and breezy baby blankets.
Getting Your Tools Ready
To practice this stitch, you don’t need anything fancy. In fact, using simple, high-quality basics will help you learn faster.
- Crochet Hook: A medium-sized hook, like a size H/8 (5.0 mm), is excellent for beginners. It is large enough to see your stitches clearly but small enough to handle comfortably.
- Yarn: Opt for a worsted weight (Category 4) yarn in a light, solid color. Choosing a light color (like cream, soft yellow, or light pink) allows you to see exactly where your hook needs to go. Avoid dark colors or highly textured yarns until you have mastered the basics of the stitch.
- Stitch Markers: These are your best friends. They help you mark the first and last stitch of a row so you never have to guess where to place your hook.
The Foundation of a Double Crochet Row
Before we begin the stitch itself, remember that every project starts with a foundation chain. When working with double crochet, your turning chain—the chains you make at the end of a row to get your hook up to the proper height—is usually equivalent to two or three chains. This can be tricky for beginners, so keep this in mind: for a standard double crochet row, we usually chain three to begin.
Step-by-Step Execution of the Double Crochet
- Yarn Over: Hold your hook in your dominant hand. With your working yarn coming from the ball, wrap the yarn over the hook from back to front.
- Insert the Hook: Find the next stitch (which should be the fourth chain from your hook if you are starting a new project). Push your hook straight through the center of that chain or stitch.
- Yarn Over Again: Wrap the yarn over the hook again, just like you did in step one.
- Pull Through: Carefully pull that loop back through the stitch you just entered. You should now have three distinct loops on your hook.
- Yarn Over (First Time): Wrap the yarn over the hook again. Use the hook to pull it through only the first two loops on your hook. You will now have two loops left.
- Yarn Over (Second Time): Wrap the yarn over the hook one final time. Pull it through the remaining two loops on your hook.
You have now completed one double crochet stitch! It feels like a lot of steps at first, but with practice, it will become a rhythmic motion that you don’t even have to think about.
Why Tension is Your Secret Weapon
Beginners often struggle with one of two things: stitches that are too loose and holey, or stitches that are so tight you can’t get your hook into them. The double crochet stitch is particularly sensitive to tension because it is a “taller” stitch.
If your loops are pulling too tightly, the fabric will stiffen and lose that beautiful, soft drape. If they are too loose, your work will look sloppy or uneven. To find your “sweet spot,” practice keeping your yarn tension consistent by how you hold the yarn in your non-dominant hand. Whether you weave it through your fingers or use a tension ring, the goal is to keep the yarn feeding smoothly. If you have to fight to push your hook through, your tension is likely too tight—take a breath, relax your shoulders, and loosen up your grip.
Common Mistakes to Avoid
Even experienced crocheters have their “off” days. Being aware of these pitfalls can save you from having to “frog” (rip out) your work.
- Miscounting the Turning Chain: Beginners often treat the turning chain as a stitch or ignore it entirely. A good rule of thumb is to look at your pattern instructions. Generally, in U.S. patterns, the chain-3 at the beginning of the row counts as the first stitch. If you aren’t sure, place a stitch marker in the top of that chain so you know exactly where to close the row when you return.
- Skipping the First Stitch: When you turn your work, the first stitch can be a bit hidden right under the turning chain. If you skip this, you are technically performing a decrease and your edges will start to slant inward. Always double-check your stitch count at the end of every row.
- Confusing U.S. and U.K. Terms: This is the most common mistake for online learners. Keep in mind that a “double crochet” in the U.S. is a “treble crochet” in Britain. Always verify that your pattern is written in U.S. English!
- Twisted Chains: When you make your long starting chain, it is common for the chain to twist as you work into it. Lay it flat on a table to ensure it is straight before you begin your first row of double crochets.
Pro Tips for a Polished Result
When you want your projects to look like they came from a high-end boutique, it is the small details that matter.
- The “Invisible” Join: When you finish a round of double crochet, your slip stitch join can sometimes look bulky. Look up the “standing double crochet” technique; it replaces the turning chain and makes your seams virtually invisible.
- Gauge Matters: If you are making a sweater or a fitted accessory, please do not skip your gauge swatch. The double crochet stitch can vary greatly depending on how tightly you hold your thread. A quick 4-inch square swatch will tell you if you need to go up or down a hook size to match the designer’s vision.
- Blocking is Transformation: Never underestimate the power of blocking. Once you have finished your project, dampen it with water or steam and pin it into shape on a flat surface. This “sets” the double crochet stitches and makes them look perfectly aligned and professional.
- Weave in Ends as You Go: If you are working on a large project like a colorful blanket, you will have many ends to weave in. Make this a habit every time you attach a new skein of yarn so that you don’t have a mountain of tidying up to do at the end.
How to Customize with Double Crochet
The beauty of this stitch is its versatility. Once you feel comfortable with the basic stitch, try these variations to add interest to your work:
- Front Post Double Crochet: By inserting your hook around the post of the stitch below rather than into the loops, you create beautiful, raised decorative lines. This is perfect for ribbing on cuffs or creating textured cables.
- The Shell Stitch: By working several double crochet stitches into the same space, you create a fan or shell effect. This is the secret behind those vintage-inspired, scalloped-edge blankets.
- V-Stitches: By crocheting a double crochet, a chain, and another double crochet all into one stitch, you create a “V” shape that creates a light, airy, lace-like fabric. This is my favorite technique for summer scarves.
Moving Forward in Your Crochet Journey
Now that you have the tools to master the double crochet, what comes next? Don’t feel pressured to tackle a complex garment immediately. Start by making a simple rectangle—a washcloth or a small coffee cup cozy are perfect “next steps.” These small projects allow you to focus entirely on your tension and stitch placement without the stress of shaping or complex instructions.
As you get faster, practice making your stitches as uniform as possible. Compare your first row to your tenth row; you will likely see a progression of consistency. That rhythm is where the joy of crochet truly lives. It becomes a form of moving meditation.
Frequently Asked Questions
Does the turning chain count as a stitch in double crochet?
Generally, yes. In most U.S. patterns, the chain-3 at the beginning of a row is meant to mimic the height of the first double crochet. However, some designers prefer to chain-2 (which acts as a “non-counting” chain) to make the edge look neater. Always check the “Pattern Notes” section at the beginning of any project to see how the designer wants you to handle the turning chain.
Why do my double crochet edges look uneven?
This is usually caused by either skipping the first stitch of a row or accidentally adding an extra stitch at the end. Counting your stitches at the end of every single row is the only way to ensure your edges stay perfectly straight until you become experienced enough to spot the rhythm visually.
How do I join a new skein of yarn mid-row?
The neatest way is a “Russian join” or a “magic knot,” but for many beginners, the simplest method is to start the final step of the last stitch with your new color or new yarn strand. Simply drop the old yarn, pull the new yarn through the final two loops of the stitch, and continue crocheting. You can then weave in your ends securely on the wrong side of the fabric.
What is the best way to keep my double crochet stitches from looking “gappy”?
If you find that your fabric has too many holes, you are likely using a hook that is too large for your yarn weight. Try going down a half-size or even a full size for your hook. Alternatively, focus on slightly tightening your “yarn over” motion.
Can I use double crochet for amigurumi?
While it is possible, amigurumi is almost exclusively worked in single crochet because it creates a denser fabric that keeps the stuffing from showing through. If you love the look of double crochet, stick to garments, blankets, and accessories where drape and flow are desired.
A Warm Invitation to Keep Creating
Crochet is more than just a hobby—it is a way of creating warmth, comfort, and beauty with your own two hands. The double crochet stitch is your passport to so many wonderful possibilities. It is the stitch that will allow you to quickly whip up a handmade gift for a baby shower in a weekend, or craft a vibrant, cozy blanket for your living room while you binge your favorite show.
Don’t be discouraged if your first few rows look a little shaky. Every expert crocheter was once a beginner struggling with their tension. You are doing something wonderful for your mind, your creativity, and your home. Take your time, enjoy the process, and remember that there is no “wrong” way to enjoy the craft as long as you are keeping your yarn close and your hooks ready. Happy crocheting!