
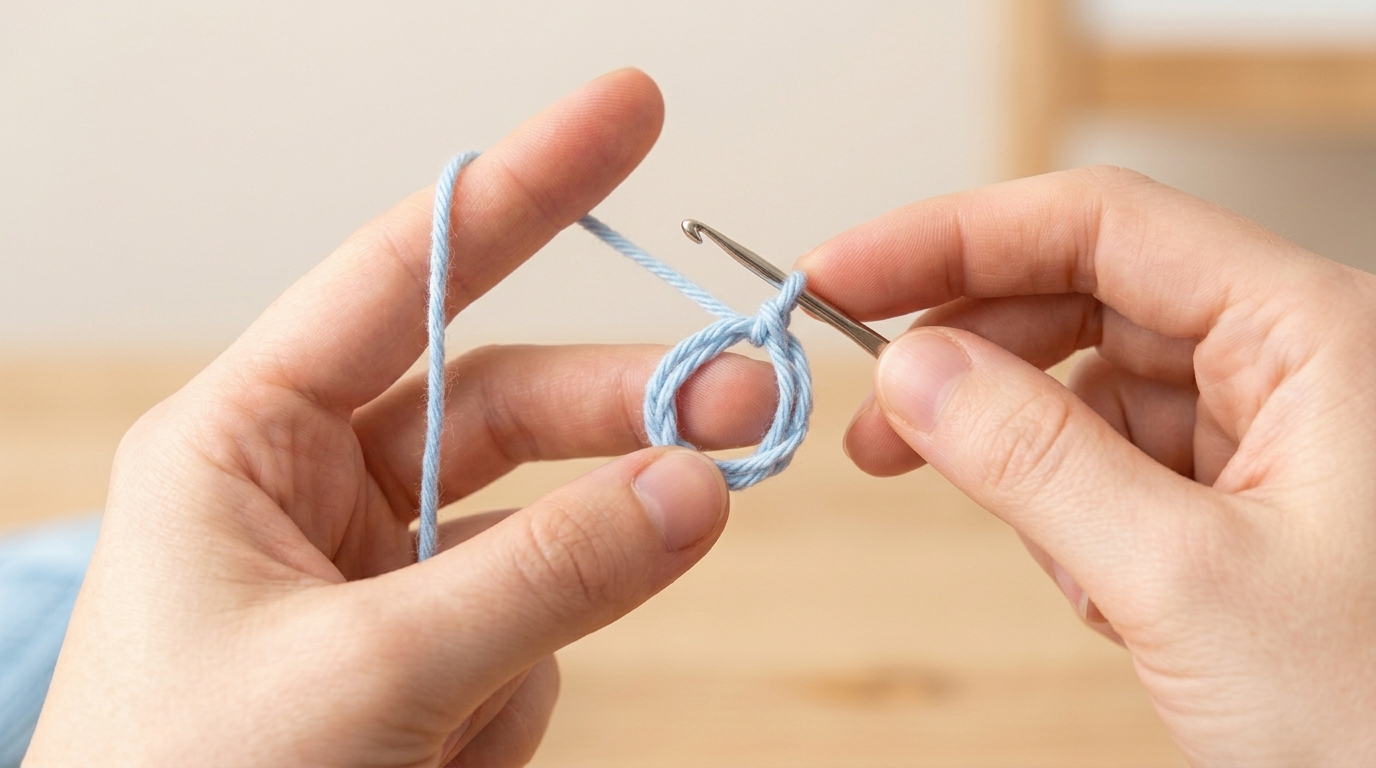
Stepping into the world of crochet is like opening a door to a lifetime of creativity, comfort, and mindful joy. Whether you have been dreaming of crafting your own soft, squishy blankets, delicate baby booties, or stylish accessories, every single project begins in the very same place: with a loop of yarn on your hook. For many beginners, this initial moment can feel a little intimidating. You might be watching videos, looking at diagrams, and wondering if you are doing it “the right way.” Please take a deep breath and know that every talented crocheter you admire today once stood exactly where you are, fumbling with a bit of string and a hook.
The two most common ways to begin your work are the slip knot and the magic ring. While both serve the important purpose of anchoring your yarn, they are like two different tools in your kit—each perfect for its own specific task. In this guide, we are going to walk through the gentle art of setting up your yarn, simplifying these techniques until they feel like second nature. By the end of this article, you will feel confident, capable, and ready to pick up your hook, pull up a loop, and start your very first—or next—beautiful project. We will focus on clear, step-by-step instructions designed to build your muscle memory and your confidence.
What You Should Know Before You Start
This guide is designed for anyone who wants to demystify the foundation of crochet. If you are brand new, you will learn the exact steps to create a secure starting point. If you have been crocheting for a while, you might find a new way to refine your technique or discover a “magic” trick that makes your circular projects look so much more professional.
In crochet, the “loop start” is the essential gateway. We focus on two primary methods here:
- The Slip Knot: This is your “old faithful” starting point. It is used for almost everything: starting a flat row, beginning a scarf, or attaching new yarn to a project.
- The Magic Ring: This is an intermediate-friendly technique—often called the adjustable loop—that is essential for amigurumi, hats, and granny squares. It allows you to cinch your starting center tight, eliminating that little hole that sometimes appears in the center of circular projects.
Understanding the difference between these two will allow you to approach any pattern you see online or in a book with complete confidence. We will cover the mechanics of both, keeping our focus on comfort, tension, and ease of use.
The Essential Toolkit
You do not need a lot to get started with your loop techniques. In fact, minimalism is one of the beautiful things about our craft. To practice these techniques today, gather the following:
- A Crochet Hook: A medium size, like a 5.0mm (H/8) hook, is excellent for beginners. It is large enough to see your stitches clearly but small enough to handle comfortably.
- Worsted Weight Yarn: Choose a smooth, light-colored acrylic or wool-blend yarn. Avoid dark colors (like black or navy) or fuzzy, textured novelty yarns for your first few practice sessions; they make it very difficult to see your stitches.
- A Pair of Scissors: For snipping your yarn after you finish practicing.
- A Calm Space: Find a spot with good lighting. The better you can see, the easier it is for your hands to learn the movements.
Understanding Key Crochet Concepts
Before we jump into the physical steps, let’s define the terminology you will see throughout your journey.
- Tension: This refers to how tightly or loosely you hold your yarn. If your loops are too tight, your hook won’t fit through to pull the yarn back out. If they are too loose, your work may look gappy. The goal, especially in the beginning, is consistency rather than perfection.
- Working Yarn: This is the portion of the yarn that is attached to the skein or ball. It is the yarn that feeds into your work.
- The Tail: This is the loose end of your yarn. You will usually weave this in later to hide it securely.
- Hook Size: Usually measured in millimeters (mm) or defined by letter sizes in the U.S. Always match your hook to the yarn weight recommended on the ball band of your yarn.
The Slip Knot: Your Foundation
The slip knot is the most important knot in your crochet arsenal. It secures the yarn to the hook without being permanent. A good slip knot should slide easily if you pull the working yarn, but stay put once you pull it tight against your hook.
The Two-Finger Technique
- Make a loop with your yarn, ensuring the “working yarn” (the part leading to the ball) is on top of the “tail” end.
- Reach through the center of that loop with your fingers and grab the working yarn.
- Pull the working yarn through the loop to create a new loop.
- Slide your crochet hook into this new loop.
- Gently pull on both the tail and the working yarn to snug the loop against the hook.
- Remember: It should be snug, but not so tight that the hook cannot rotate.
Beginner-Friendly Tip
If you struggle with the slip knot, try laying the yarn on a flat table. Form your loop on the table, reach through, and pull. Sometimes taking gravity out of the equation allows your brain to process the movement more clearly. There is no right or wrong way to tie the knot, as long as it isn’t a permanent “hitch” that won’t untie.
The Magic Ring: The Circular Secret
If you have ever wondered why some crocheted hats or stuffed animals have such a perfectly closed center, the magic ring is the secret. It’s a way of starting a round of stitches into a loop that you can then shrink down to nothing.
Step-by-Step Magic Ring
- Wrap the yarn around two or three fingers of your non-dominant hand, crossing the yarn to form an “X” on your palm.
- Hold the intersection of the “X” with your thumb.
- Insert your hook under the first strand and grab the second strand, pulling it under the first.
- This should create a small loop on your hook. Chain one (to secure it) and hold onto the ring shape.
- You now have a loose circle. You can work your initial stitches—usually single crochets—right into that ring, working over both the ring and the yarn tail simultaneously.
- Once you have completed your first round, hold the tail of the yarn firmly and pull. You will see the center hole vanish as the ring tightens.
Common Mistakes to Avoid
Even though these concepts are simple, they are easy to trip over. Here is how to keep your journey smoother:
- Death Grip Tension: Many beginners hold their yarn with a “death grip,” making the crochet process painful and the fabric stiff. Try to relax your shoulders and hold the yarn just firmly enough so that it doesn’t flop around.
- Ignoring the Yarn Tail: When working with the magic ring, don’t let your starting tail get lost in your stitches. Keep it off to the side so you can find it for that final tug.
- Mixing Up Terms: Always double-check your pattern to see if the author uses U.S. or U.K. terminology. In the United States, we use “single crochet,” whereas the U.K. calls that same stitch a “double crochet.” If your gauge is way off or the stitches look wrong, verify the terminology origin.
- The Twisted Chain: If you start with a chain and then join, make sure the chain isn’t twisted before you slip stitch to close the round. It is a common mistake that is easily avoided by running your finger along the chain to ensure it is straight.
Pro Tips for Better Results
You want to move from “learning” to “creating.” Here are a few ways to level up your efficiency:
- Stitch Markers are Your Best Friends: If you are working in a circular pattern, it is incredibly easy to lose count. Place a stitch marker in the first stitch of every round. It will save you from having to restart your row after you realize you miscounted.
- Don’t Rush the First Row: The foundation chain or the first round is the hardest. The subsequent rounds get significantly easier because you have a stable structure to hook into. Give yourself permission to be slow and steady at the start.
- Practice with Different Weights: Once you master the slip knot with a medium-weight yarn, try it with a thinner or thicker yarn. Your hands will learn to adjust to the scale of the yarn, which makes you a much more versatile crocheter.
- The Importance of Blocking: If your finished project looks a little uneven or bunched up, don’t worry! Blocking—the process of lightly wetting or steaming your piece into the desired shape—will transform your stitches, making them look uniform and professional.
Variations and Customization
Part of the beauty of crochet is how you can personalize these simple techniques.
- Adding Beads: If you are making jewelry or a decorative accessory, you can thread beads onto your yarn before you tie your slip knot. This allows you to integrate sparkle and texture right from the very first stitch.
- Double-Stranding: If you want a thicker, more rustic look, try holding two strands of yarn together as you create your starting knot. This is a fantastic way to use up smaller scraps of yarn to create a chunky, cozy fabric for home decor items.
- Substituting the Magic Ring: Sometimes a pattern asks for a magic ring, but if you find it frustrating, don’t feel guilty about using the “chain-three-and-join” method instead. You will have a small hole in the center, but that can be easily closed with the remaining yarn tail after you fasten off. Your project, your style!
Next Steps in Your Practice
Now that you have mastered these two fundamental starters, what comes next? Don’t feel pressured to tackle a complex heirloom blanket tomorrow. Start small. Perhaps your next step is practicing a uniform stitch, like a row of single crochet or double crochet, trying to keep your edges neat.
You might also consider looking for “beginner-friendly” patterns that use these techniques, such as a simple drawstring bag or a pair of classic coasters. Working on a project with a tangible end goal keeps the motivation high and makes the process of learning feel like a reward rather than a chore. Remember: crochet is a journey. Some days your stitches will feel fluid and perfect; other days, they will feel a bit stubborn. Both days are part of the craft. Embrace the time you spend with your yarn—it is quiet time for your brain and a beautiful exercise in gratitude for what your hands are capable of producing.
FAQ
How do I stop my slip knot from coming undone while I work?
A slip knot should never be permanent, but it shouldn’t pop off your hook, either. Make sure you tighten it just enough so it sits comfortably against the hook, but not so tight that it restricts the hook’s movement. If it keeps coming undone, you might be pulling on the tail too much while working your stitches; try to keep your fingers positioned further down the yarn shaft.
Does the magic ring unravel over time?
A well-made magic ring is very secure! To ensure it stays closed, be sure to weave your tail end back and forth firmly through the stitches of the first round. Don’t just snip it; weave it in a “Z” pattern through the center stitches for maximum security.
Why is my circle curling like a bowl instead of lying flat?
If your work is cupping like a bowl, you likely need to increase more in your rounds. If it is ruffling, you are increasing too much. Always double-check your pattern to ensure you are meeting the standard increase sequence for circular objects.
Can I use the slip knot to start a hat?
Yes! You can start a hat by chaining a few stitches and joining them into a ring. It’s a classic, reliable method. The magic ring is just an alternative that offers a tighter closed center. You will get a lovely result with either method.
Is it normal to have a small gap in my magic ring?
It is very common, especially when you are just starting out. Even the most experienced crocheters sometimes have to wiggle their stitches into place after pulling the ring tight. If a small gap remains, simply use the leftover tail of your yarn and a tapestry needle to stitch the center closed from the wrong side of your project.
Conclusion
You have just taken the first step toward creating beautiful, handmade items that can last for generations. Whether you are using your new skills to craft gifts for loved ones, items for your home, or simply to enjoy the meditative rhythm of the process, you are officially part of a creative community. Don’t be afraid to make mistakes—they are just evidence that you are learning something new. Keep your hook close, your favorite yarn ready, and remember that every masterpiece starts with a single, simple loop. Happy crafting!